Wave 1 Online
W1-O Checklists Online
W1-O Checklist - Scheduling Stage
Calling participants from REDCap
- Participants can be considered “lost to follow up” if they meet all of the following criteria:
- Researcher has tried to contact individual at different times of day.
- Researcher has used at least 2 different approaches (e.g. email and phone), UNLESS only 1 form of contact has been given, in which case participant should fully meet all other criteria.
- Person has been contact at least 4 times.
- Situation is NOT considered “phone tag” (a participant calls and lab member returns call but keeps missing one another- this shows participant may still be interested, therefore number of contact and lack of response may not be due to lack of interest. Participants in “phone tag” situation should stay on contact list).
Waitlist criteria
- This regards the “out of town” option on the wave1_Status on REDCap
- Should include:
- any participants here live outside of LA, and won’t be coming back to LA (e.g. did not relocate just for COVID-19 pandemic purposes)
- participants whose age tally exceed 10, the target collection number for each age group in our age range. Refer to the Participant Tally for reference.
PLEASE NOTE: Participants who have not aged out yet, or who are not free at the moment yet, OR live outside the US but plan to come back as soon as the pandemic is over should all still be kept on the contact log and just have a future recontact date. We only want to put people who are going on our “out of town” waitlist (like a plan B, only contact if necessary)!
We will only refer to the waitlist if (1) we will be behind on recruitment for Wave 1 and will need to just schedule people who we know cannot come back for future waves to complete data collection or (2) we will be behind on recruitment for Wave 1 and will need to just schedule people who are anywhere within our age range, rather than targeted numbers by age to complete data collection (3) we have to stay in the pandemic and all future waves will be remote.
Important Reminders
Screening
- Check participant tally before screening to know if we would be scheduling or waitlisting if they qualify
- When answering the call ask who you are speaking with ( so we know if it’s a parent or teen)
- If a potential participant is not of age then put their recontact to future around the time they would qualify
- If screening a family with multiple children each child has to be screened with their own smbb
- Oldest child gets next available smbb number just like the mbb number protocol
- Only exception is if we only knew about younger child then during screening mentions they have another child that wants to participate.
- Triple check you write down the address correctly for participants ( repeat it back to them / spell it out)
- Do not run session until you are 100% sure they are eligible. If unsure of a criteria verify it before session.
Calendar
- Put the W1 for wave one ( e.g. S1 W1 ) on session events
- For reminder emails put Status: Incomplete in description
- For Session 1 Reminder 1 call event put “Only if no email response” in the description and then status: Incomplete
- Whenever you complete a reminder event mark it as complete and update the MBB participant log
Emails to participant
- Move potential participant email to “Added” tab of MBB once you add them to the participant database
- All emails to a participant should be in the same thread
- The thread we initially contacted them at should be the one we send the session confirmation to
- Remember that email templates need to be edited(e.g. there are no written responses in wave 2 so that chunk should be deleted, there is no ASA in wave 1 so that should be deleted in wave 1, etc.)
- The thread we initially contacted them at should be the one we send the session confirmation to
- The easiest way to not forget steps is to do all “ session has just been scheduled” tasks based on the MBB log
- Make sure you are sending the correct reminder email - S1 R2 is the one with the researcher card
Confirming sessions
- Do not put as “ confirmed session” on MBB log unless we got verbal confirmation / email confirmation
- If called and no answer leave a note on the calendar event saying was not able to verbally confirm & also put into SRA chat
REDCap
- Log into REDCap with your own account to avoid confusion and for easier identification of who screened each smbb participant
- After contacting someone change the Wave status “date to recontact” to one week from the current date ( can be two weeks if it’s someone that hasn’t responded in long time)
- When you schedule a new MBB participant change their SMBB “Wave 1 status” to enrolled
Scheduling and Confirmation
- Schedule session 1 two weeks in advance from “package mailing day” (see package preparation in pre-session checklist)
- Schedule session 2 ~one week after session 1
- Ask Lab Manager to make Zoom link with scheduled session times and save to google calendar
- Send session 1 confirmation email (in templates)
Enrollment
- Create participant Box folder using MBB_template (delete blank README from newly created folder)
- Enroll participant in Wave 1 on REDCap
- Go to “Add / Edit Records” of MBB
- Make sure the tab is “Arm 2: wave 1”
- Type in the next available MBB
- Be careful because any premature clicking makes a new ID*
- Fill participant instrument on REDCap
- Age should be the age of participant at the time of Session 1
- In notes section add the date and time of session
- Update Participant Tally
Calendar
- Create MBB Session 1/2 calendar events (and invite researcher)
- MBBXXX WX- Online Session 1
- Add Lead and backup reseracher, MBB#, participant age, sex,whether Bio or els, and session time in the event decription
- MBBXXX WX- Online Session 2
- Add Lead and backup reseracher, MBB#, participant age, sex,whether Bio or els, and session time in the event decription
- MBBXXX WX- Online Session 1
- Add participant to the weekly MBB mailing calendar event
- MBB999 WX (Scheduled for 00/00/00) Sent: Incomplete
- Create MBB Session 1/2 reminder calendar events
- MBBXXX WX- Session 1 Reminder 1 (email) - 1 week prior
- Add Status: Incomplete to the description
- MBBXXX WX- Session 1 Reminder 1 (call) - the day after Reminder 1 email
- Add Status: Incomplete to the description
- Add “Only if no email response” to description
- MBBXXX WX- Session 1 Reminder 2 (email and call) - 3 days prior
- Add Status: Incomplete to the description
- MBBXXX WX- Session 2 Reminder 1 (email) - 3 days before second session
- Add Status: Incomplete to the description
- MBBXXX WX- Session 2 Reminder 2 (call) - 2 days before second session
- Add Status: Incomplete to the description
- MBBXXX WX- Session 1 Reminder 1 (email) - 1 week prior
- Create MBB Home Session reminder calendar events
- MBBXXX WX- Home Session Reminder 1 (email) - 1 week after Session 2
- Add Status: Incomplete to the description
- MBBXXX WX- Home Session Reminder 1 (call) - 8 days after Session 2
- Add Status: Incomplete to the description
- MBBXXX WX- Home Session Reminder 2 (email) - 14 days after Session 2
- Add Status: Incomplete to the description
- MBBXXX WX- Home Session Reminder 2 (call) - 15 days after Session 2
- Add Status: Incomplete to the description
- Add * Only if package missing and have not been in contact with participant* to description
- MBBXXX WX- Home Session Reminder 1 (email) - 1 week after Session 2
W1-O Checklist - Calendar Reminders
NOTE: all template emails are in bablab gmail
- Send Session 1 Reminder 1 email
- Update calendar event description to Status: Complete
- Update MBB participant log
- Confirm package is received
- Session 1 Reminder 1 call made
- Update calendar event description to Status: Complete
- If no call made put “NA - responded via email”
- Update MBB participant log - if NA put NA
- Send Session 1 Reminder 2 email & call
- Update calendar event description to Status: Complete
- Update MBB participant log
- Make a note on calendar whether they confirmed session
- Send message to SRA chat whether participant confirmed and tag the researcher running the session
- Confirm package is received
- Session 2 Reminder 1 email made
- Update calendar event description to Status: Complete
- Update MBB participant log
- Confirm package is received
- Session 2 Reminder 2 call made
- Update calendar event description to Status: Complete
- Update MBB participant log
- Send message to SRA chat whether participant confirmed and tag the researcher running the session
- Confirm participant
- Preferably by phone
- Update calendar event description to Status: Complete
- Update MBB participant log
- Update Session 1 calendar status
- Home Session Reminders
- Check participant log to see what info is missing before sending home session reminder emails
- Check with Kristen if unsure what info is missing
- Make sure the list of “items needed” is tailored to that participant
- Send written response links if it hasn’t been completed yet
- If package missing after home session email reminder 2:
- send message to SRA chat that participant is still missing package
- move on to home sess call 2
- next steps will be on a case by case basis
General Notes about calendar
Session 1 reminders
You can differentiate the Session 1 Reminder 1 and Reminder 2 emails by seeing if it says to include Research Profile ( reminder 2 is the one with the researcher profile)
the files you attach to the emails are in BABLAB/Studies/Mind_Brain_Body/Documents/Infographic_next_steps/Wave_1_online
consents are in BABLAB/Studies/Mind_Brain_Body/Documents/Consents/Wave_1_online
Research profiles are in BABLAB/Studies/Mind_Brain_Body/Documents/Infographic_next_steps and remember to drag the picture in show it shows up in the email body
When you call you’re just asking them to confirm that the session date and time works for them & that they received package/ *Hi this is ____ from the Brain and Body Lab. I am calling to confirm you are still available for your session on ___. Also, have you received the package?*
Session 2 Reminders
You can check if they consented to stool sample by looking at email thread to see the session @ confirmation email the researcher sent them OR you can go to their Session 1 checklist on REDCap
Make sure you only include relevant reminders in the email, delete the highlighted parts that don’t apply to them
Home Session Reminders
Check the MBB participant log to see if we haev received their package.
If the Package COnfirmation section is filled out as complete then we have received package.
Lab manager also sends message to SRA to update on packages that are received so can search chat
If still unsure if participant has sent package back to us check email thread
For home session reminders make sure to only send request if they haven’t sent package back or are missing something
- If we did receive package but something is missing ( contact list, BSS) then you would request it. Lab manager usually tells whoever is in charge of calendar if things were missing from packages that were received
Misc Notes
If the calendar event is for something else such as checking in with a participapant or rescheduling a session the lab manager or other memmber of team will provide the necessary context
If unsure about a particicular calendar event you can slack Lab manager or send a message to SRA to see if someone knows answer
Remember to mark as complete on calendar and on MBB participant log after doing each calendar event
refer to Wave 2 Checklist for script for the text message if it is not in the description of calendar event
W1-O Checklist - Pre-Session 1
Package preparation: “magic box”
(prepare and send from all scheduled participants in the last week, to be mailed 2 weeks prior to session)
NOTE: Printing can be done in black and white. Labeling should be in the notation “MBB___ W_”
- Print [What is in this magic box and what goes back to the lab?]
- Print Reward Board (plus gold star stickers)
- Print/Staple Parent Questionnaire Booklet (in this order)
- Parent Questionnaire Cover Page / Parent Proxy Intro
- demographics
- financial
- covid_objective (parentproxy version)
- pedsql_gi_parentproxy
- pedsql_wb_parentproxy
- pedsql_f_parentproxy
- easy (revised)
- tesi (revised)
- cbcl (revised)
- cshq (revised)
- mb_metadata
- med_check
- pds
- dhws
- hpq
- parent_stress
- cssi (for children under 8)
- fci (only adopted)
- iai (only internationally adopted)
- Parent Self Intro
- bdi
- covid_objective (parentself version)
- Print/Staple Session 1/Session 2 Booklet (in this order)
- Session 1 Cover page
- Pleasant/Unpleasant Events Checklist
- Height Measurement Instruction
- Weight Measurement Instruction
- Waist Measurement Instruction
- Saliva Sample Instructions Sheet
- Hair Sample Instructions Sheet
- Session 2 Cover Page
- Contact List and label with participant ID
- Stool Sample Instructions Sheet
- Bristol Stool Scale and label with participant ID (MBB Specific Version)
- Prepare 1-2 sharpened pencils
- Prepare paper measuring tape (for waist and height measurements)
- Label 2 biohazard bags (with 2 cotton balls in each bag)
- Label 1 cardboard box (for samples)
- Label hair sample kit (aluminum foil 7”x7”, painter’s tape with “root end” labeled, 1 ziplock bag pre-labeled with participant ID & Wave)
- Include a hair comb and alligator clip
- Label stool sample collection kit (paper clip collection tube and toilet hat together)
- Insert purple gloves for stool sample
- Label saliva sample collection kit (collection tube)
- Insert MBB info card
- Attach FedEx slip to return mailer
- Label return mailer with “exempt human specimen” (in sharpie)
- Take picture of prepaid blue return mailer (marked with MBB number & Wave) and file in participant data folder on Box
- Insert all labeled items and forms for post-session in blue return mailer
- Insert all labeled items and forms for session itself in magic box
- Insert blue return mailer into study package
- Tape package closed and put BABLAB sticker on
- Take a picture of study package with tracking information to file offline on researcher computer (NOT Box)
- Mail “Magic Box” package to participant
Setup - 1 Hour Prior
- Open up Zoom link for Session 1
- Read “participant” information instrument on REDCap for notes section for any notes from the scheduler about child
- Open Slack and keep open for entirety of session for communication with the research team/Lab Manager
- If Lab Manager, assign all fellow researchers co-host. If SRA, ask Lab Manager to sign on to assign you Host or co-host.
- Pull up session scripts/protocol, Halloween training instructions, and Halloween Test instructions
- Send Session 1 Links email
- NOTE: do not add Gorilla Code to LINKS email- code is their MBB # which cannot be paired with private information (participant’s name/email)
- Activate the participant’s ID on Gorilla; leave Gorilla open so researcher can track participant progress during behavioral task
- Prepare Session 1 checklist on REDCap
- Have the Participant’s MBB and secondary MBB number on hand
- Preload the Consent/Assent picture slideshow on researcher computer
- Prepare biological sample kits for demonstration during session
- hair sample, saliva sample, stool sample
- Ensure researcher’s Zoom security settings are set for study session
- Have the following links ready to send to the Participant throughout the session:
- link to Consent on REDCap with codes ready
- link to Child’s Gorilla Game
- link to child questionnaires on REDCap with codes ready
W1-O Checklist - Session 1
- Welcome & Introduction to Zoom (important features- chat)
- Session walk-through/package explanation
- Consent/Assent
- Parent-child observation (note recording via Zoom or participant recorded)
- If participant recorded, instruct participant how to upload to Box
- Explain Questionnaires Parent Proxy or Parent self on second device if available (for parent to complete during Halloween training, Halloween test, and Child Questionnaires)
- Halloween training
- Height
- Weight
- Waist circumference
- Halloween test
- Saliva sample
- Hair sample
- Child Questionnaires
- Stool Sample explanation
- Contact list explanation
- Qualitative parent and child free responses (optional) explanation
- Confirm mailing address for payment
- Confirm Session 2 time and date
W1-O Checklist - Post-Session 1
Notes
- Submit lab session checklist child
- Make note of issues to discuss (if needed) in Boxnote for next core meeting
- Update Participant Tally
- Update Participant Log
W1-O Checklist - Pre-Session 2
NOTE: all template emails are in bablab gmail
- Send Session 2 Links email
- Open Gorilla to track participant progress
- Have the Participant’s MBB number on hand
- Open home session checklist on REDCap
W1-O Checklist - Session 2
- Halloween test delay completed
- Fill in home session checklist on REDCap (halloween test delay information)
- Stool sample questions answered
- Wave 2 Interview
- Bristol Stool Scale reminder
- Contact information sheet reminder
- Walk through package to send back (check “mbb_online_package_checklists”) for checklist of items participant needs to send back to the lab
W1-O Checklist - Post-Session 2
- Save and submit home session checklist on REDCap (halloween test delay information)
- Update Participant Log
- Download and copy delayed behavioral task data (from Gorilla) to participant folder (raw)
- Send Session 2 TO DO List email from bablab gmail templates
W1-O Checklist - Final Online
Filing
- Make low-res parent child interaction video and save on BABLab External Hard Drive
- Burn all audio and video (low res) files to CD and label/store CD in binder
- Make manila folder for participants to file all hard copies
Reminders
NOTE: all template emails are in bablab gmail
- Home Session Reminder 1 Email made
- Home Session Reminder 1 phone call made
- Home Session Reminder 2 Email made
- Home Session Reminder 2 phone call made
After package has been received…
Package confirmation
- Halloween test delay completed
- Hair sample received
- Saliva sample received
- Stool sample received
- Bristol Stool Scale data received
- Questionnaires received
- Contact information sheet received
Data Entry
- Enter contact list information into recruitment database
- Scan and upload parentproxy questionnaires to Box
- Scan and upload parentself questionnaires to Box
- Enter questionnaires data to REDCap (parentproxy and parenself)
- Scan and upload Bristol Stool Scale to Box
- Enter Bristol Stool Scale data to REDCap
- Enter height/weight/waist to body measurements on REDCap
Filing
- File Consent/Assent forms in filing cabinet (consent manila folder)
- File contact list in filing cabinet (contact list manila folder)
- File Bristol Stool Scale in filing cabinet (participant folder)
- File questionnaires in filing cabinet if paper versions were sent (participant folder)
Sample Storage
- Label with PID and Wave and store stool sample (add data quality to REDCap)
- Label with PID and Wave and store saliva sample
- Label with PID and Wave and store hair sample
- Update sample storage log on Box (once all received)
- Upload all sample photos to Box
W1-O Checklist - No Show
- Delete session 2 & reminder calendar events from MBB calendar to avoid confusion
- Session 2 reminder email
- Session 2 reminder call
- Session 2 session event
- Home session reminder 1 email
- Home session reminder 1 call
- Home session reminder 2 email
- Update [Participant Tally] as “rescheduling” (https://ucla.app.box.com/file/724688028024)
- Update MBB_Participant_Log – under “Wave 1- online session date”, write “rescheduling”
- Note in REDcap participant instrument “notes” that participant is being rescheduled.
- Rescheduling steps
- Send No-show rescheduling email same day
- Add calendar event for reschedule call 1 (following day)
- Add calendar event for rescheduling email 2 (3 days after original session date)
- Add calendar event for rescheduling call 2 (4 days after original session date)
- Add calendar event for rescheduling email 3 (1 week after original session date)
- Add calendar event for rescheduling call 3 (8 days after original session date)
- IF participant is not reached after 6 previous recontact attempts, make note in the next SRA meeting document, and follow-up with Kristen regarding next steps.
- IF participant gets rescheduled:
- Update new date of session in:
- MBB_Participant_Log
- REDcap Participant Instrument
- Recreate S1 and S2 calendar events, as well as each reminder calendar event.
- Update new date of session in:
W1-O Protocols - Pre-Session 1
W1-O Protocol - Recruitment Online
Adding Participants to Participant Database
For when there is a new email interest form
- Verify that potential participant is actually a new participant
- In other words check Participant Database to check that they didn’t previously participate / fill out interest form before
- Add the info provided on interest submission ( name, age, email, phone number) 3. For column labeled “Added”:
- Yes if you’ve added them to REDCap
- No if they haven’t been added
- Recommended that you add to REDCap immediately and reach out to them
- Add participant to REDCap ( see below for full instructions)
- Move interest form email from inbox to “Added” tab of MBB
- “Move to” button is at top next to labels button, make sure you move not just put “Added” label
Pre-Screening
- Check if participant is in Participant Database
- If not, add them to the Participant Database
- Check if participant is in ID Drive
- If yes, check if they have a Screener ID
- If not, assign them a Screener ID once contact has been established based on the next available Screener ID # in REDCap and proceed with screening
- If yes, proceed with screening under existing Screener ID in REDCap
- Check participant tally before making call to see if they would be scheduled or waitlisted ( if we reached 15 participants for that age group) if eligible for study
Screening
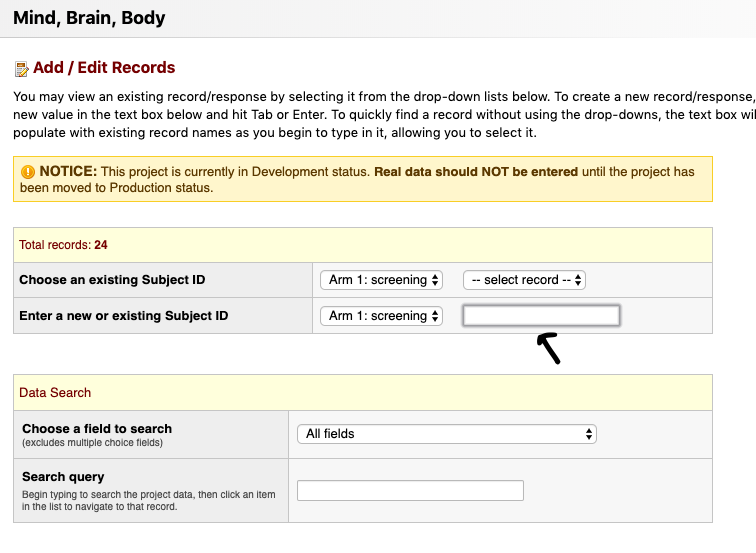
- To screen a new participant click “Add / Edit Records”
- Click to enter a new Subject ID
- Make sure Arm 1: Recruitment is selected
- Type “SMBB#” (Screener ID) to create a record and hit “Enter”
- Make sure to link the participants Screener ID and their name on the ID Drive ONLY
- Before creating a new record, be sure to check the ID Drive to see if the participant already has an existing Screener ID
- If a record exists, add a new instance of the screen instead of creating a new record
- The screening arm contains two parts
- The screen
- The wave1_status
- The wave1_status is to be updated after the first and each subsequent contact

- The wave1_status is to be updated after the first and each subsequent contact
- Click on the radio button in the “screen” row to screen the participant
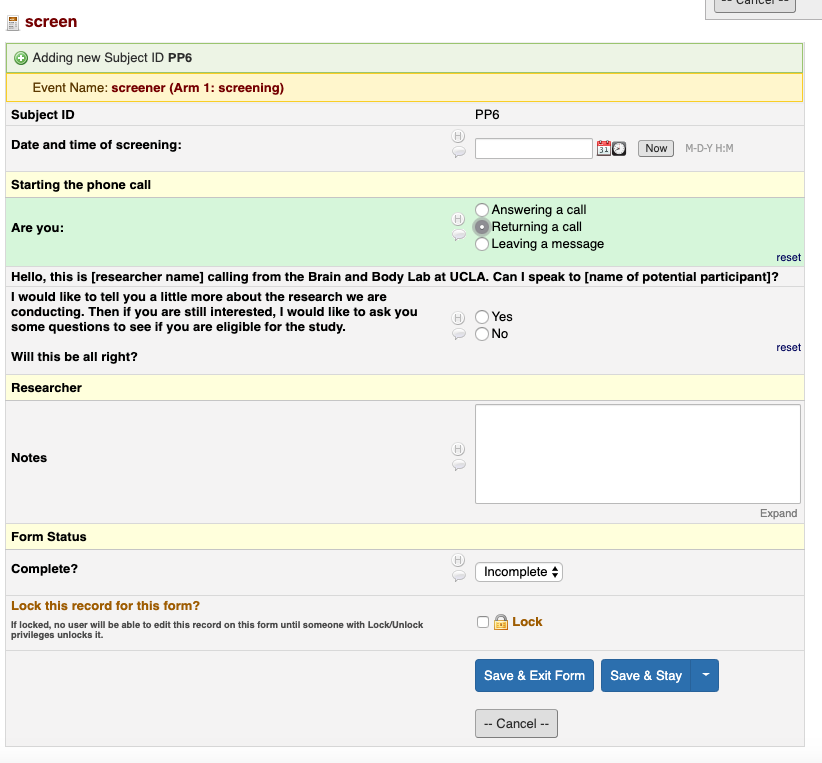
- Click “Now” to enter today’s date and time
- Select the appropriate choice to start the phone call and follow the skip logic
- Follow the skip logic to the end
- For items without a text field, write the information down in the Recruitment database (This identifying information cannot be on REDCap)
- In “Notes” make detailed note of relevant info ( eg. Session scheduled for this day, participant has not responded to prior emails, etc )
- Once done, select “Complete” and “Save & Exit Form”
- The screen can be entered multiple times - for instance if there are multiple phone calls or contacts
- It is important to keep a record of all instances of contact
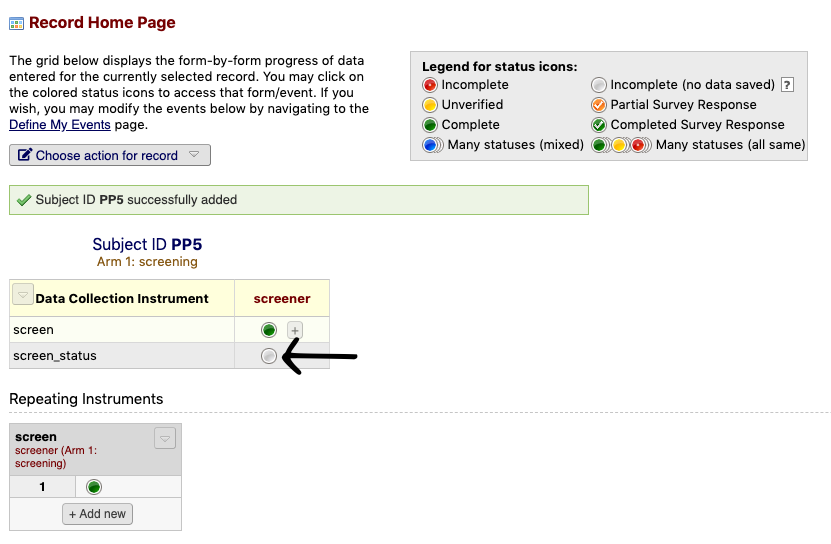
- Click the screen_status radio button
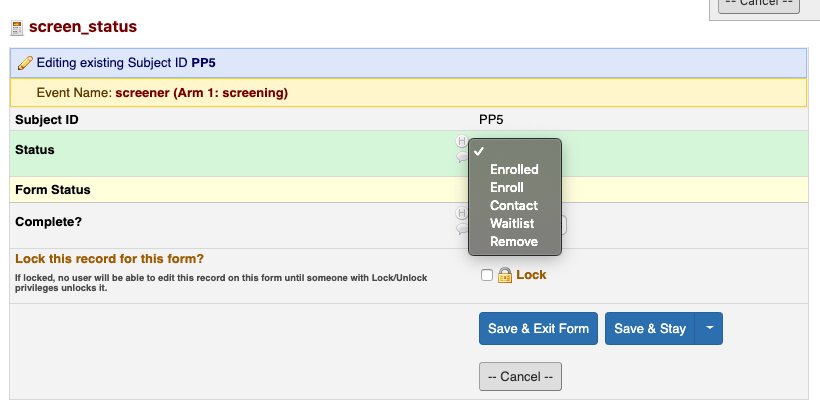
- Select the appropriate option
- Contact - Participant needs to be re-contacted (add Recruitment Database & ID Drive). Participants who are still too young to participate, or are unavailable at the moment should stay on this list but be set for a future recontact time/date.
- Ineligible - Participant not eligible for study
- To Enroll - Participant to enroll (need to create subject ID, enter subject info, schedule participant, add to Recruitment Database, add to ID Drive)
- Enrolled - Participant has been enrolled (all above have been completed)
- To Remove - Participant wants to be removed
- Out of Town- Participant lives outside of LA, and will not be returning after the pandemic. This is our “waitlist” of those we will contact if really necessary
- Be sure to update the screen status after each contact
- Update the recontact date on wave status
- One week from today (date you contacted them)
- After 3 contacts (with no response) - review (time of day, contact method, etc.)
- Update the recontact date on wave status
- If enrolled, proceed to pre-session checklist in the participant log
- Highly recommended to do all post-enrollment tasks by following the “Pre-Session Checklist” on MBB participant log
Scheduling
- Open BabLab google calendar and note availability for designated data collection research team.
- Check-in with the Lab Manager to see what the designated “package mailing day” of the week is. Participants must be scheduled 2 weeks or more in advance from the “package mailing day”, to ensure appropriate time for the package to be received by the participant.
- Create event on google calendar for 2 hours. Notify the participant that sessions may not last the full indicated time, however, we like to designate additional time just in case.
- As soon as the participant has been scheduled, create/add to a google calendar event for the designated “package mailing day” of the week the participant ID (MBB number).
- This will notify the Lab Manager to create a package for this participant with session and post-session materials when they go into the lab for “package mailing day.”
Other Screening Information
Accessing Lists
To find out where participants are in the recruitment process, there are several lists.
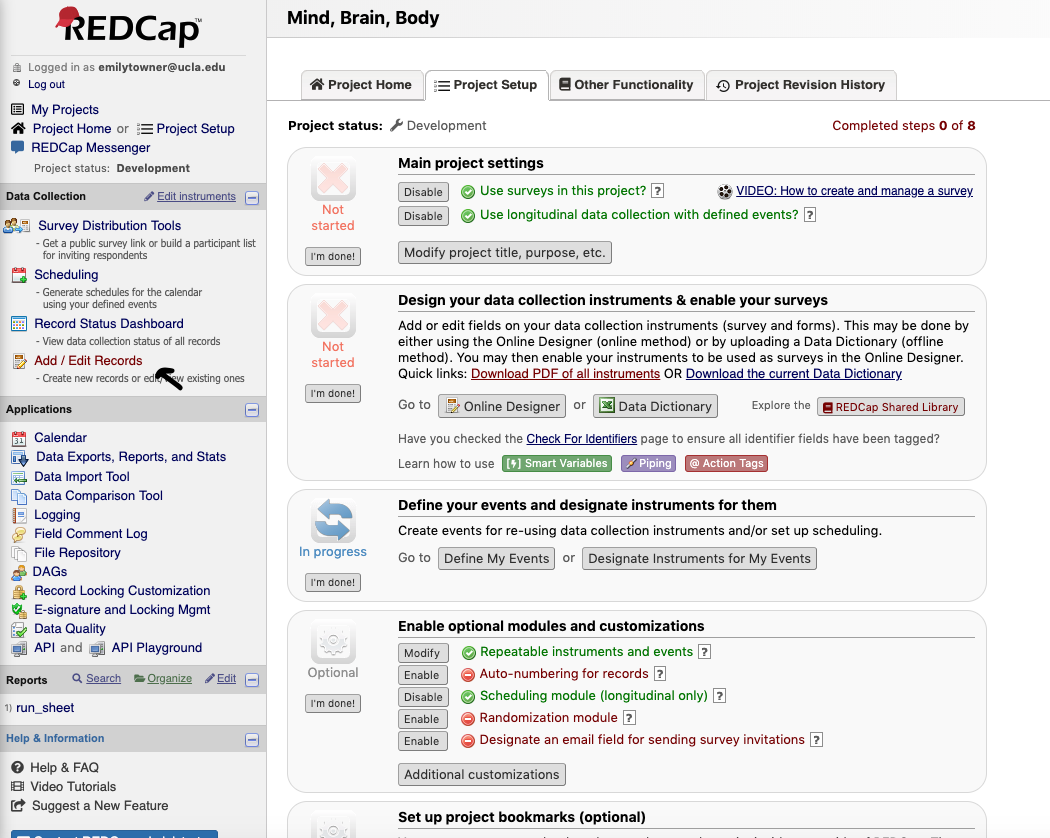
 1. Click on “Record Status Dashboard”
 2. Participants who have been enrolled will be listed in the Enrollment - Wave 1 list
3. Participants in the process of recruitment will be listed in one of the 4 Recruitment lists
- *These lists are populated based on the individuals “Screen Status” so be sure to update after each contact!
2. Participants who have been enrolled will be listed in the Enrollment - Wave 1 list
3. Participants in the process of recruitment will be listed in one of the 4 Recruitment lists
- *These lists are populated based on the individuals “Screen Status” so be sure to update after each contact!
List Types
- Contact - List of individuals who need to be contacted or re-contacted (also includes waitlist)
- Ineligible - Participants are ineligible but interested
- To Enroll - Participants who have been screened and are eligible to enroll
- To Remove - Participants who were not interested in being contacted for this or future research
- Out of Town- Participants who do not live in LA and will not be returning after the pandemic. This is a waitlist of individuals who we may contact if (1) we are behind on recruitment for Wave 1 and will need to just schedule people who we know cannot come back for future waves so we make sure we get data or (2) we have to stay in the pandemic and future waves will be remote.
Concerns
If a parent has a concern about the study before the session, send the email template:
- [MBB_online - CONCERNS]
Making a Zoom link
- Log onto https://zoom.us
- Click to “Meetings” and “Schedule a new meeting”
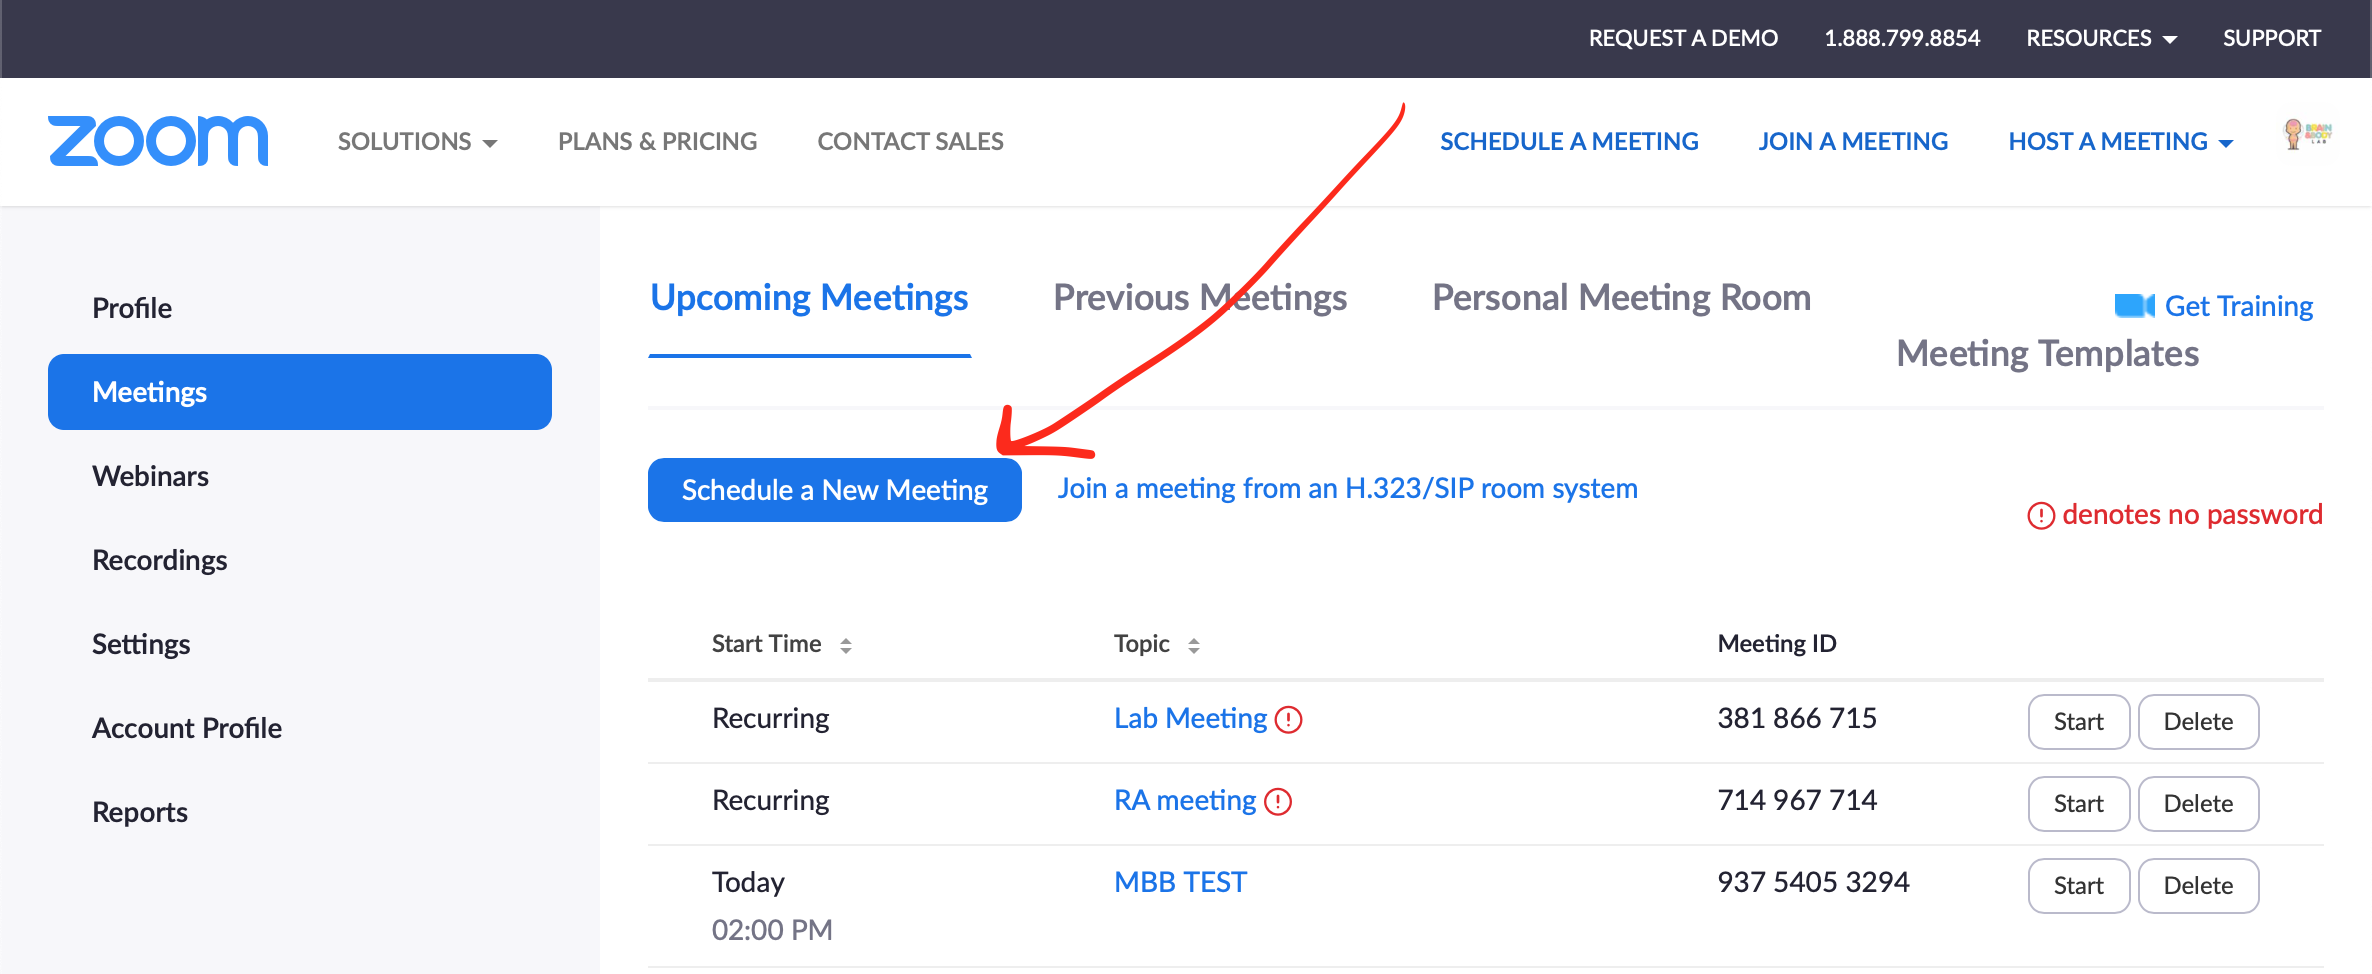
- Title the meeting with the Participant’s MBB number, set scheduled time, indicate 3 hours
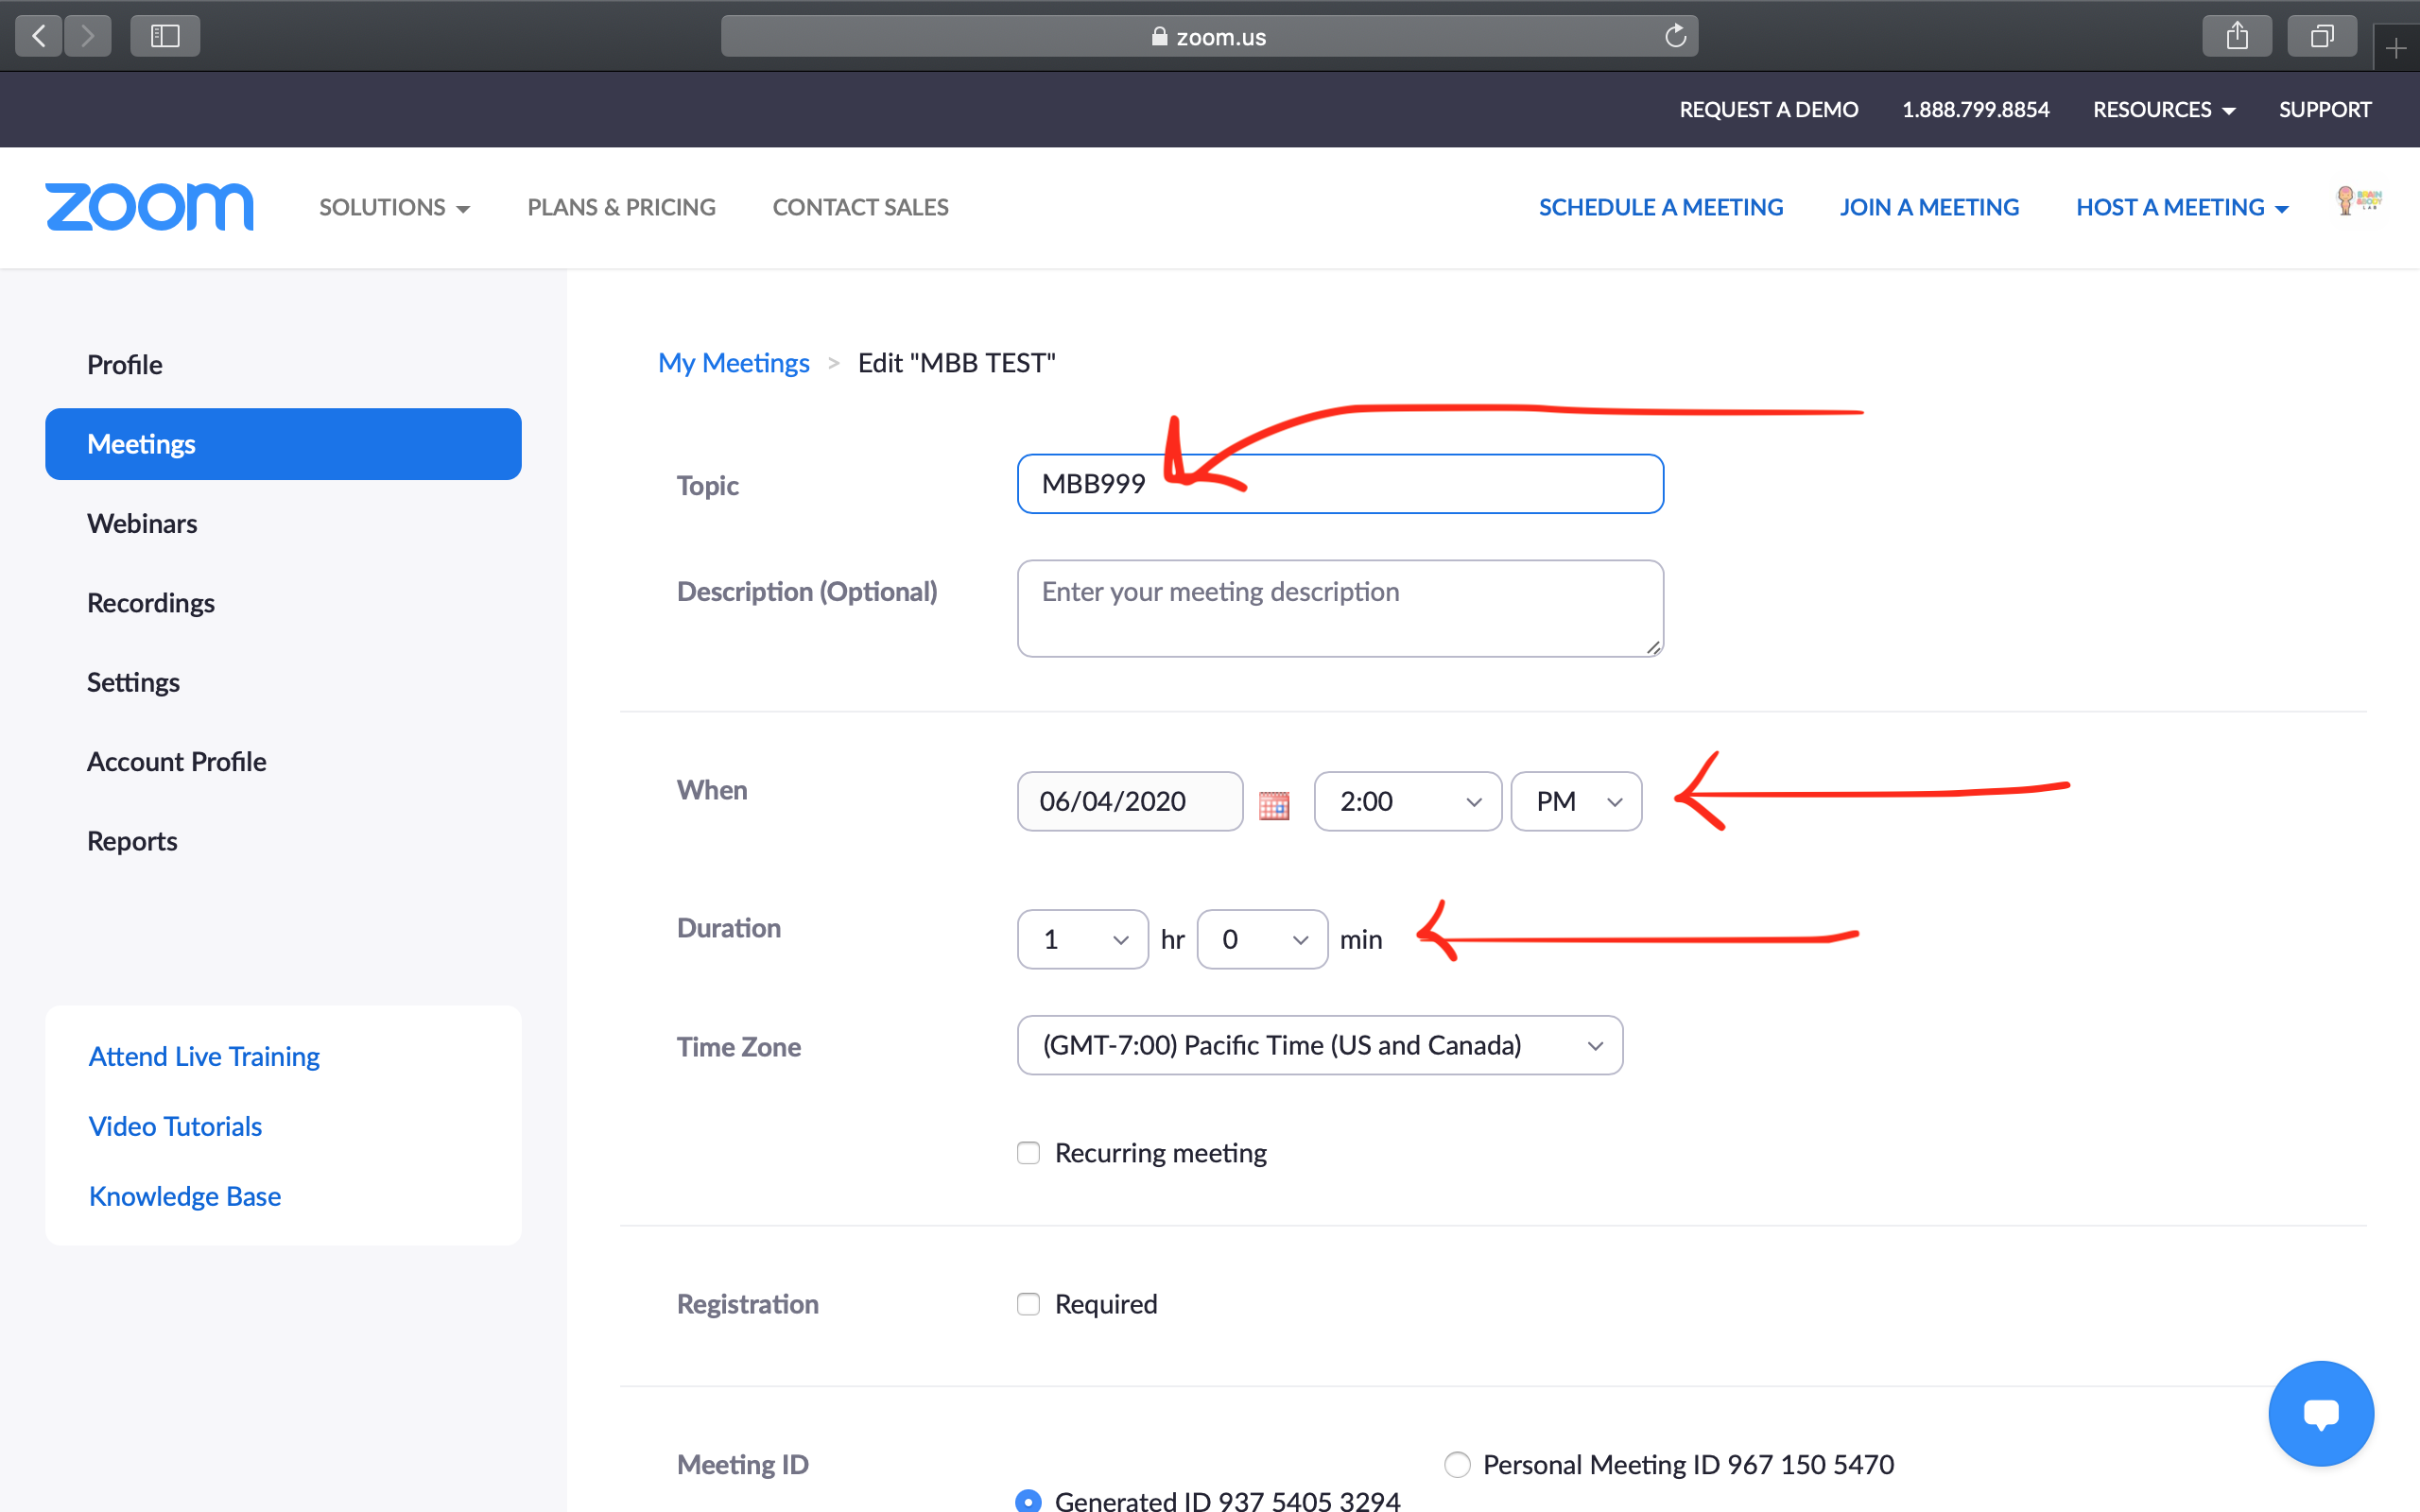
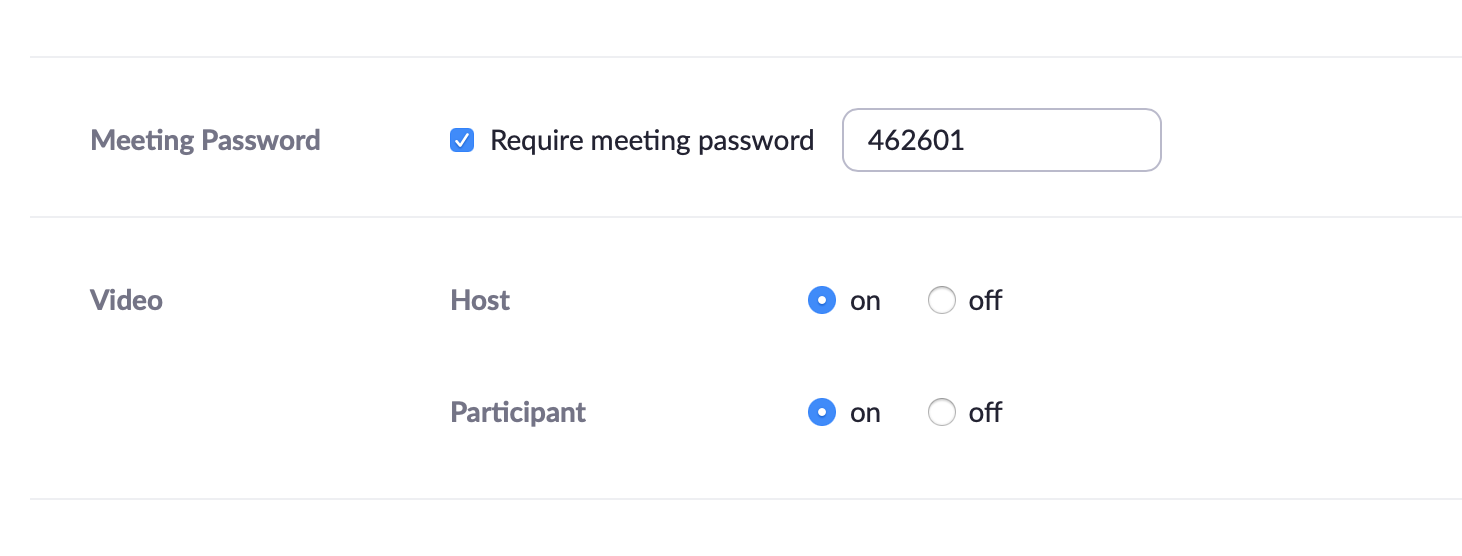
- Set setting with password and turn host/participant on
- Save and click to add Zoom meeting to google calendar

- Click on the bablab.ucla@gmail.com
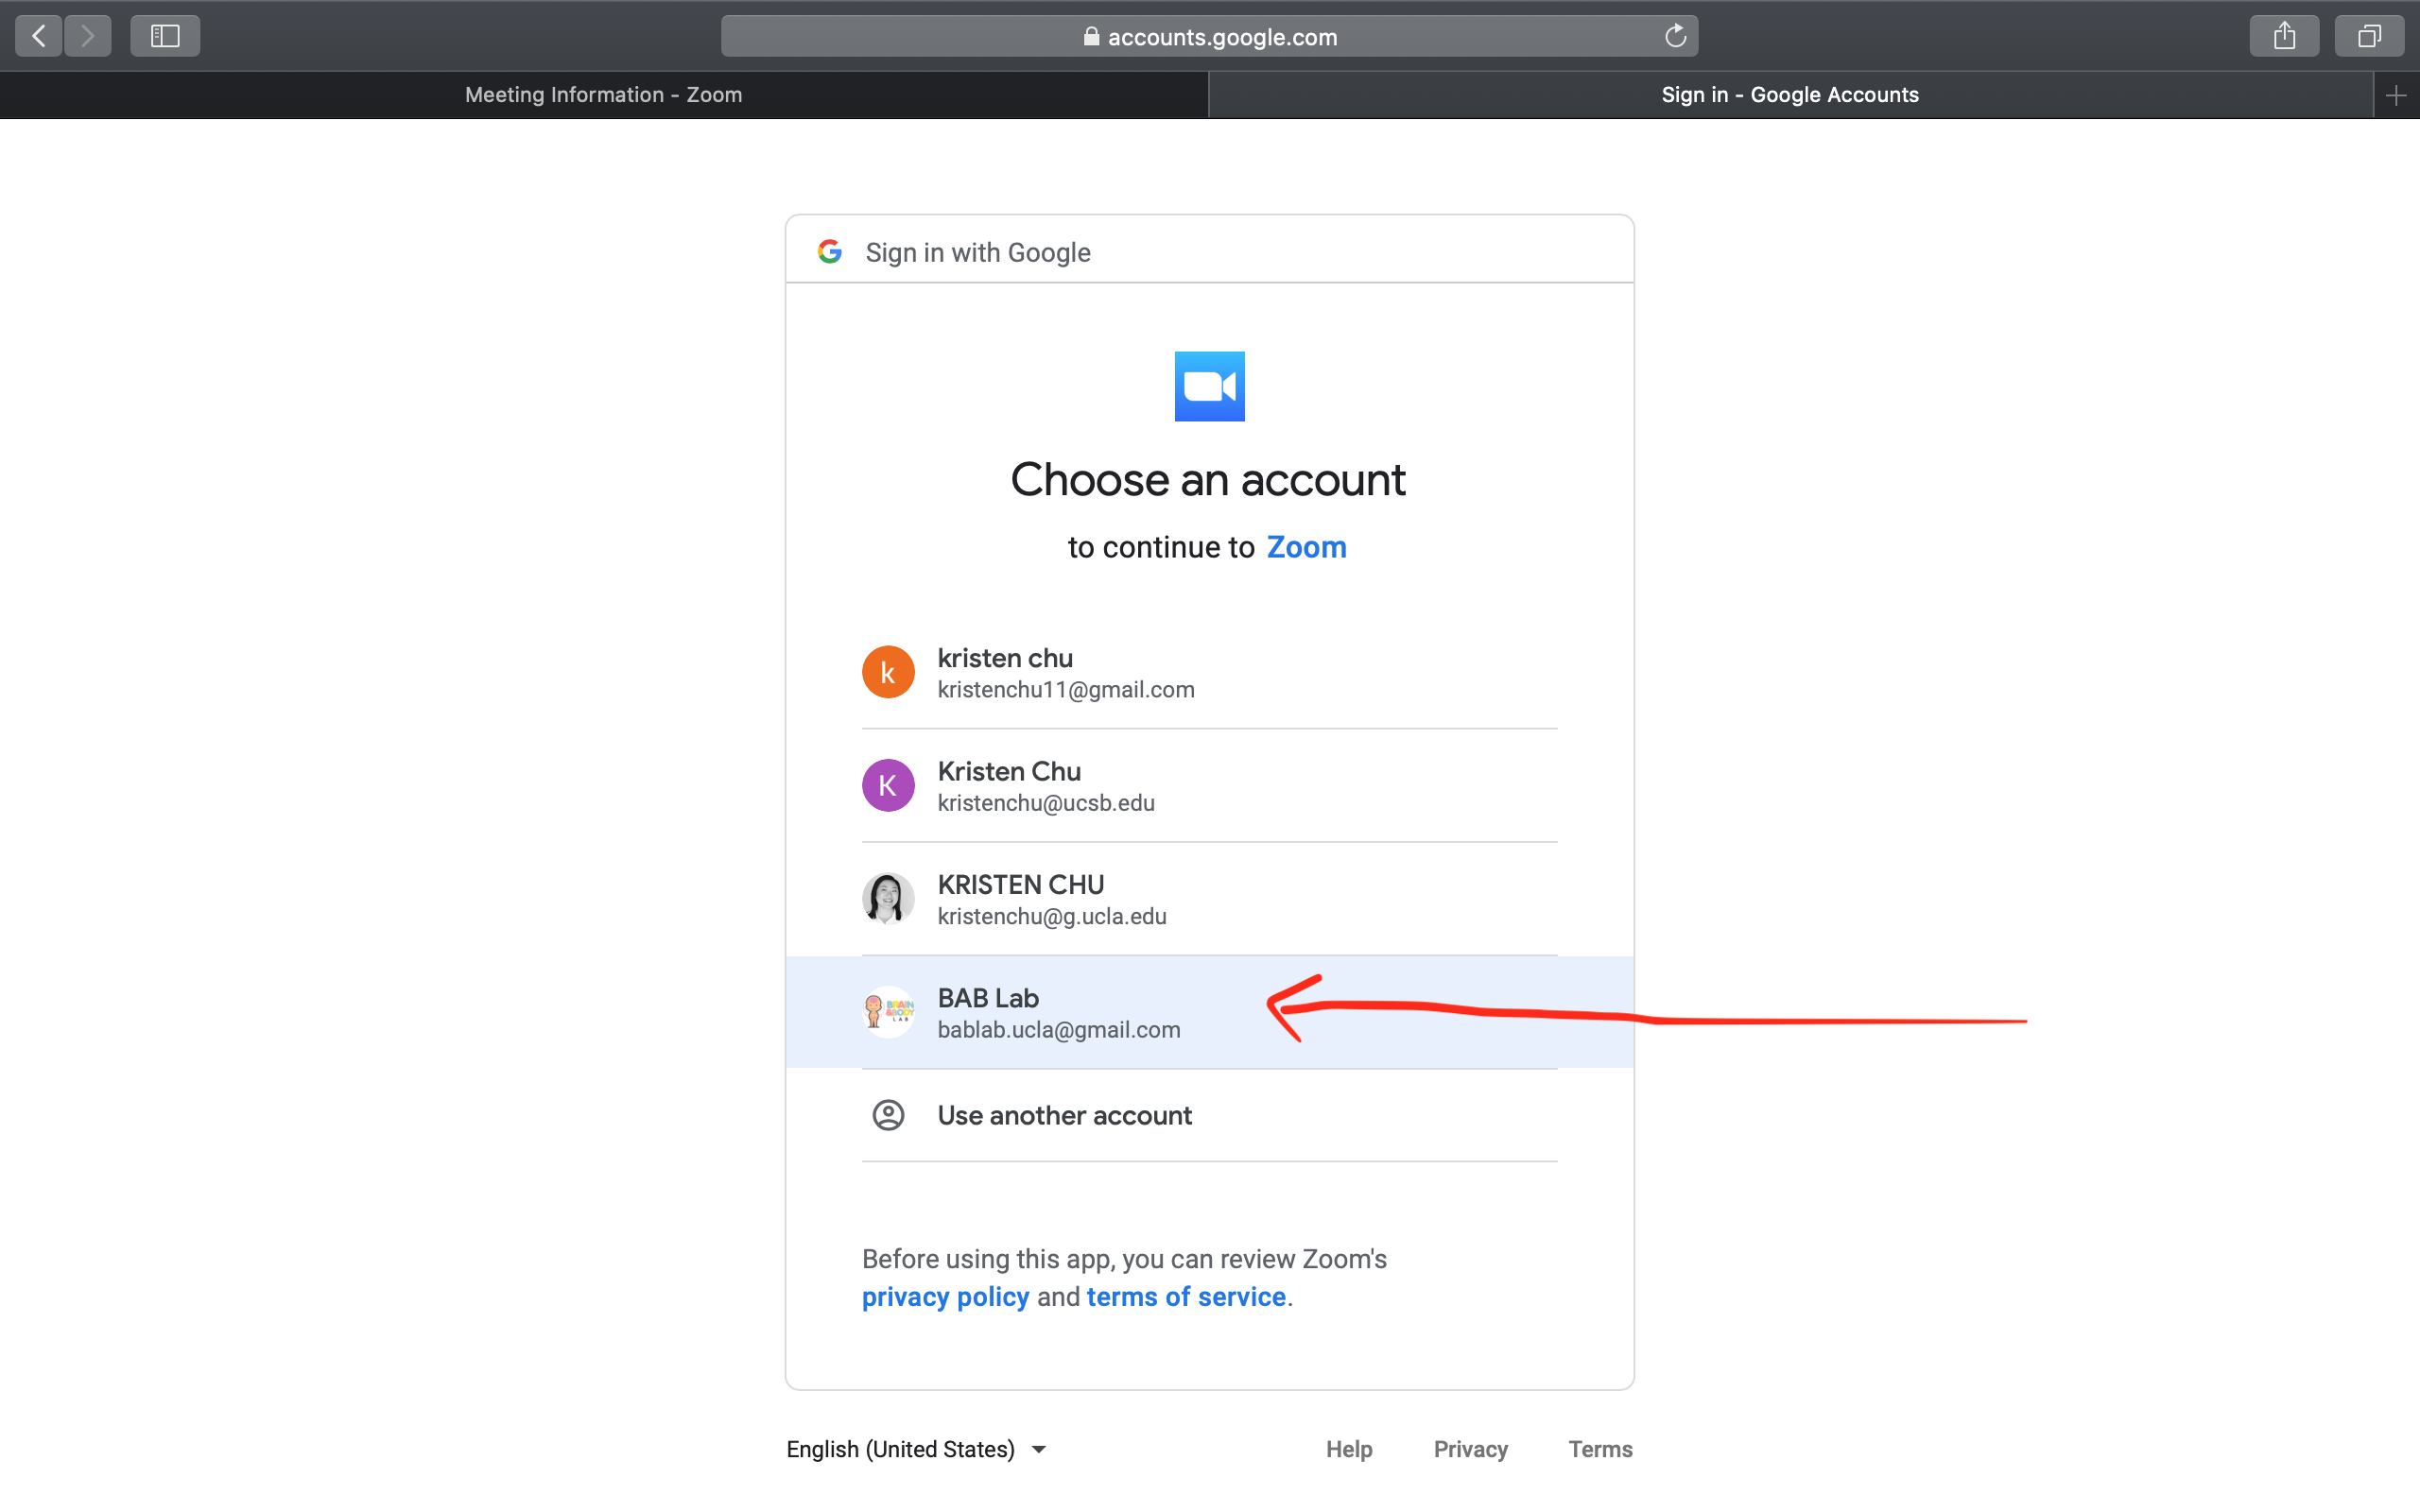
- Click allow

- Copy the Zoom link from the Description section and save
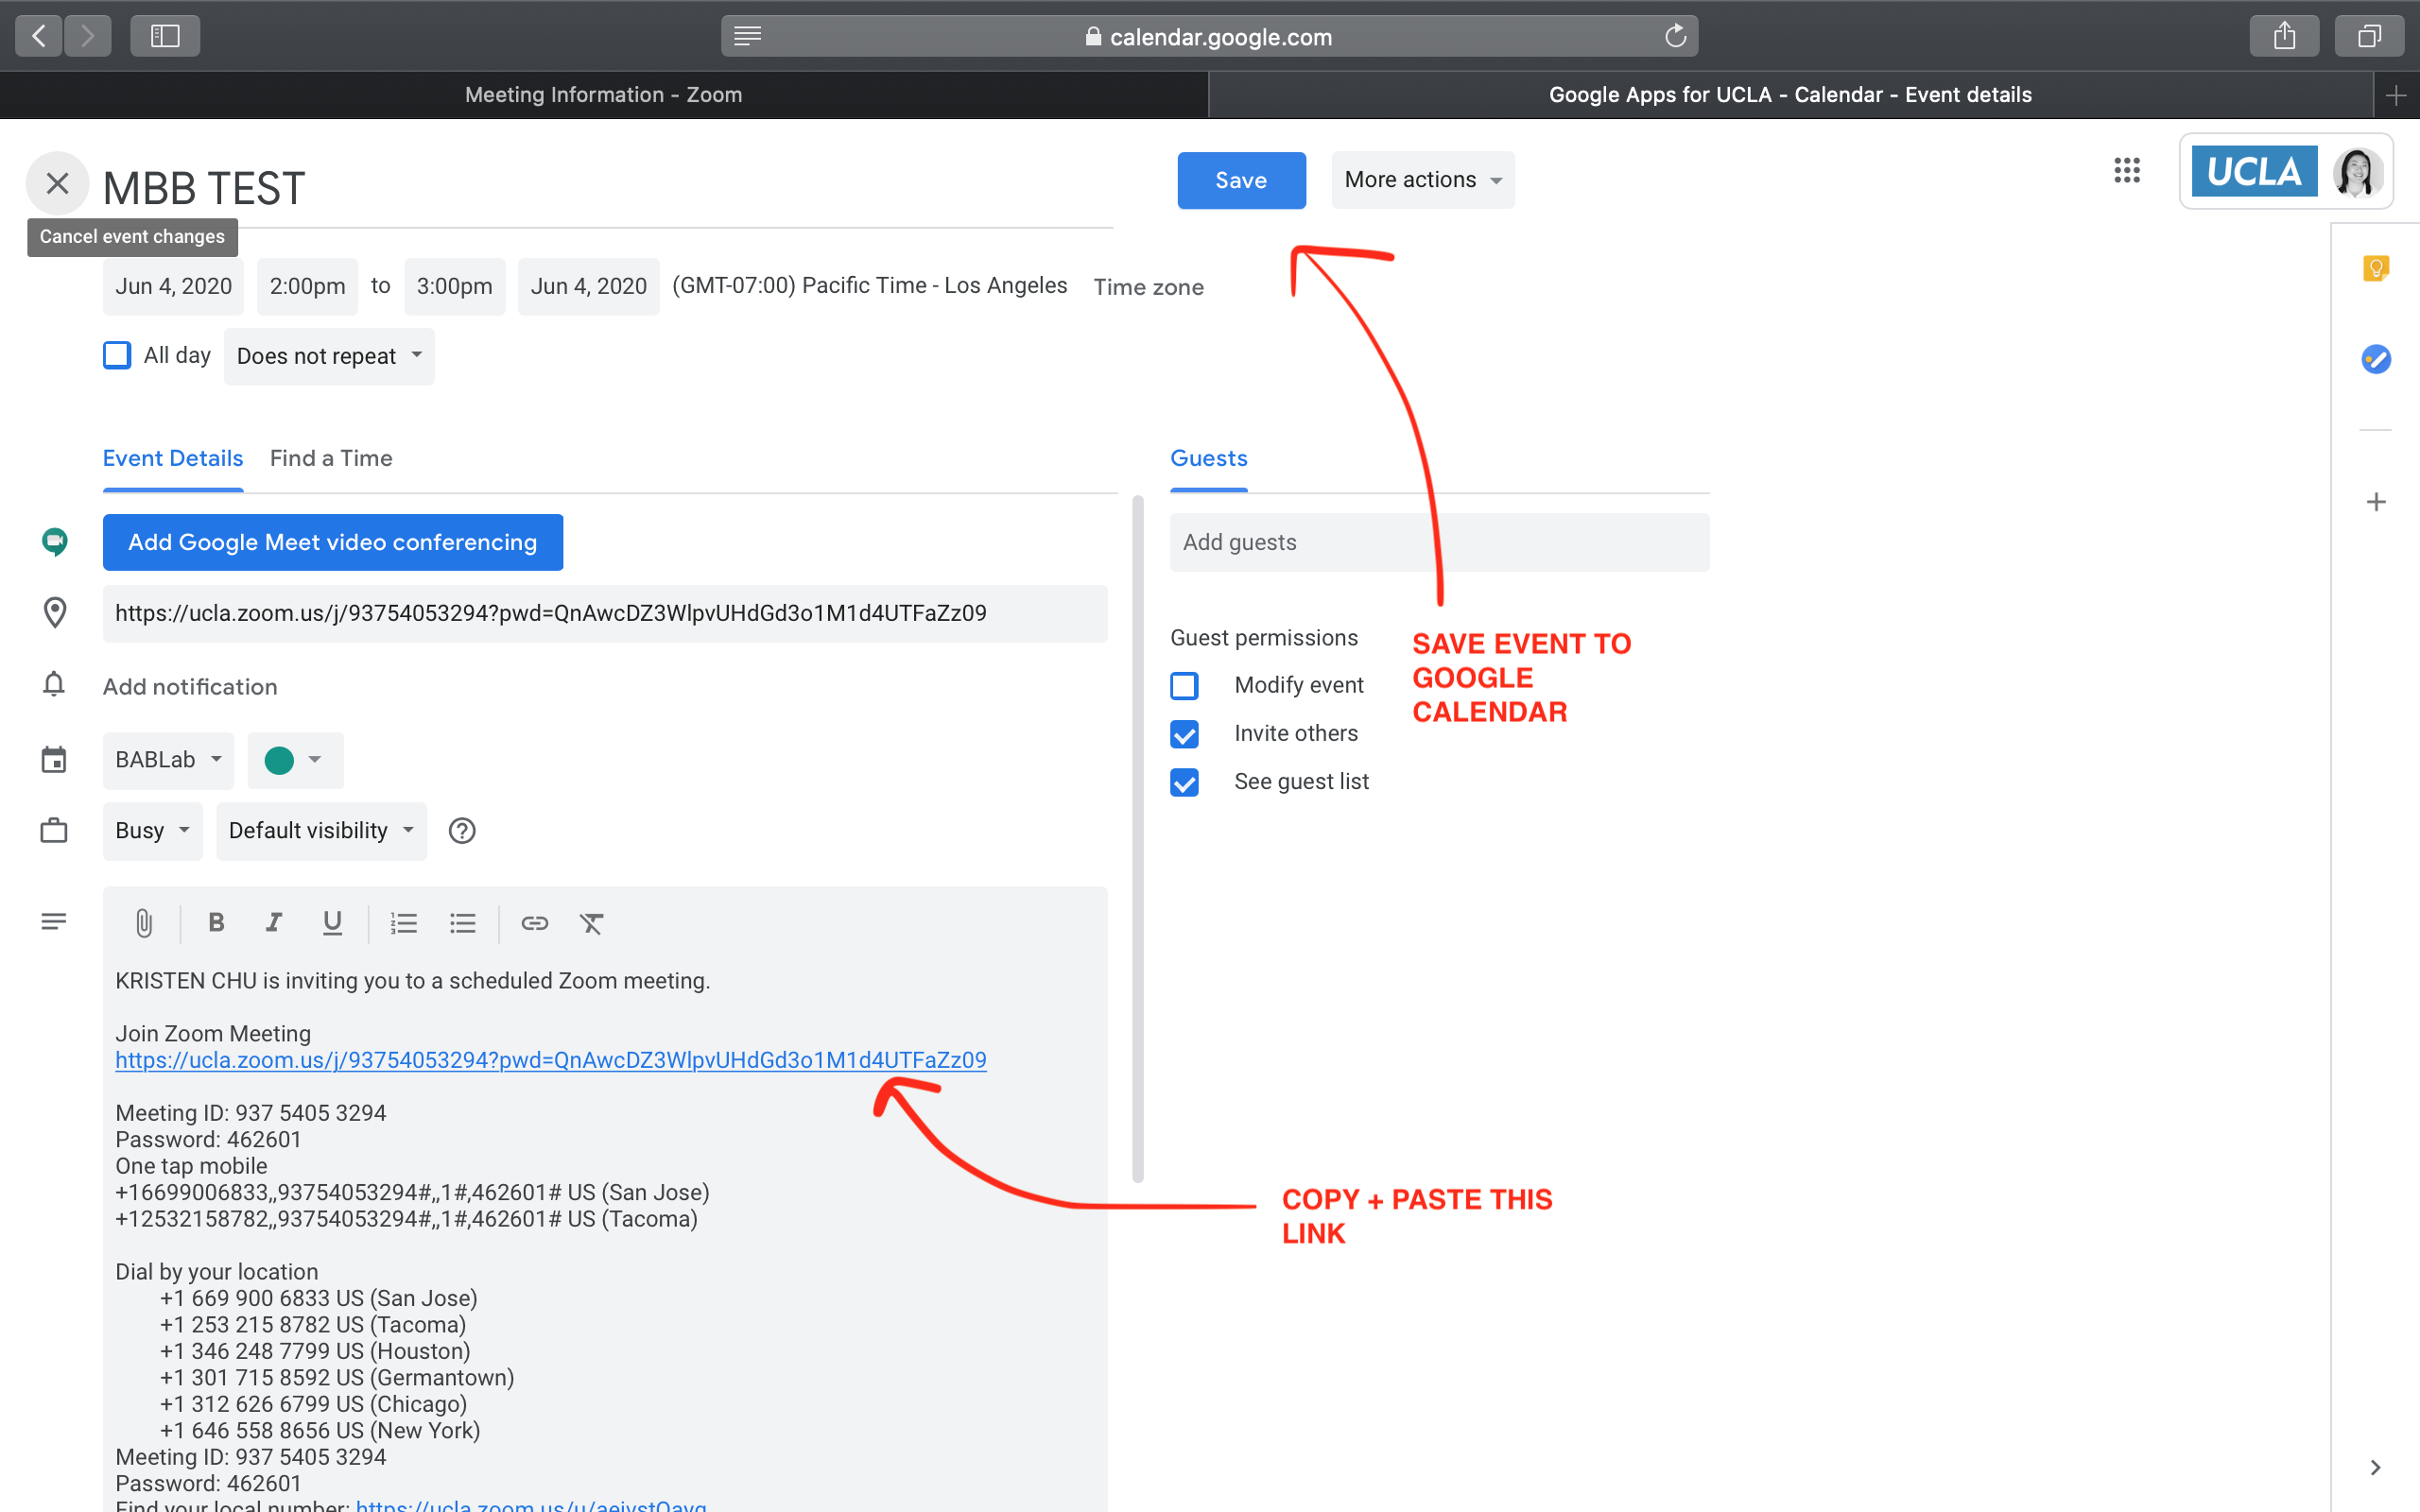
- Paste Zoom link into the “confirmation email” you send to the participant with their session confirmation, Zoom instruction sheet, and Next Steps sheet
W1-O Protocol - Session Preparation
Package creation
- There will be a designated “package mailing day” one day a week in which the Lab Manager will go into the lab to prepare necessary materials and send out packages from scheduled participants in the last week, on the same package mailing day.
- Once the package materials have been put together, it is time to bring the package down to the mailroom in the Psychology building, Tyler’s Office, OR to the UCLA MDDS.
- If you go to the mailroom or to Tyler’s Office, you need to have your own box. Tyler can tape up the box for you if needed.
- At MDDS, they provide free mailers (but no boxes), which can fit materials for up to 1 participant
- To mail the package to the participant, you will need the following information:
- Recharge ID
- Participant name
- Participant mailing address
- Lab mailing address
- From the mailroom: you can write the addresses directly on the box, and circle the recharge ID. Leave the box on the table above the “outgoing mail” sign.
- From Tyler’s office: you will receive a FedEx label in which you can write this information. Take a picture of the tracking number and save OFFLINE. Leave the box in Tyler’s office for FedEx to pick up.
- From MDDS: they will package your materials for you, and you will write the shipping information on provided labels. You can also request a tracking number, which they attach to the box for you. Take a picture of the tracking number and save OFFLINE Leave the box with MDDS to mail out.
Zoom security Settings
- Require Encryption for 3rd Party Endpoints*
- Prevent participants from saving chat
- Click on the “security” button and ensure the following items are checked and all other items unchecked
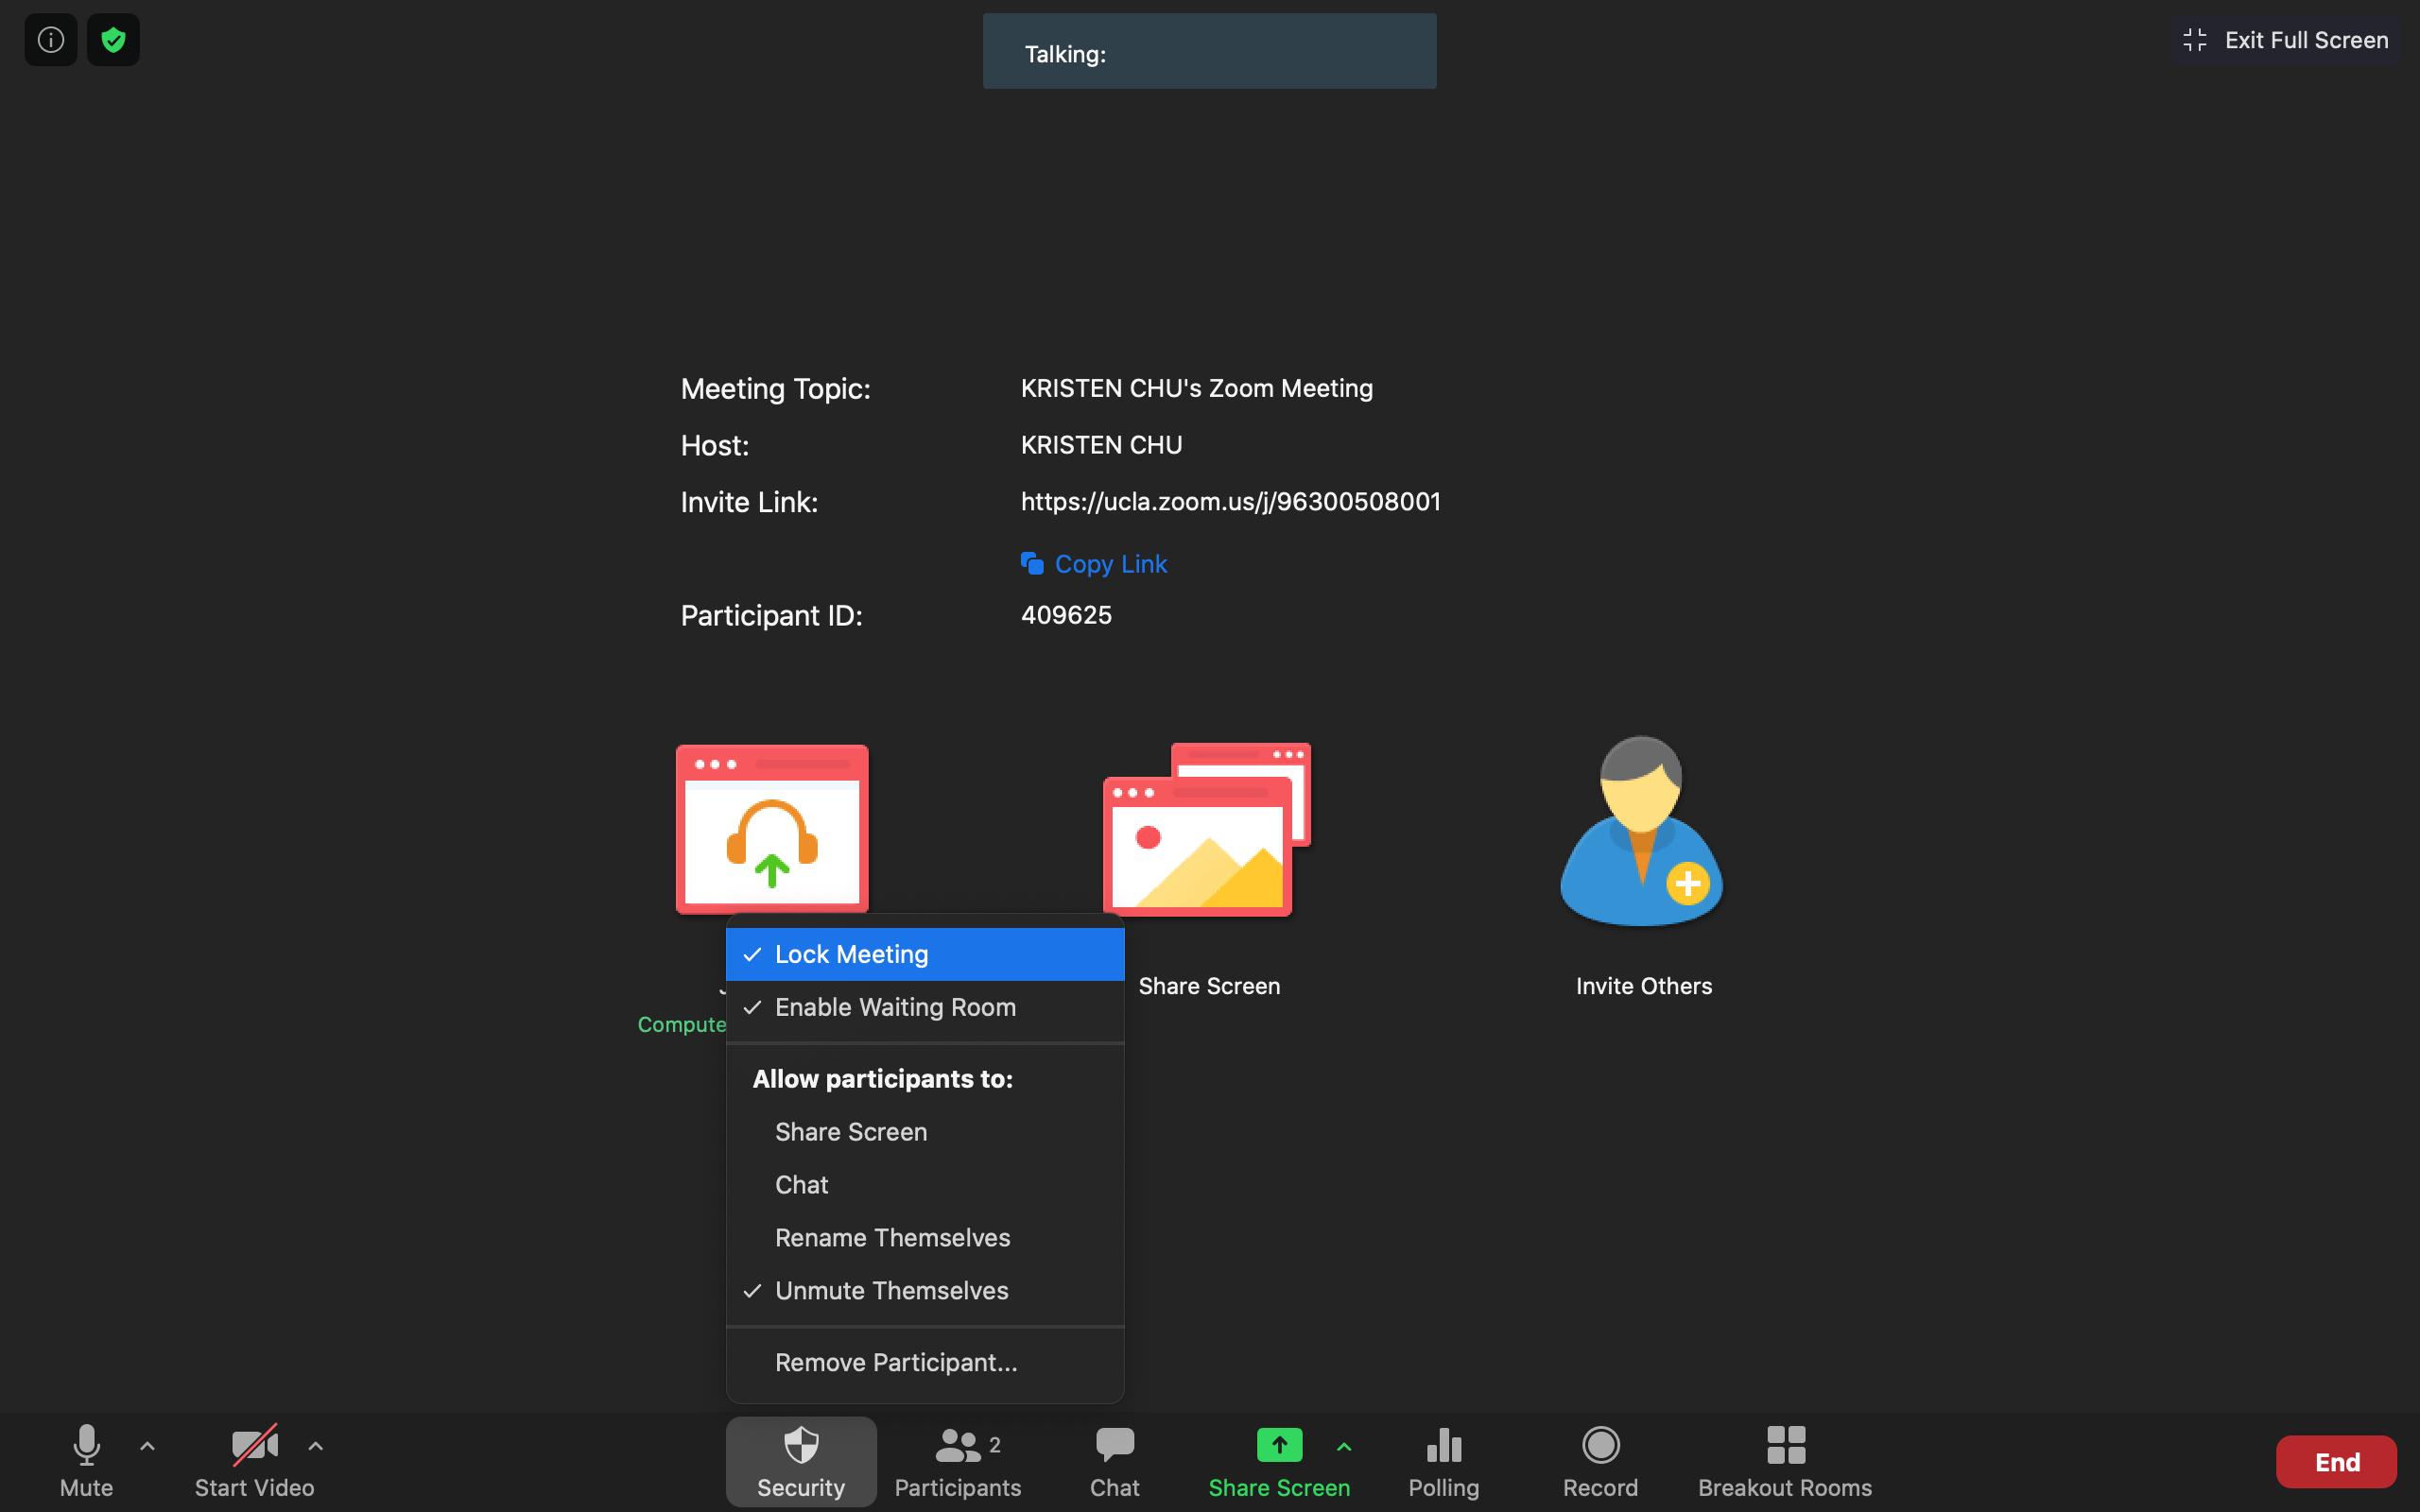
- “Enable Waiting room”
- “Lock Meeting” after participant has entered
- Allow participant to “Unmute Themselves”
- Disable Cloud recording*
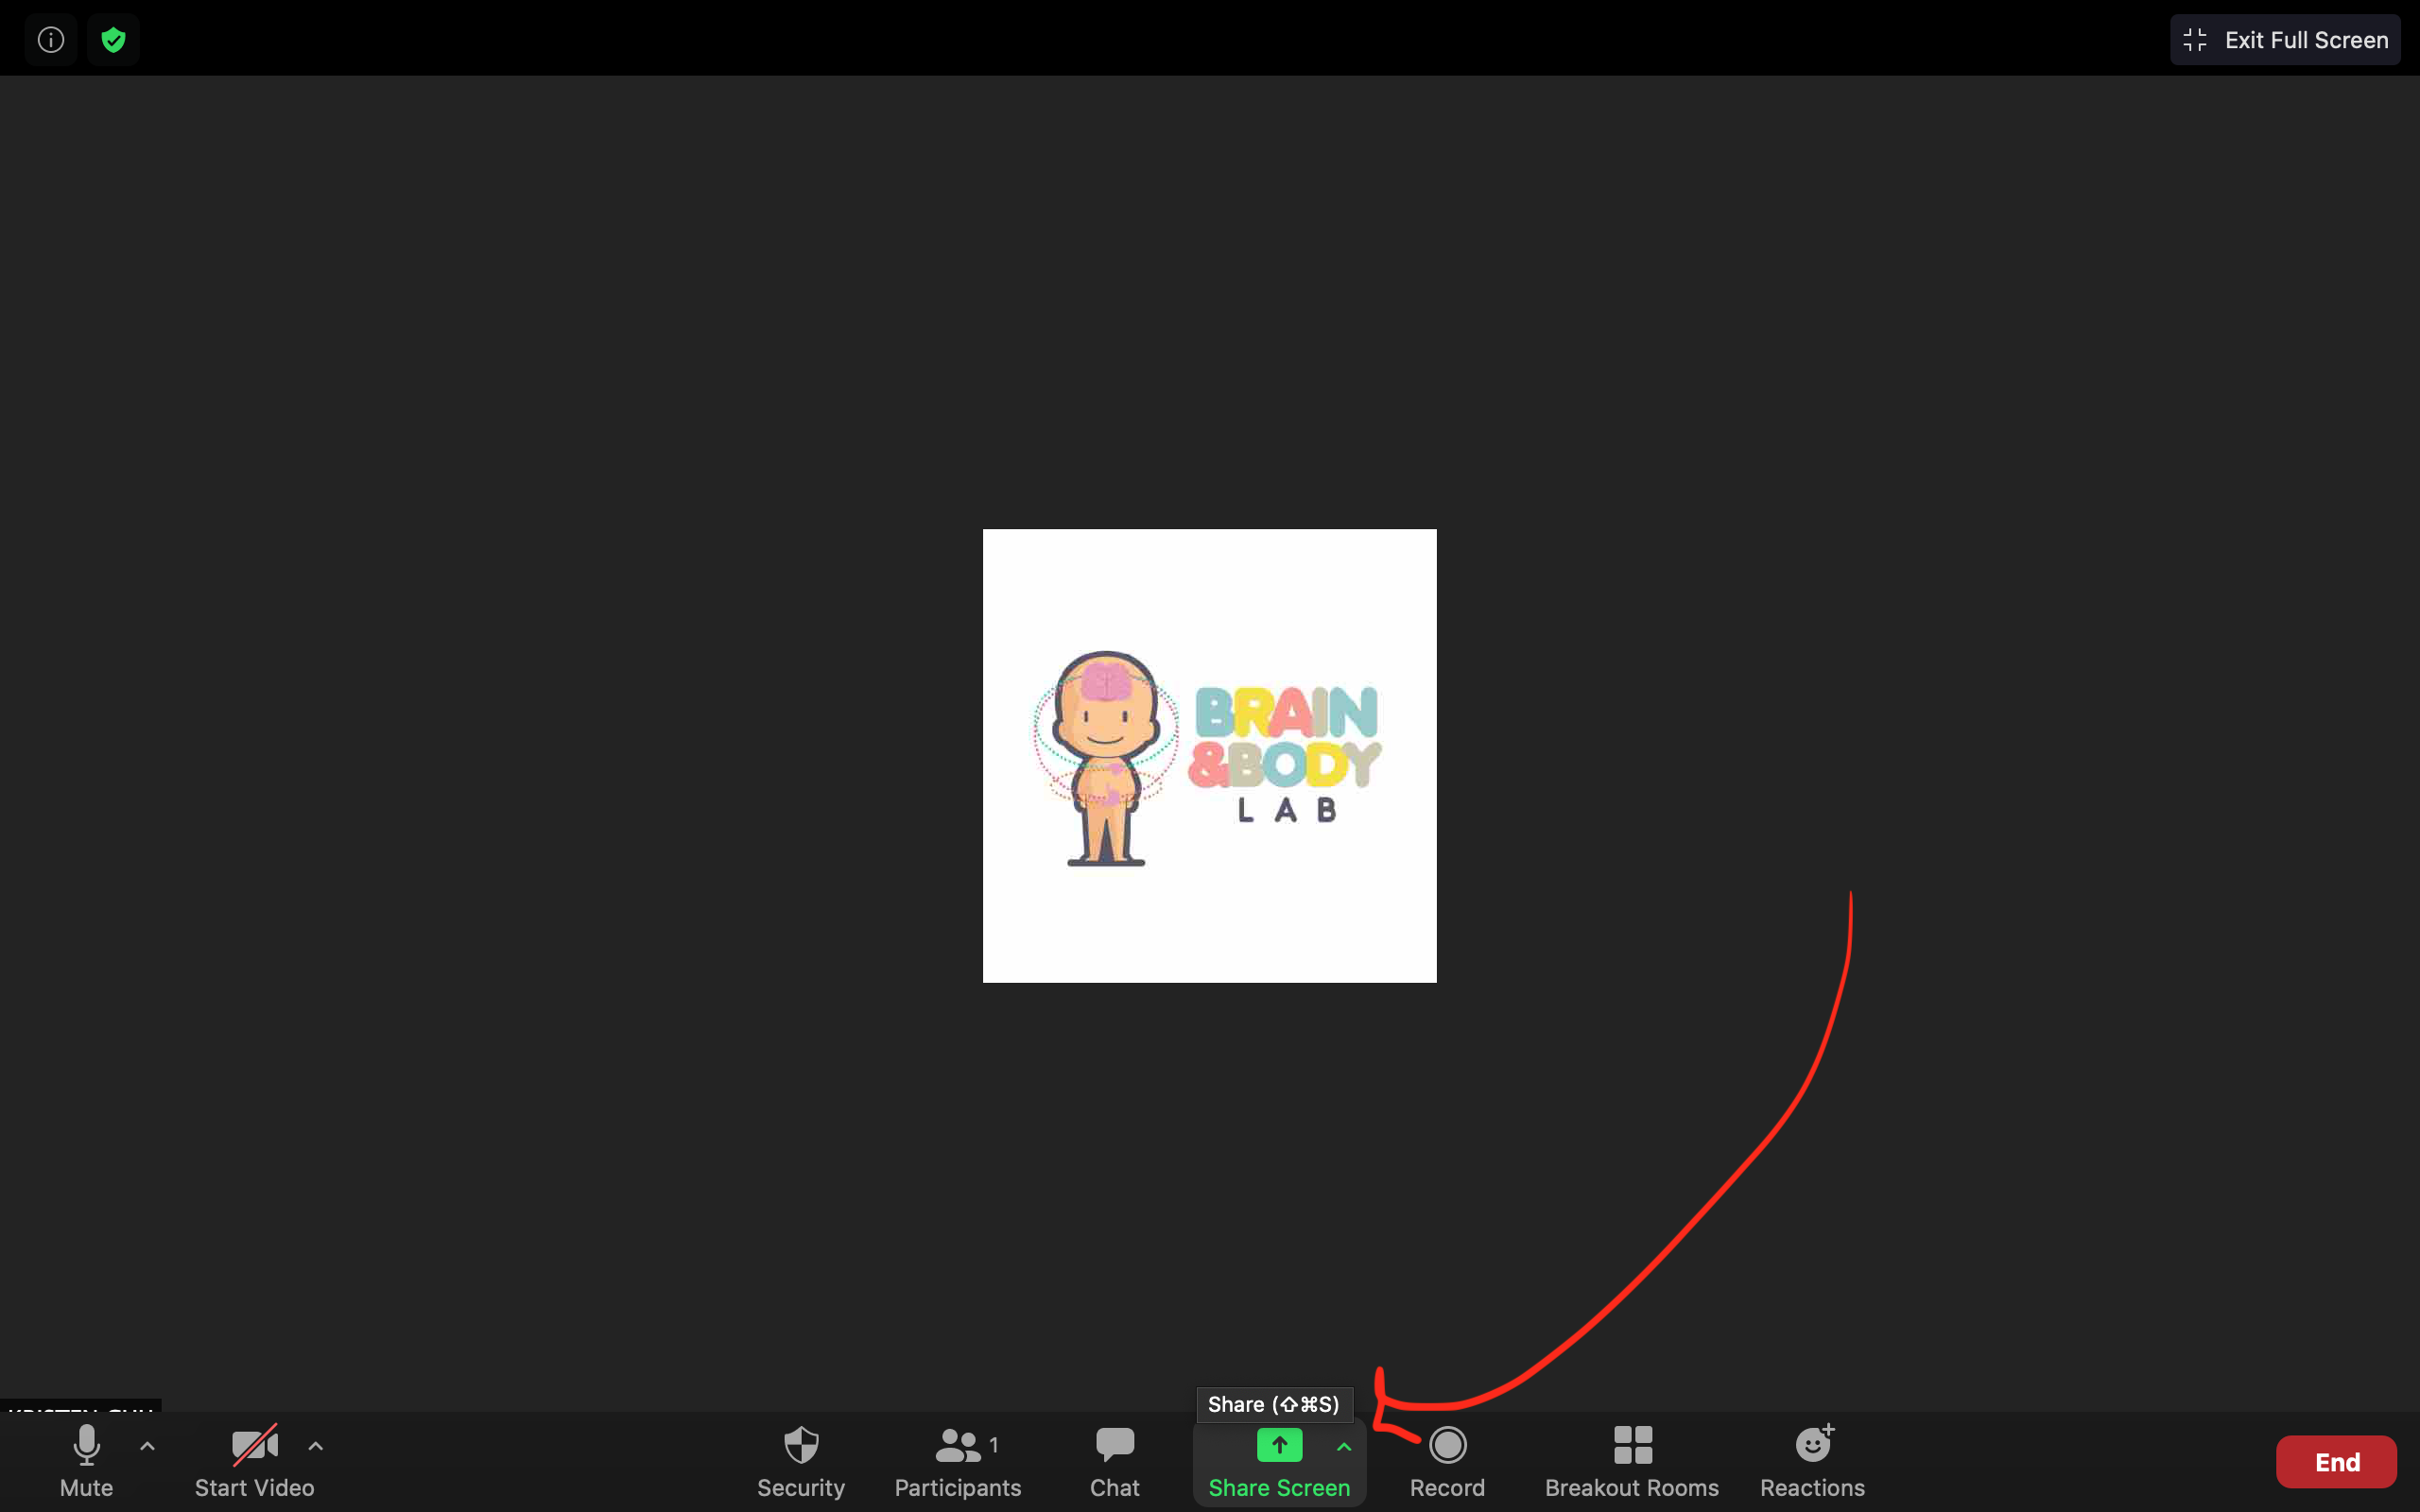
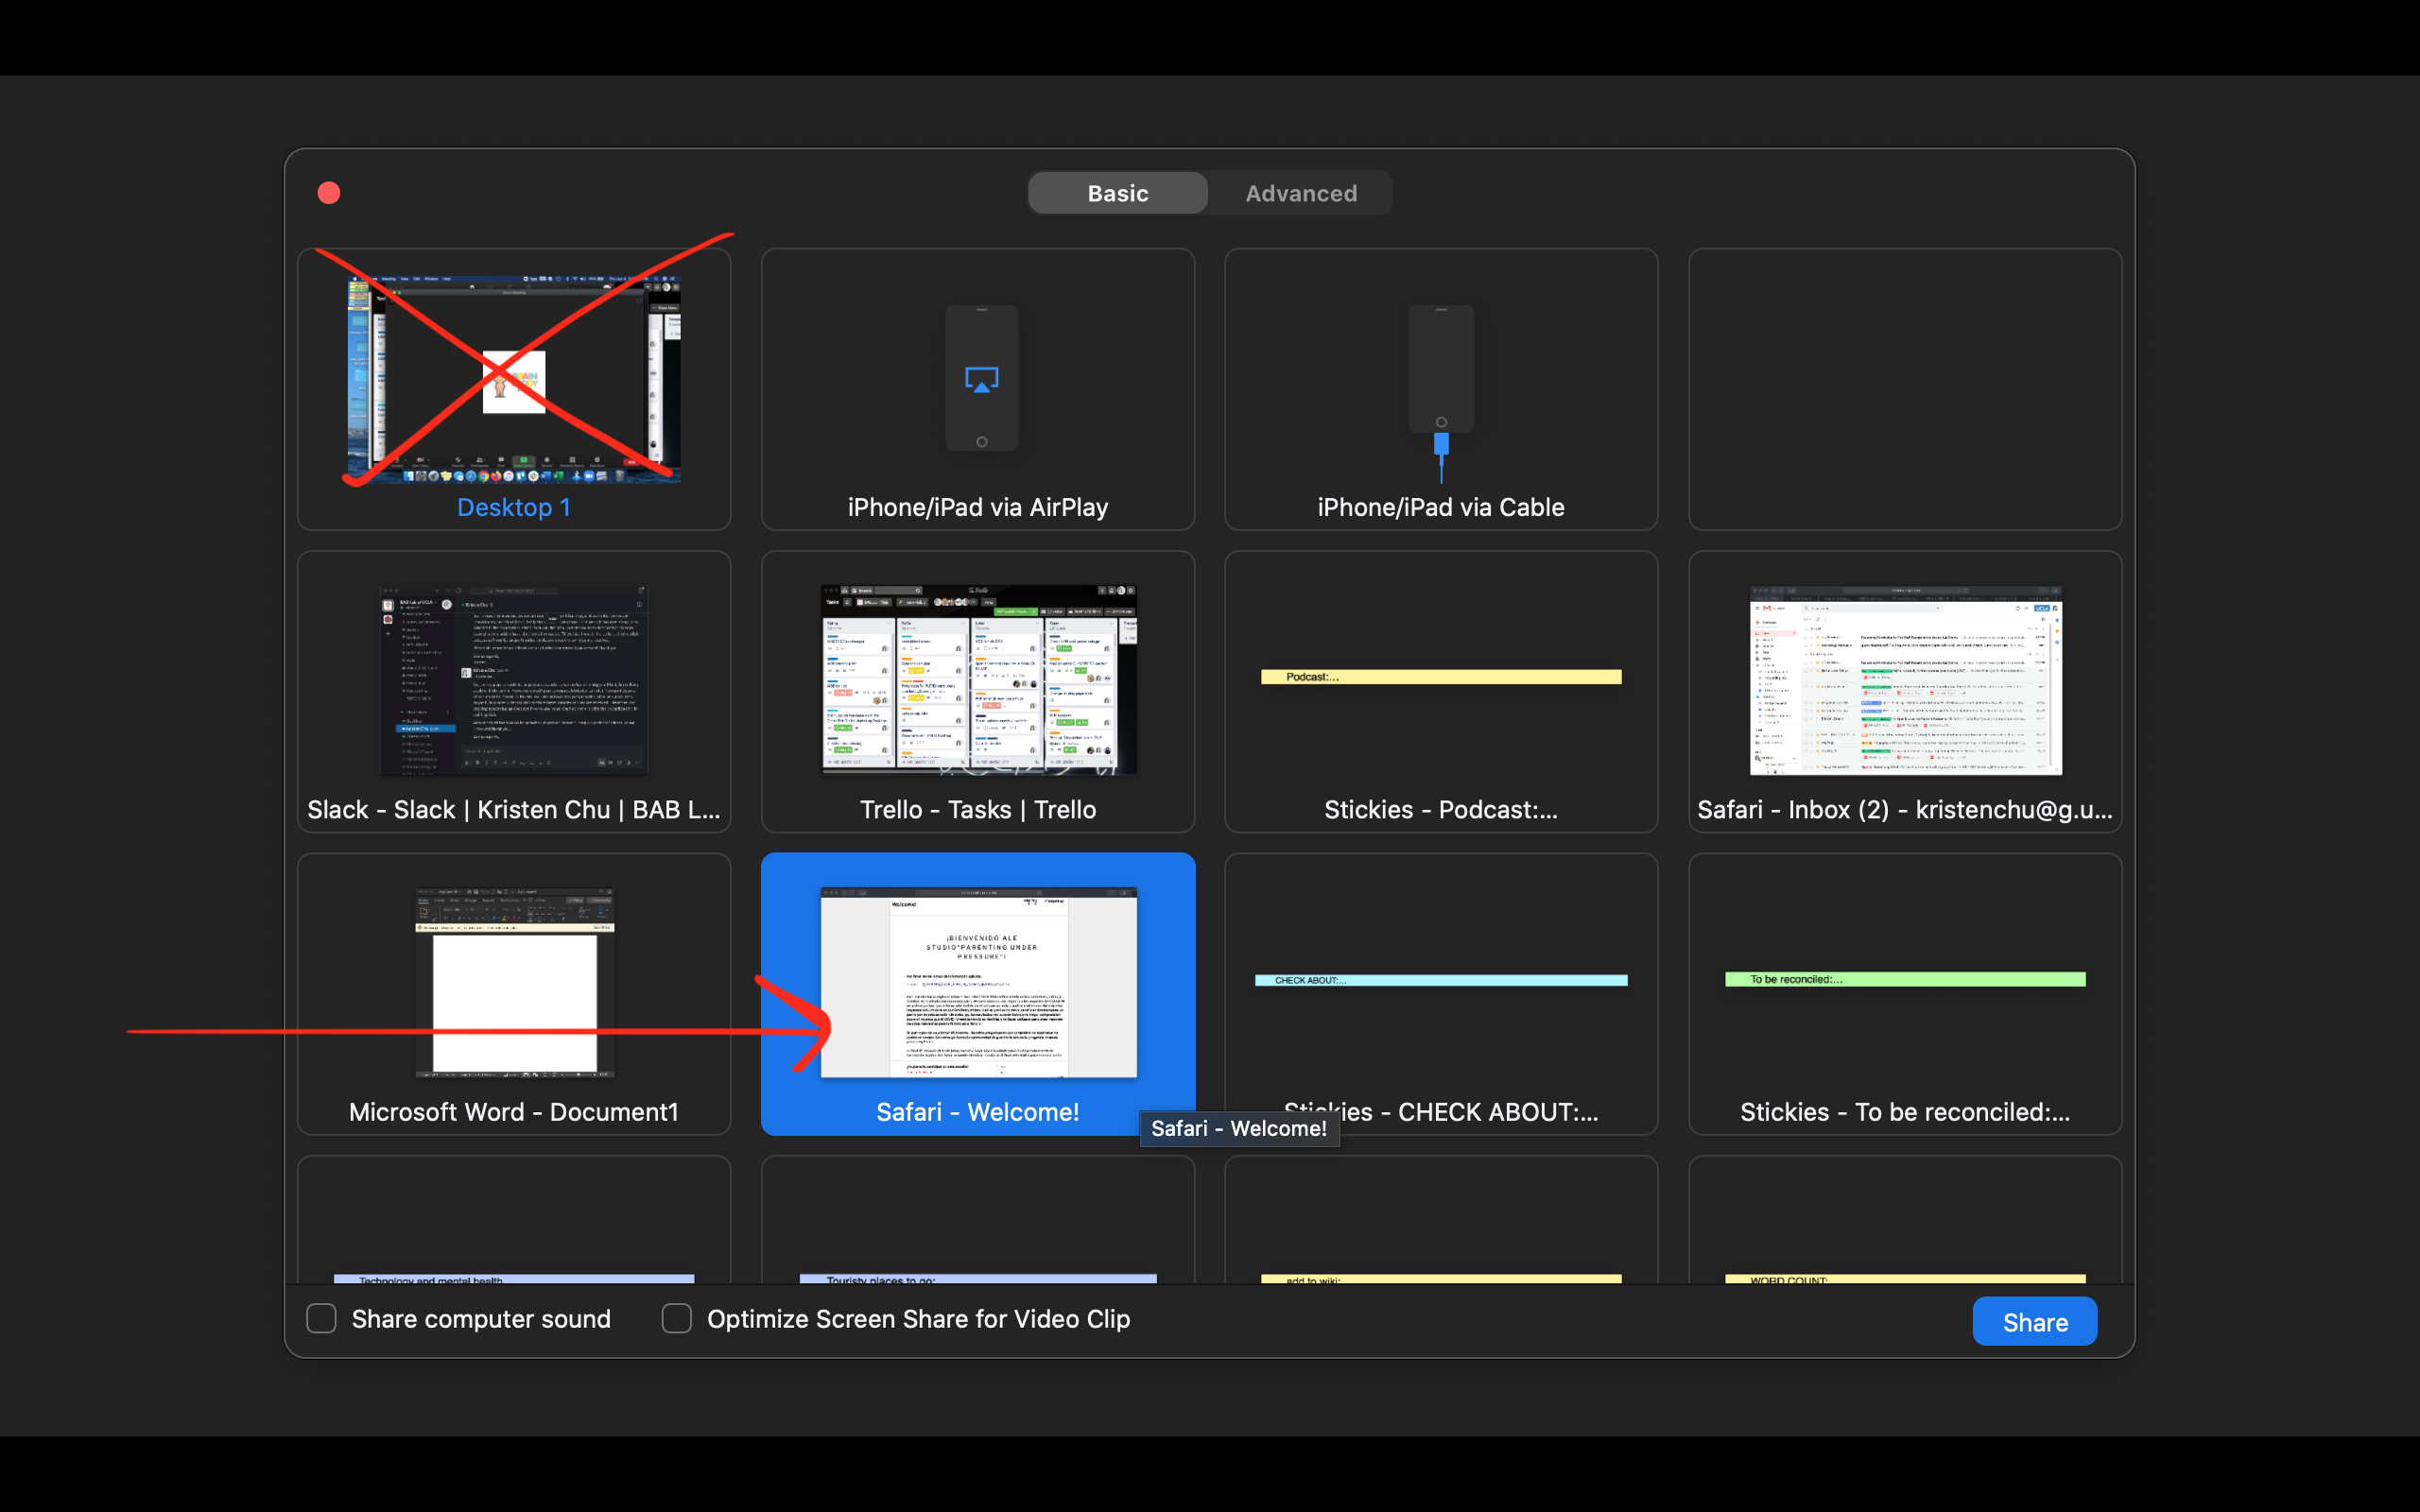
- Host-only screen-sharing
- click on the arrow next to “screen sharing” and click on “Advanced sharing options”
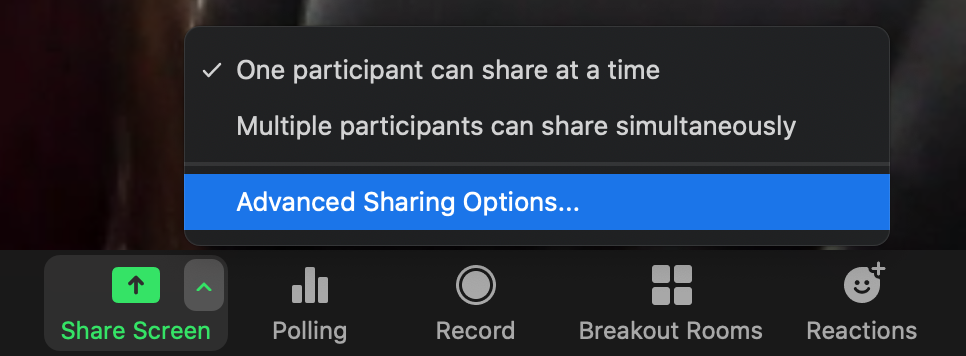
- Ensure “one participant can share at a time” and “only host” options are selected
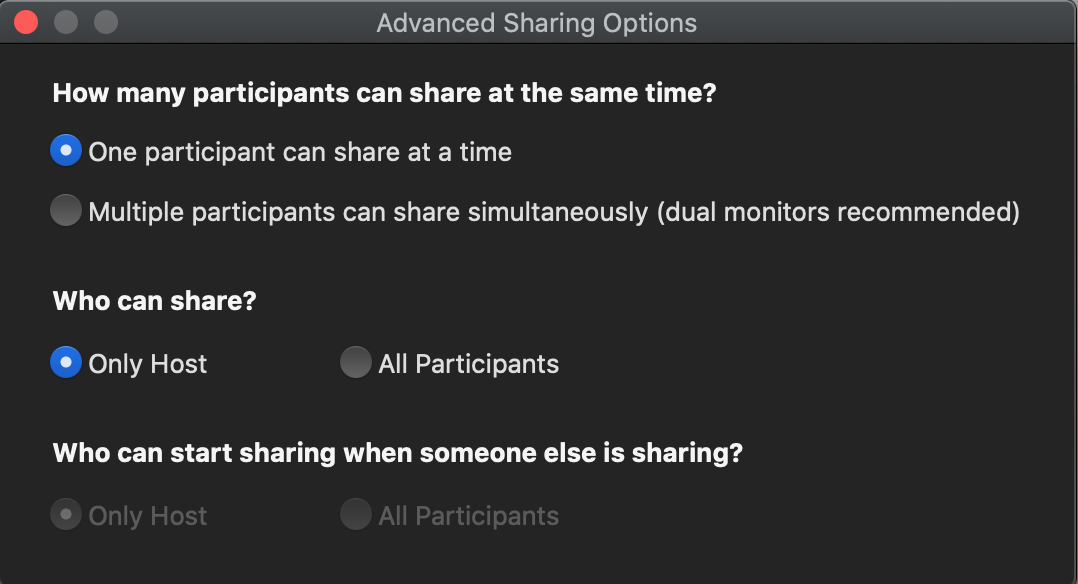
- click on the arrow next to “screen sharing” and click on “Advanced sharing options”
*Note that #1 and #4 are the default settings (so those don’t have to be changed).


W1-O Protocols - Session 1
W1-O Protocol - Welcome & Zoom Introduction
[ONCE ZOOM IS CONNECTED]
Hi! Thank you so much for joining us today! We are so looking forward to today’s session with you. Usually, when we conduct a study such as this, we would do it our lab at UCLA. However, with COVID-19 we’ve decided it would be safer to carry out this study online for the time being- social distancing and all!
Our session today should take around 2 hours long. In addition to what we do here today, there will be a follow up zoom appointment with us one week from now. At that appointment, we will reconnect on a second Zoom call in which your child will log on for 15 minutes and complete a computer game.
So first, I’ll just ask- have you ever used Zoom before?
[If yes, say] Great! So you are probably familiar with the different functions here, but I will just give you a little refresher on some buttons we will need for today. The most important thing you need to be aware of is the “chat” button below. If you click on it, a chat box should open- I will be using this throughuot the session to send you imporant links. You may already know this, but you can also display your camera so that it is in gallery view or speaker view in the top right corner. I think it might be best for you to do speaker view so it will feel more like we are in the room together!
[If no, say] No problem! Welcome to Zoom- it is very easy to use! The most important thing you need to be aware of is the “chat” button below. If you click on it, a chat box should open- I will be using this throughuot the session to send you imporant links. You can also display your camera so that it is in gallery view or speaker view in the top right corner. I think it might be best for you to do speaker view so it will feel more like we are in the room together!
[Troubleshooting…]
Great! If for any reason, we lose each other over Zoom, the connection seems to be bad, or one of us freezes, lets leave the session and try to reconnect on the same link again. If I am frozen- feel free to leave and come back. If you leave and I don;t see you come back, I will try to give you a phone call!
How does that sound? Do you have any questions?
[If no, say] Great! Lets switch gears and talk a little bit about what we are going to do today. Let me just pull up a little presentation we have got!
[Researcher to open up the MBB_Consent_Script_Presentation]
W1-O Protocol - Consent & Assent Online
Before we begin, I just wanted to let you know that in this study, we ask a lot of questions about family life and tough things that might have happened to kids. We are going to ask these questions to you and we ask a couple to your children as well, we just want to let you know that it is in our protocol to make sure everyone is safe, so if you or your child reveals to us that you’re at current risk of harm or if you’re at risk of harming someone else, then we will follow up with you and make sure everything is okay. If it is not, then we will take some steps to make sure that we keep everyone safe.
First thing we are going to do is go over what is on the consent and assent forms. (These are the attached documents we sent you in the emails leading up to this session.) We will walk through, in a little bit more detail, all of the things we will be doing during today’s session.
During today’s online session we are going to be doing some interactive things. First, we are going to have you and your parent sit and talk about some not so fun things and some fun things while on ZOOM. This conversation will be recorded but we will not be watching or listening in
Next, we are going to have you play a game on the computer. In this game, you will be looking at pictures. Some of the pictures will be a bit scary, some sad, others a bit boring. While you are playing this game, your parent will stay with you in the room but will be working on some surveys to fill out.
After the game is over, your parent [NAME] will help measure your height, weight, and waist circumference.
You will also be answering some surveys (for children) with the researcher OR (for teens) on your own.
Lastly for today, your parent will help take two biological samples during this session.
- One is the hair sample which helps measure hormones that everyone has in their hair
- Two is the split sample which helps tell us learn a little bit more about your microbiome
- Do you know what a microbiome is?
- A microbiome is all the little bacteria that live inside your mouth. Everyone has these, they are healthy! We just want to know what kind and how many of each there are.
For helping us out in today’s session, you will be getting $45 for the work you put in! After this online session is over, we’ll ask you to do three more things in the second session:
- One is the Child poop sample – this helps us learn a bit more about your microbiome
- There are also little bacteria that live in your tummy! Everyone has these and we want to know more about them.
- Two is filling out the stool scale – this is a short scale that gives a description of your sample
- Three is the computer memory game – this is when you will log back on with us via ZOOM in a week’s time to see what you remember from today’s session
Great! Do you have any questions for us about any of the samples
When you complete the poop sample and the computer game as apart of Session 2, we will pay you another $20!
We will send the full payment of $65 ($45 for today’s session and $20 for completing the Session 2) as soon as we receive the samples back through the mail.
Here are some things to keep in mind:
You are a volunteer in this study, which means you do not have to do anything, or say anything, that makes you uncomfortable. We would like you to try everything you can, and to do your best, but if there are things you absolutely do not want to do, just tells us, that is o.k.
Another thing we want to remind you is that nothing you do today is a TEST!! We want you to try your best, but there is no “right” or “wrong” answers in anything you do today. We just want to learn about you!
We will keep your participation confidential. You are given an ID number in order to keep your data confidential and separated from your name. Therefore, any identifying information (like your name, email, address, etc.) will be kept private and not paired with your data. We will also use a secondary ID number to save the videos with (since your faces are in it), which will help separate this from your name and the other data we collect form you. Only members of our research team will have access to your name and ID numbers.
I will rename your “ZOOM Name” right now with your Secondary ID number, to prepare for the recordings we will take in our session today
[Researcher will rename the participant’s name to “P” for participant. 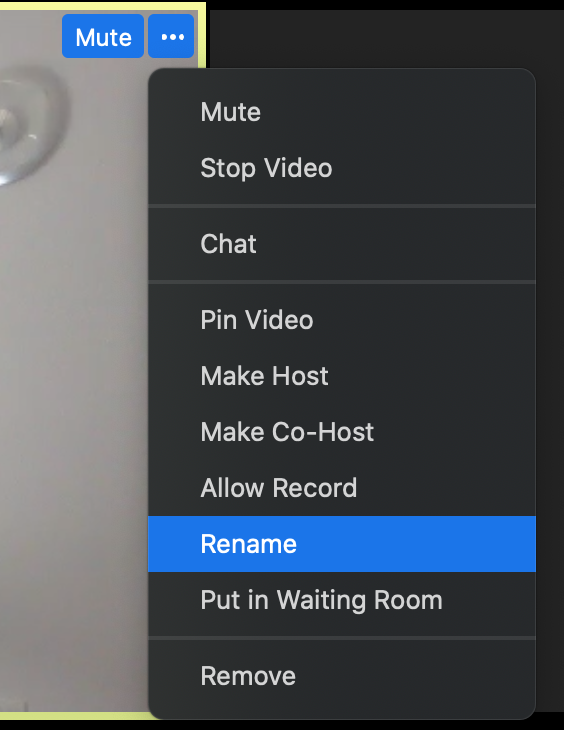
Ok- I will now send you a link through the Zoom chat, which will open up a survey that allows you to virtually indicate your consent to participate in the study. Please feel free to take your time reading through the consent and assent forms now if you’d like. As I mentioned earlier, these are the documents we had previously sent you in the emails leading up to today’s session.
[Then once they are done reading through]
All set and any questions?
[IF NO,] Please click to indicate yours and your child’s consent/assent and verbally let us know each of the items you have consented/not consented for, so we can adjust the session in case there is something you/your child may not feel up for today!
You may press submit once you are finished to “send in the form.”
Researcher to grab magic box.
Once you are all set with that, we’d like you for to grab the magic box we sent you in the mail. This contains everything you will need for today’s session and what you will do as apart of Session 2 as well.
If you haven’t already done so, please open the magic box up. The magic box should contain a sheet of paper at the top which details all of the contents, but we will let you know when you need to take each item out of the box. Please set aside the magic box for now but keep the materials near you as we may need to access materials from the magic box throughout today’s session!
What you can pull out now and use throughout the session is the Reward Board and Gold Star Stickers. Use this reward board to track all the steps you accomplish today! Each space is like each task for the session. Once you complete the task you can put a gold star on the space!
Are you ready to get started on the session? Great, lets dive in!
W1-O Protocol - Parent Child Observation Online
The parent and child will be seated together in view on the Zoom camera. During that time they will be filmed while solving a conflict, and then again while discussing a pleasant event. The conflict event will always go first, followed by the pleasant event. We did this to ensure that the parents were not thinking of the negative interaction upon answering the questionnaires about their child, which they did immediately after the observation interaction.
[RESEARCHER SHOULD ASSESS VOLUME. If participant volume is too low, recording will not pick it up. Ensure that volume is at an appropriate frequency before proceeding to PC interaction recordings.]
[RESEARCHER SHOULD CHANGE TO SPEAKER VIEW. Participants should be in speaker view so recording will enlarge the parent and child for behavior analysis.]
Step 1: The researcher will ask the parent to find the Pleasant/Unpleasant Events Checklist piece of paper from their session package.
Researcher: So the first thing we will have you pull out of the magic box is the paper packet titled “Session 1 Booklet.” You can flip to the page that says “Issues Checklist.”
Researcher will wait for the participant to find the Online Session Booklet and flip to the correct page.
Researcher: Next we are going to take some film of you while you discuss something that’s hard and try to resolve it. On this piece of paper (Issues Checklist) is a list of things that parents and children sometimes have disagreements about. We will give you a moment to read the list and think about some that you would like to discuss together. Then after about one minute, you will start discussing the things you have selected and try to resolve them. You do not need to tell us what you chose to discuss, and it does not matter if you chose something from this list, or decide to choose something else. Please choose something you can try to resolve not an emotionally charged topic that would be difficult to discuss together right now. And we want you to remember- this is not a test and there are no right or wrong things to say!
I am going to turn off my camera and mute myself to be out of the recording, and I will also turn my volume on low and will not be listening in closely. I will come back in and let you know when the six minutes are all done! If possible, make sure any other children are not in the room. As a reminder please make sure you are both visible on the screen and that you speak loud enough for the microphone to register it.
When you are ready, I will begin the recording and give you a total of 6 minutes- one minute or so to choose, then five mimnutes to discuss! Are you ready?
Step 2:
- Researcher will ensure Zoom security settings are set up for the video.
- Parent and child will be situated side-by-side in view on the Zoom camera.
-Researcher will press record on the Zoom application. 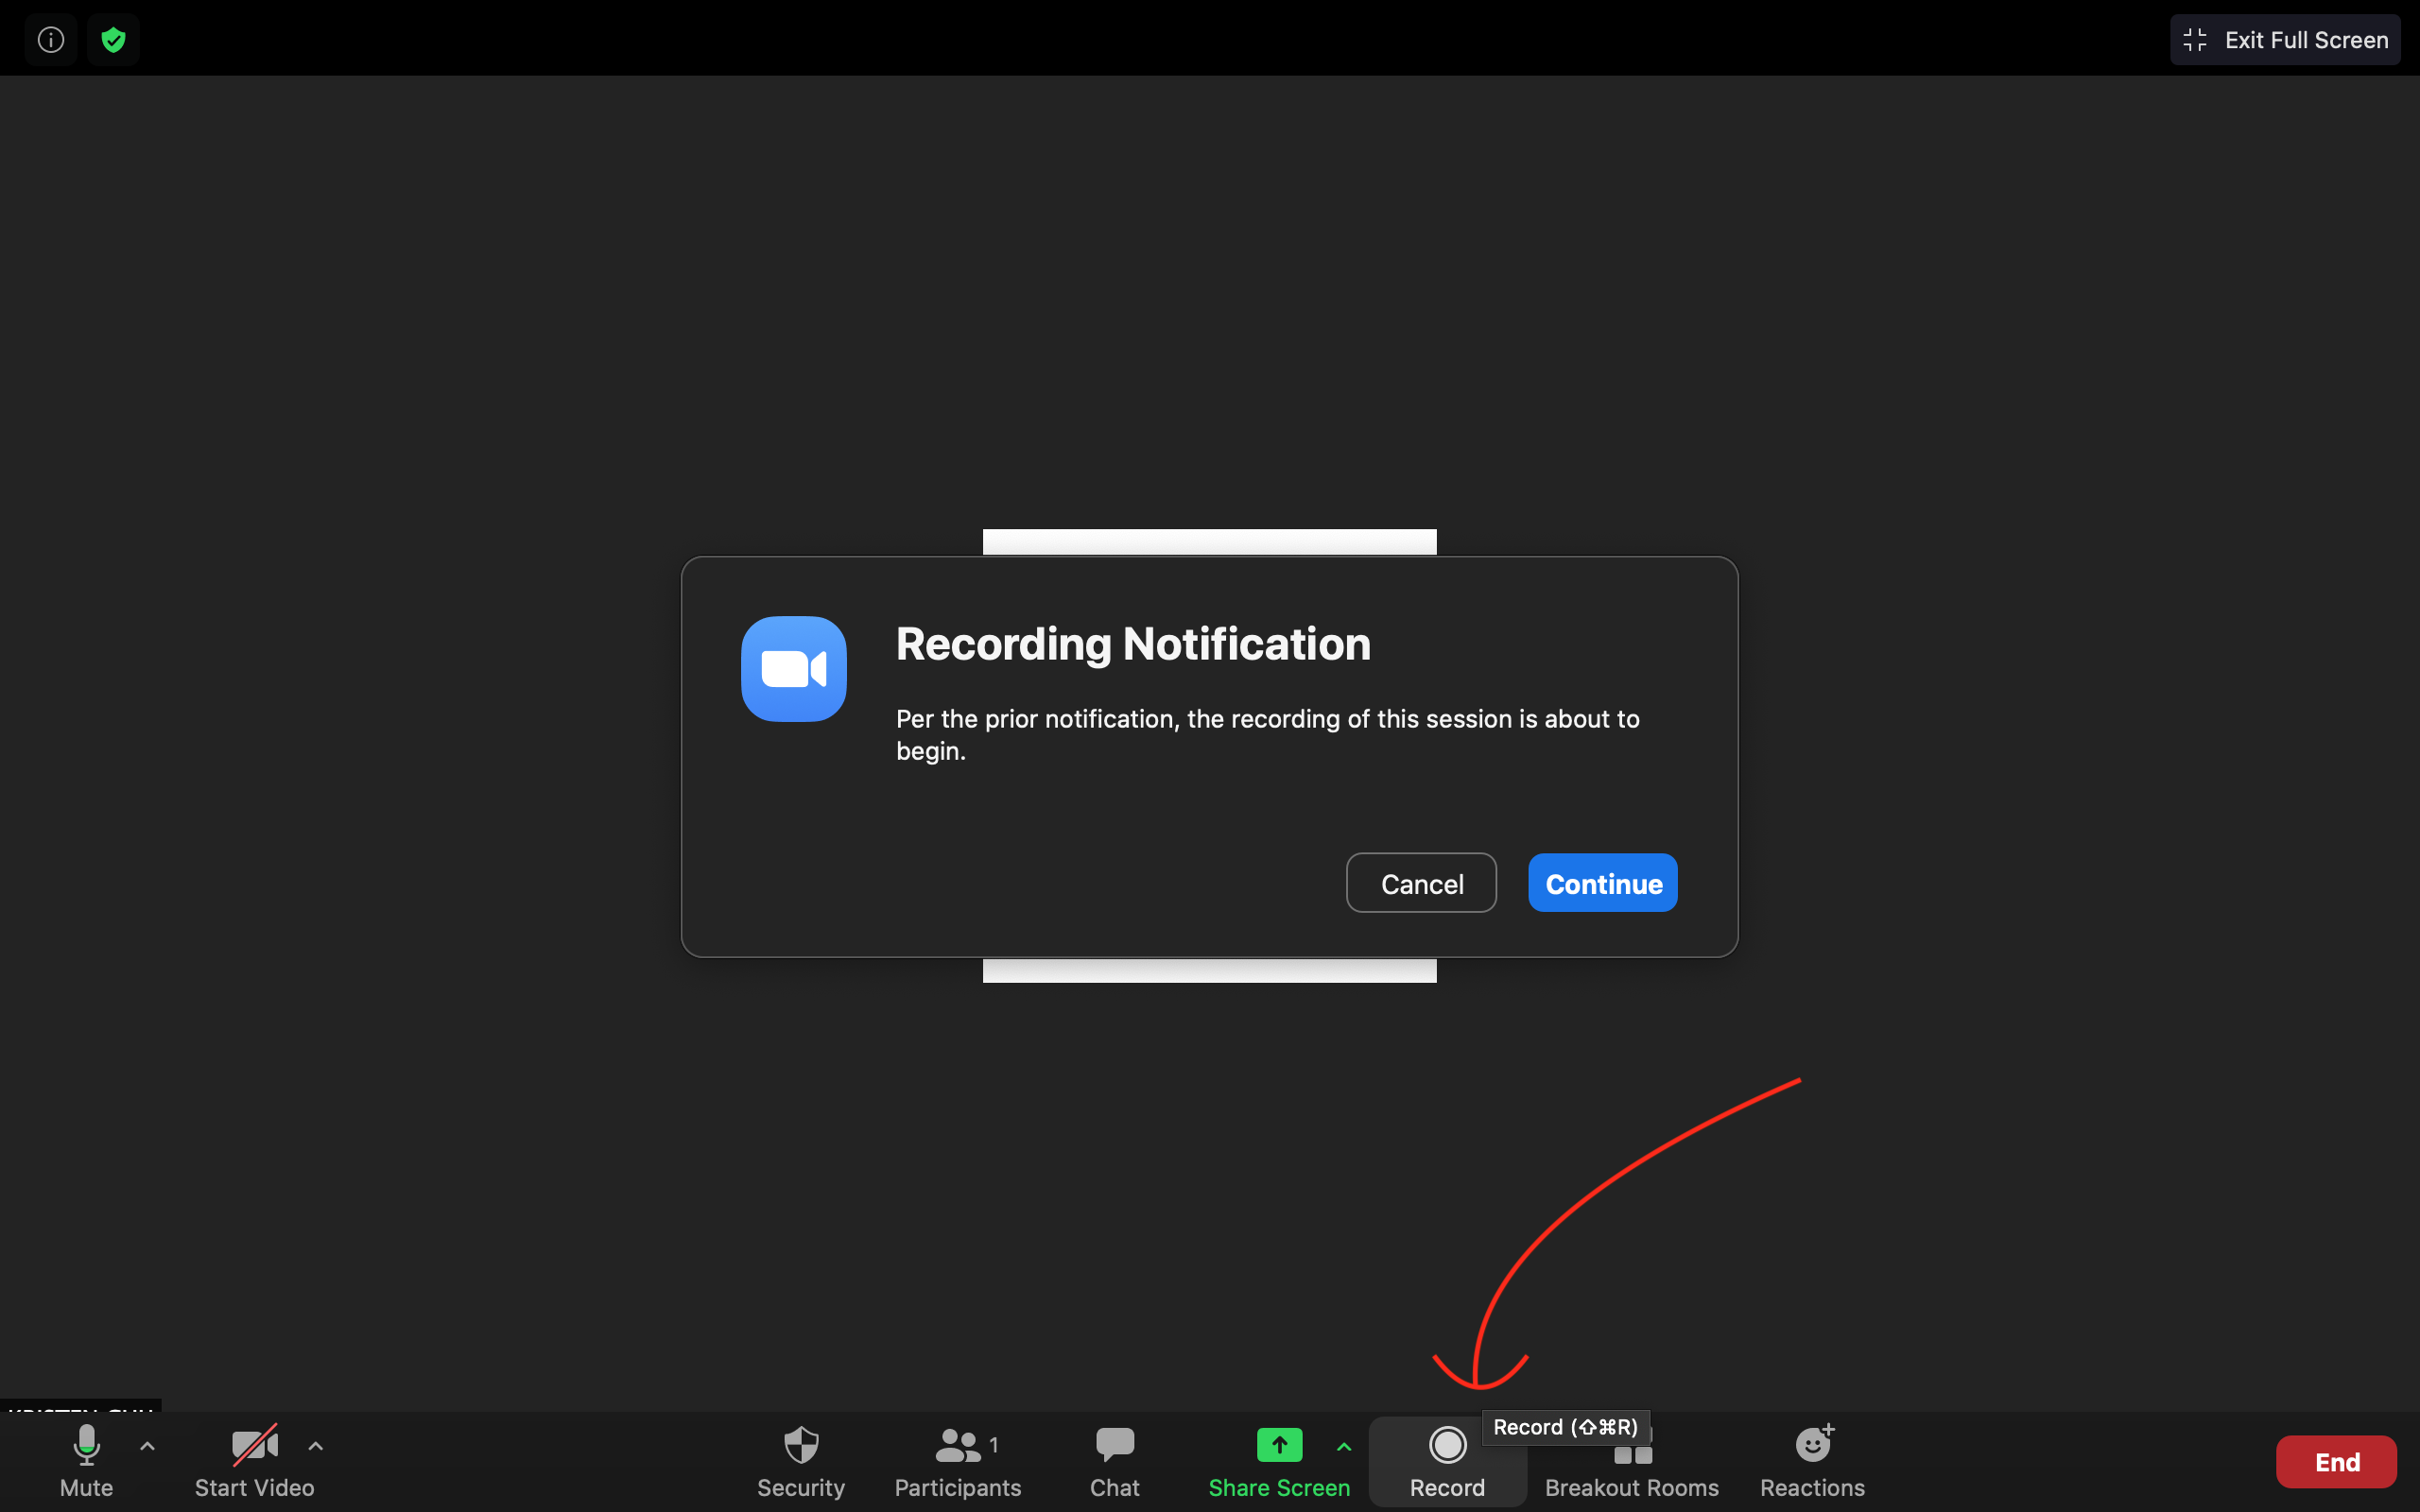 Wait to hear the audio Zoom confirmation “this meeting is now being recorded” and view recording in progress at top left of screen to ensure recording is live.
 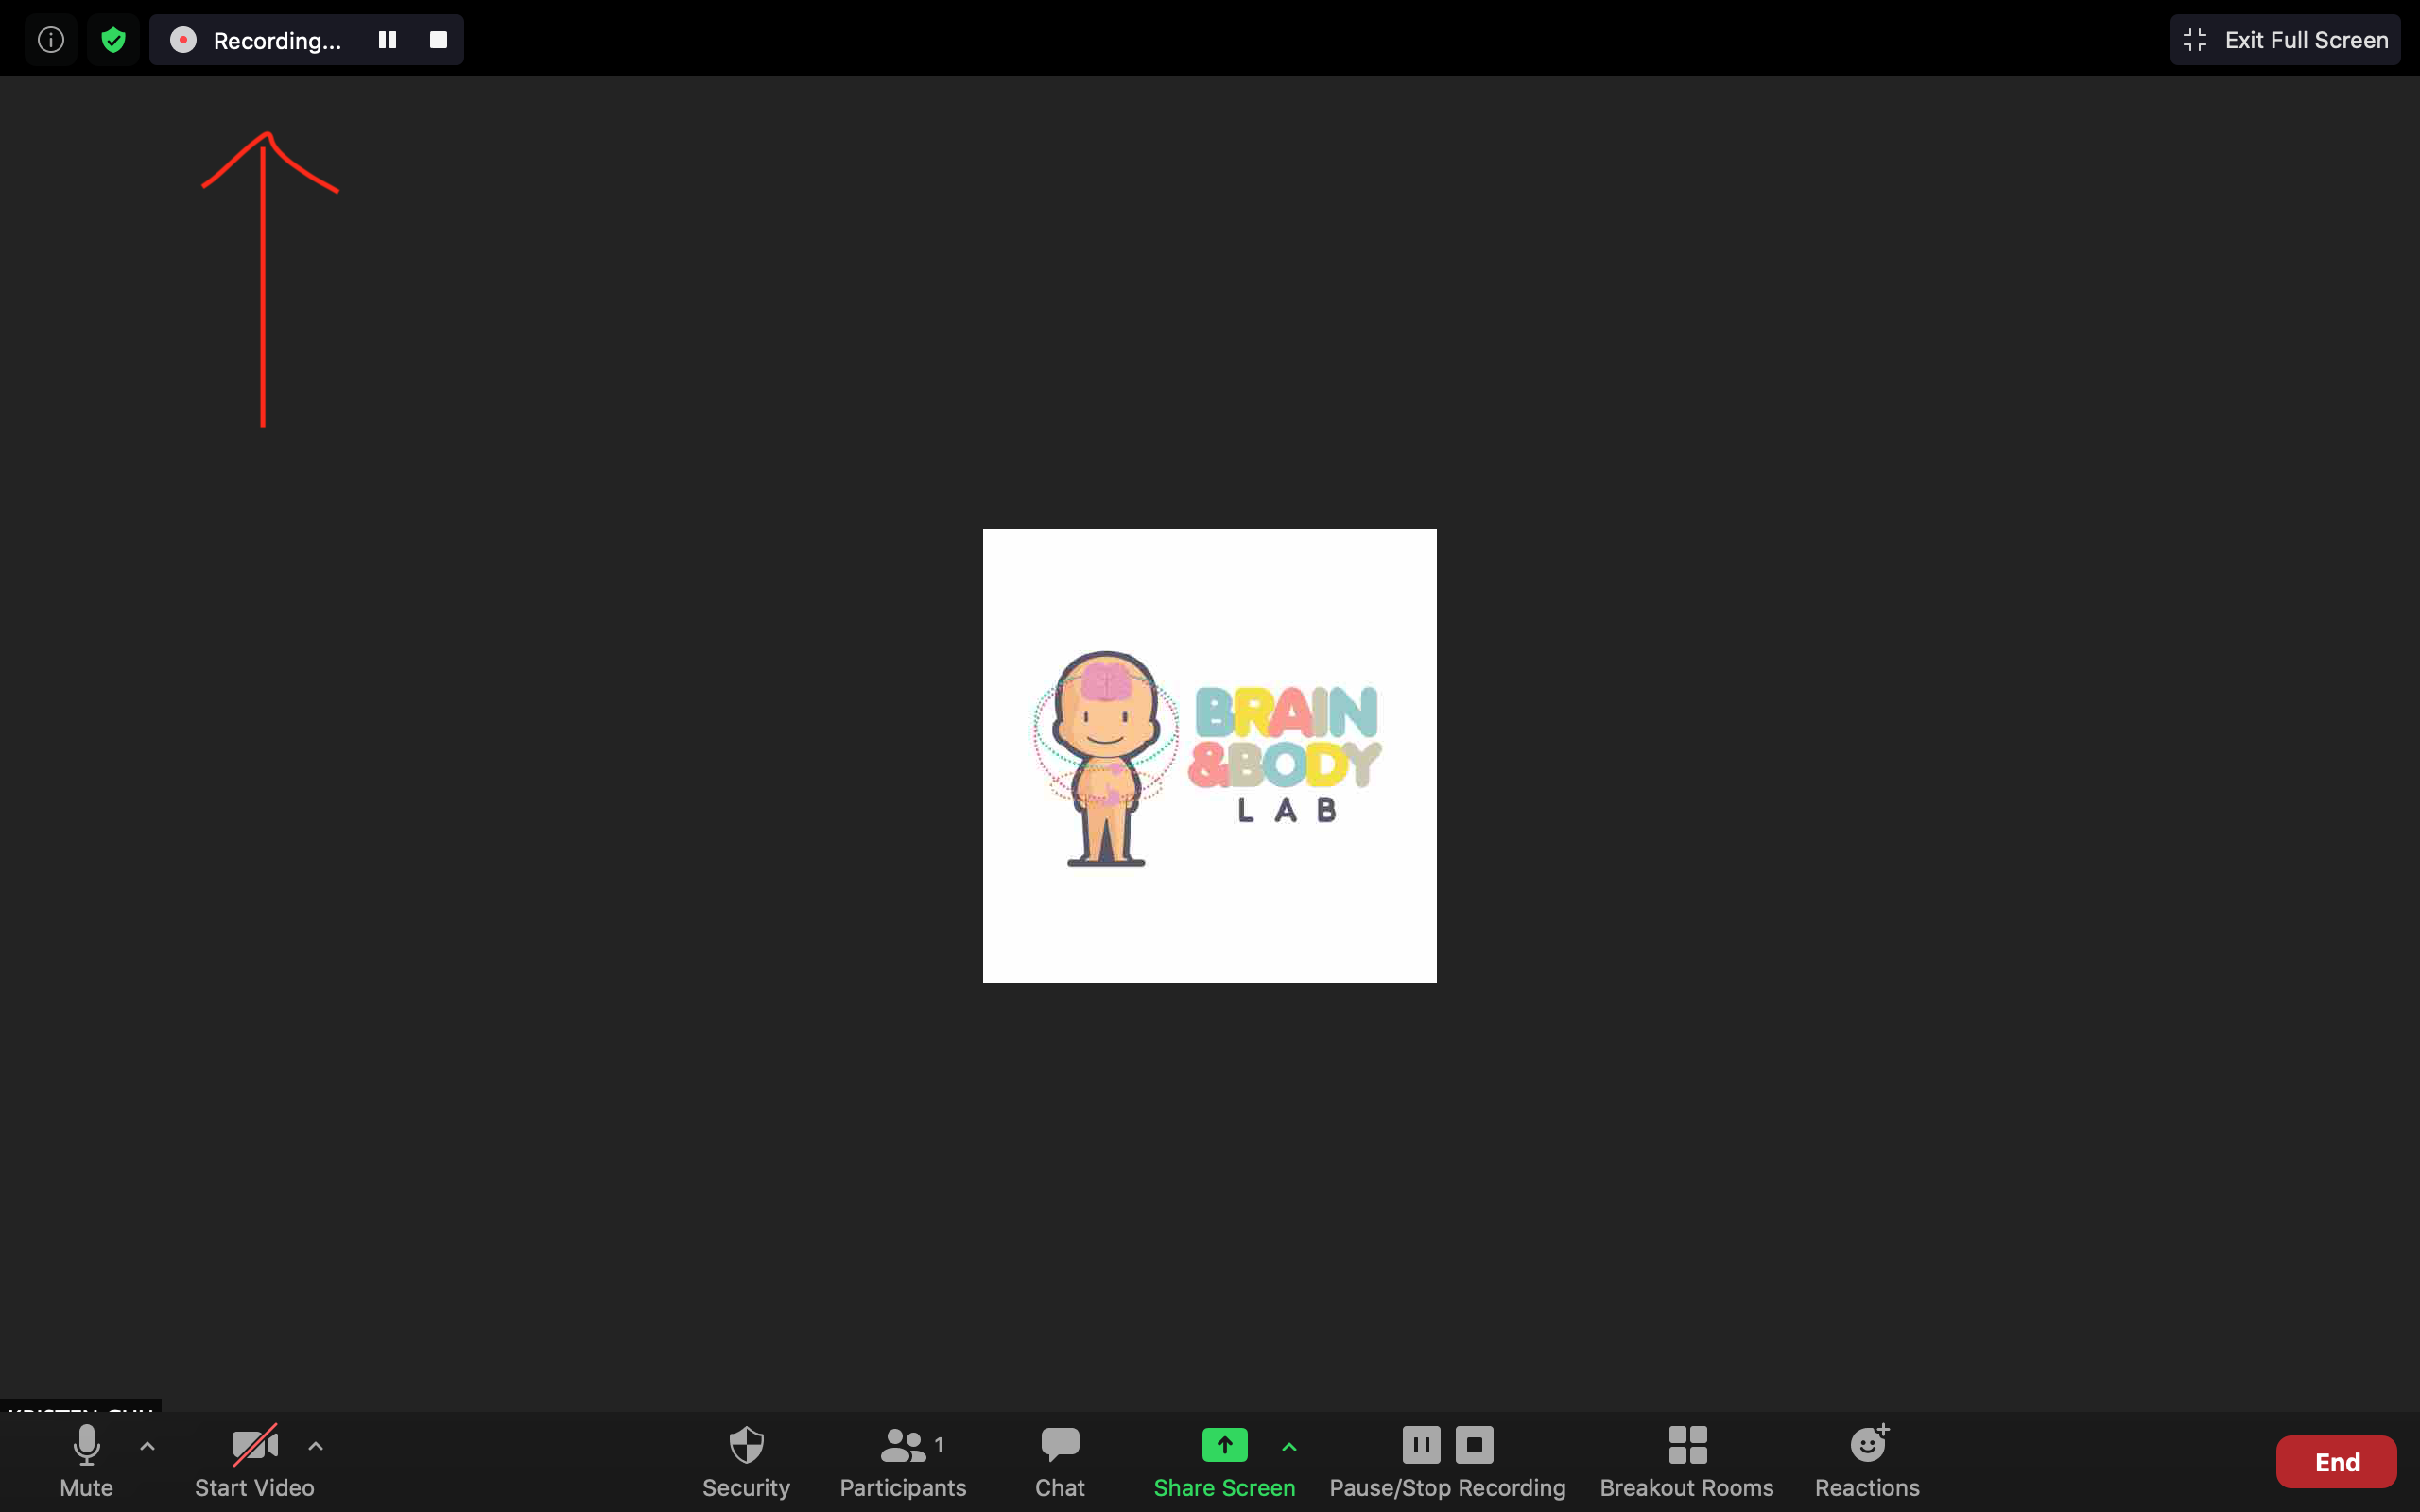 - Researcher set timer for 6 minute1
Step 3: - Researcher will mute themselves on Zoom and turn off their camera, and step out of the room. - Researcher will start timer for 6 minutes. At the end of 6 minutes, reenter camera view and unmute themselves.
[After 5 minutes have passed, say] Thank you for taking the time to discuss something difficult. Next we are going to take some film of you talking about something nice. You can now flip to the page that says “Pleasant Events Checklist”. On your “Pleasant Events Checklist” is a list of fun things that parents and children sometimes do together. I will give you a moment to read the list and pick something that you would like to plan to do together. Then after about one minute, you will start discussing the things you have selected and try to plan them. Again, you do not need to tell us what you chose to discuss, and it does not matter if you choose something from this list, or decide to choose something else. When you are ready, I will start the recording and then give you a minute to choose and five minutes to discuss!
I will be give you six minutes in total, one minute to choose and 5 minutes to discuss- remember, try to plan whatever fun thing you talk about during those five minutes. After, I will come back into the video call and give you further instructions. Do you have any questions?
If no questions, proceed.
Step 5: - Researcher will start timer for 6 minutes.
Step 6:
- After six minutes, researcher reenters the room and back into camera view, turns up volume on the computer, and stops the recording on Zoom. 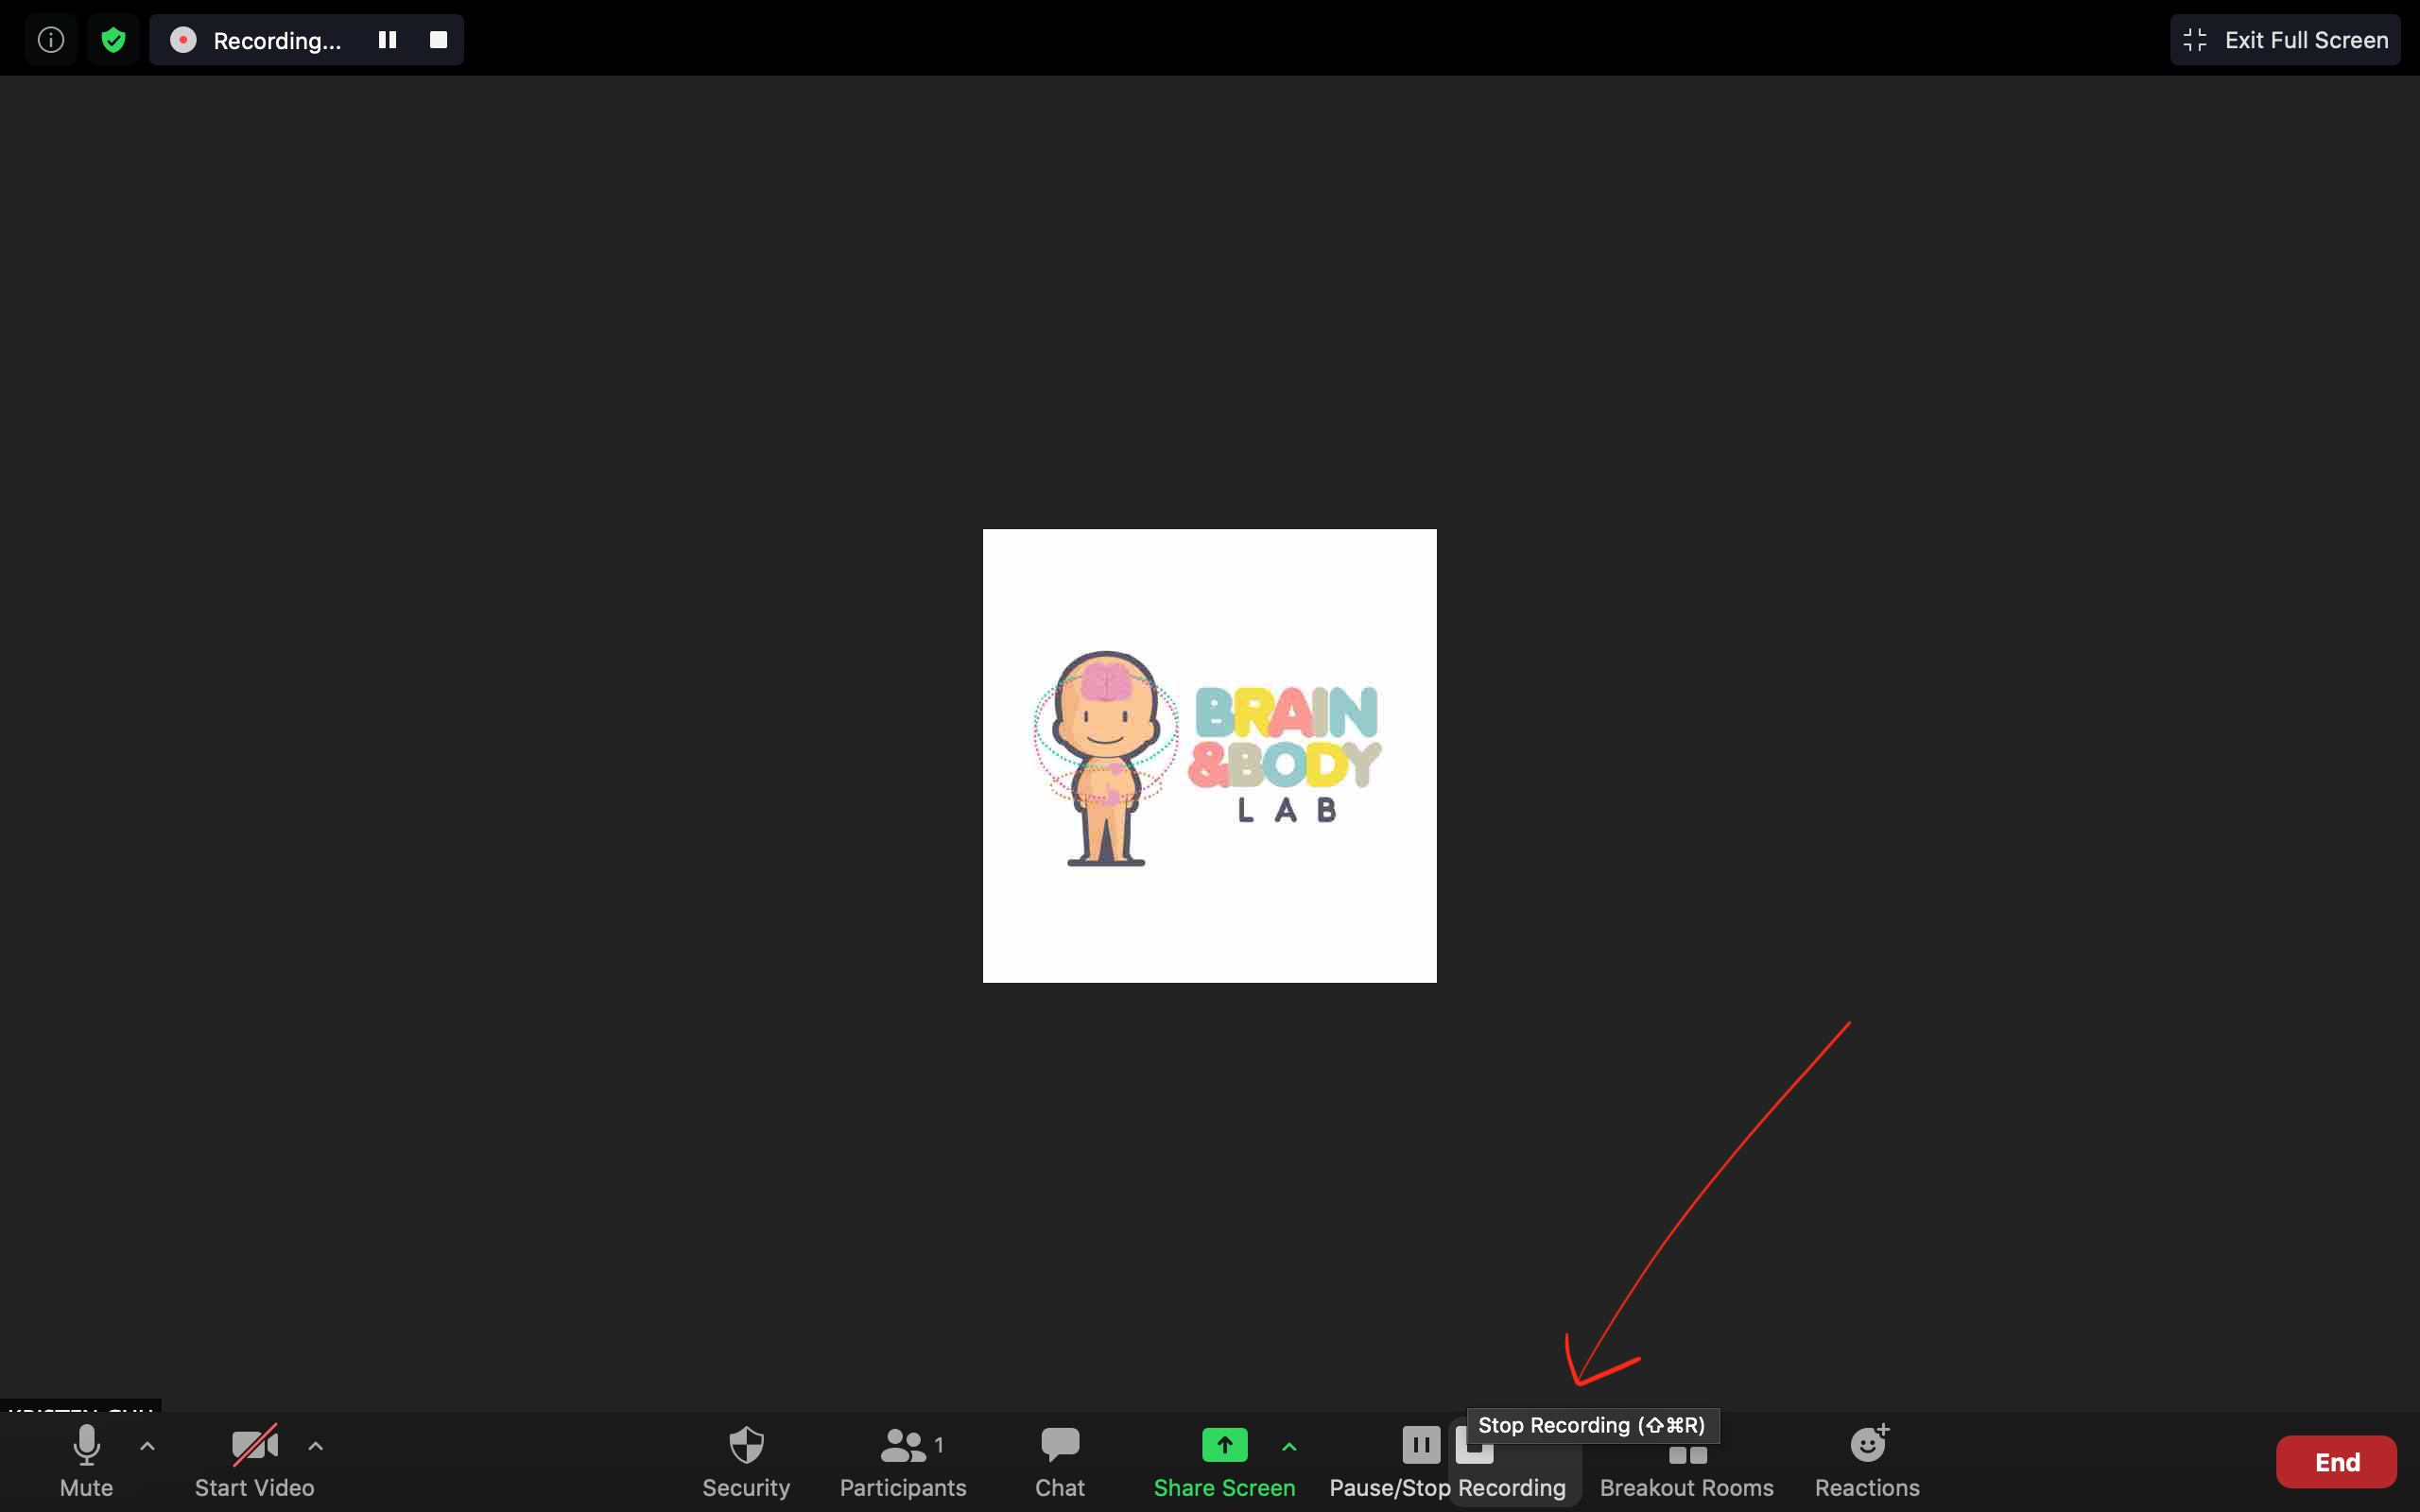 You will view this notification in the upper right hand corner that states the recorded file will be converted to mp4 once the meeting ends.
 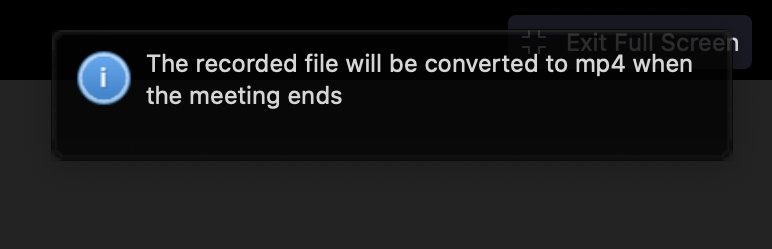 Move the child/adolescent and parent onto the next task in the session, as the video will not be saved until after the session is complete.
Please visit “Post-Online Session Protocols to view instructions on how to save the video recording.
W1-O Protocol - Halloween Training/Parent Questionnaires
Now we are done with the group activity. You can go ahead and take out your token board and gold star stickers, and stick one golden star on the first block, where the movie icon is!
Next we will move on to some individual activities, where Mom/Dad will complete some surveys while you [Child’s name] plays a computer game. The computer game is about your child’s learning and memory so it is important they dont get help from you! We actually prefer you don’t watch the screen so you dont know which pictures they see. If you recall the example from our powerpoint at the beginning of this session, this will be the time that your child will see some pictures on the screen
I will now just give [Child’s name] some instructions on the computer game. Let me share my screen so I can show you some examples!
[Researcher to open up the halloween_training]
Ok, [Child’s name]- so in this computer game, you are going to go on a trick-or-treating adventure! First, you will be shown instructions that look just like this! The places you will be visiting are houses that either have a toy or a candy. Your job is to do their best to remember what toy or candy is with what house.
Here are some examples of what you might see
Sometimes you will get a toy while other times you will get a candy, and sometimes you will be visiting a nice house while other times you will be visiting a scary one. Remember that the type of toy or candy will vary and where it is found will differ. You will only be shown the photos for a few seconds, so do your best to memorize these details as quickly and as much as possible!
We also want to make sure you are paying attention, so when you see this red triangle, we want you to hit the space bar!
You will be reaching a halfway point where you can just click “continue”
There are TWO PARTS to this game- we are only going to be doing PART 1 right now. So, it is super important that when you see the page that says you’re finished with this part, PLEASE LET ME KNOW!!
[Researcher to stop sharing screen.]
So to get your child setup for the computer game, we will send you a link through the Zoom chat now. Let me know once the link has loaded.
[Researcher to send Gorilla task link through the chat, then wait for them to pull it up.]
If necessary - the link can be found here.
[Then, confirm they are on the right page] You should be seeing a login screen that asks you to enter your primary participant ID screen.
While your child is doing the game, you can get started on some parent surveys. So now I will ask you to reach into your Session Package and pull out the booklet titled “Parent Survey Booklet” and a pencil to fill these out.
We ask that you please fill the surveys out in the order that they are presented so parent proxy first then the parent self surveys. Some of these surveys are about your child and some of these surveys are about you. The game will take around 5-10 minutes and I will notify you when we are finished. You can go ahead and work on the surveys now and your child can start the game.
Ok! If you are both ready to start, we will just have Mom/Dad click “Log in” on [Child’s name]’s page, and you can both get started!
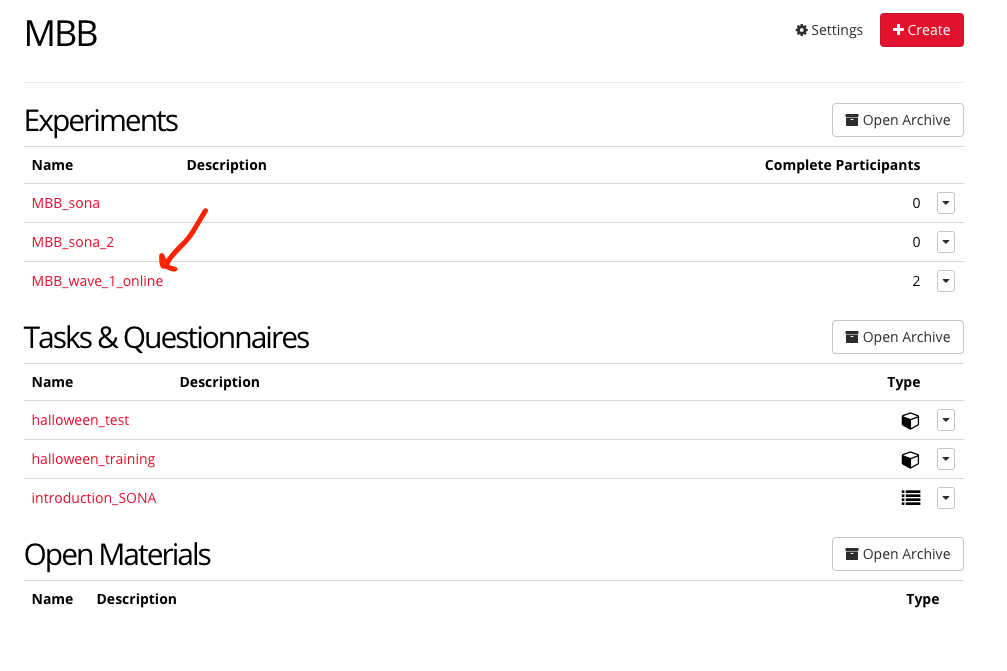
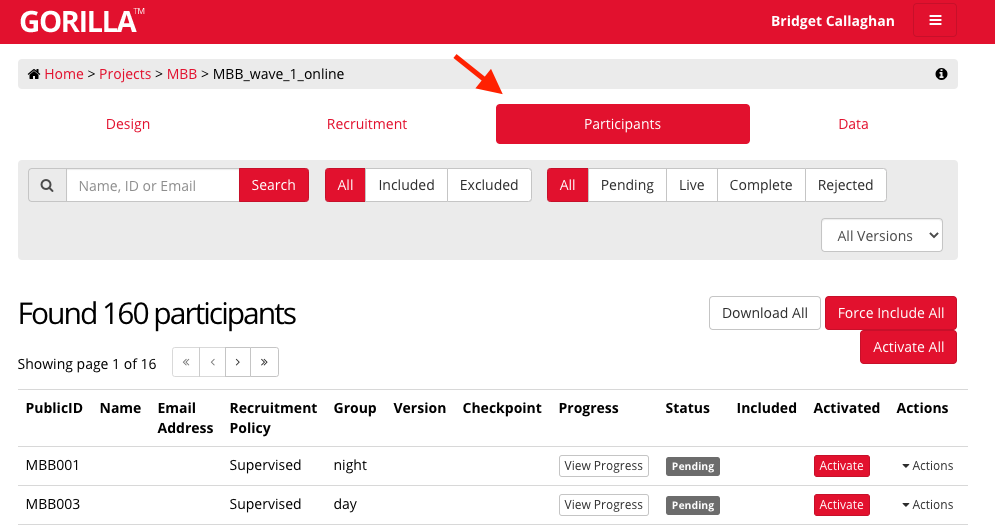
[Researcher to open gorilla to track participant progress. Click on my projects>MBB>MBB_wave_1_online>participants tab>scroll to their mbb number and click “view progress”]
[RESEARCHER TO TAKE NOTES: PARENT BEHAVIOR DURING THE HALLOWEEN TRAINING]
[If participants do not seem to check-in with researcher after ~15 minutes, ask if they have any questions] Hi, just wanted to check-in and see if everything was going alright. Do you have any questions?
[Once you confirm on the “view progress” node that Halloween training is complete, say] Great job! We have completed the second part of this session- you can go ahead and take out your token board and gold star stickers, and put another star on the second block!
W1-O Protocol - Height Online
Ok, for the next part of this session, we will have you (parent) pause on your surveys so you can help take some measurements from your child (height, weight, and waist). I will ask you to reach into your Magic Box and pull out the “Session Booklet”, a pencil, and the paper measuring tape.
[Wait for participant to retrieve session booklet, pencil, and paper measuring tape]
This booklet contains all the instructions for our measurements and sample collections during today’s session, which you can use for reference if you’d like. I will also walk you through each measurement and collection!
We will start with Height! Feel free to grab your paper measuring tape and measure your child’s height in inches.
[Researcher to note child’s height on the session checklist google form.]
Awesome job! We have completed the next part of this session- you can go ahead and take out your token board and gold star stickers, and put another star on the next block!
- Researcher will be walking the parent through how to measure their child’s height via Zoom video call. Ask parent if they have a full length measurement tape. If not, we will proceed with the paper measurement tape.
- Ask parent to place child/adolescent directly against wall/frame
- Advise child/adolescent to stand up straight
- Have parent ensure heels of child/adolescent are up against the wall/frame
- Use a flat object (booklet, ruler, sheet of paper, etc.) to accurately mark the height on the wall/frame
- Use the paper measuring tape to scale up the wall and measure the height marking
- Record height on Online Session Checklist
W1-O Protocol - Weight Online
Next, we will do weight! Do you have a weight scale?
[If yes, say] Please go and weigh your child, and return to the screen so we may record the number. You do not have to bring the scale to the camera! [Researcher to note child’s weight on the session checklist google form.]
[If no, say] Can you please record an estimate of your child’s weight? [Researcher to note child’s weight and check “approximated” on the session checklist google form.]
[Child’s name] you can go ahead and put another star on your token board!
- Instruct parent to have child/adolescent to step on weight scale
- Measure weight
- Record weight on Online Session Checklist
- Specify on Online Session Checklist if weight was estimated or not
W1-O Protocol - Waist Measurement Online
Next, we will do the Waist measurement! You can go ahead and grab that paper measuring tape once again, and measure your child’s waist at the belly button. You can do this over their t-shirt.
[Researcher to note child’s waist on the session checklist google form.]
Great! [Child’s name]- you can stick another star on your token board! Look- we are about halfway there!
- Advise parent to hold tape measure at the child/adolescent’s belly button and bring it around their waist, over their t-shirt
- Make sure measuring tape is horizontal around the waist and even in the front and back
- Keep the tape snug around the waist, but not compressing the skin
- Have participant breathe in
- Measure the participant’s waist just after they breathe out
- Record waist measurement on Online Session Checklist
W1-O Protocol - Halloween “Test” Online
OK! It is time to go back to our learning and memory section.
[Give child instructions on Halloween Test] [Researcher to open up the halloween_test]
Ok [Child’s name]- now we want to see how much of your trick-or-treating adventure you remember. You will see an instructions page like this first!
You will first be shown a candy or a toy and will be asked if you saw that candy or toy when you went trick-or-treating. This is where your memory kicks in!
Here are some examples of what you might see.
The next set of questions show the houses that you visited and asks what candy was found there and where it was located on the screen.
Here are examples of what this looks like!
We also want you to remember that this is not a test! Just try your best!
When you finish, all you have to do is let me know!
[Researcher to stop sharing screen.]
Can you please go back to the “Gorilla” website. If you still have the browser up that’s great - please refresh the screen to continue. If not, you can go back to the same link as before and enter your MBB ID. Here you will be completing the second part of the computer game.
[Wait for child to log back on with their PRIMARY MBB ID]
If necessary - the link can be found here.
[Confirm that they are on the correct page] If you left your browser up, you should see Part 2 of the game, if you had to click on the link again, you should see the same logon screen where you can enter your MBB ID. Do not click submit just yet!
[Once confirmed, let the parent know they can resume on their parent surveys during this time] So just to reiterate, this next part is about your child’s learning and memory so it is important they dont get help from you! We prefer you don’t watch the screen so you don’t know which pictures they see. While you wait for your child to complete their task for the next 15 minutes, you can get continue on your parent surveys. Once your child is finished, we can regroup!
Ok! Now you can get started!
[RESEARCHER TO TAKE NOTES: PARENT BEHAVIOR DURING THE HALLOWEEN TEST]
[If particiapnts do not seem to check-in with researcher after ~15 minutes, ask if they have any questions] Hi, just wanted to check-in and see if everything was going alright. Do you have any questions?
[Child’s name] great job! Now that we are done with the computer game, you can go ahead and put another star on your token board!
[Once the Halloween test is complete, you may proceed to Saliva Sample Collection]
W1-O Protocol - Saliva Sample Online
Now, we will do some sample collections! The first one is the Spit Sample. As I mentioned earlier, you can flip to the instructions in your session booklet if you would like, but I will also walk you through it step-by-step! First, please grab your “spit tube” from the Magic Box. When you are ready, I will let you know what to do next!
First, we just want to check-in to make sure you haven’t had any food, water, drink, or gum in the last 30 minutes?
[If yes, say] Ok- no worries, we just have to wait that time before we can collect the spit sample. Let’s move on to the next task and come back to this later! [Researcher to make note on home session checklist and return to this item later in the session.]
[If no, proceed.]
[Researcher to walk through Spit Sample.]
- Researcher has saliva “spit tube” example for explanation to participants
- Advise parents to have child/adolescent fill spit tube to indicated line
- Do not count the bubbles at the top, ensure that the saliva reaches the line
- Close the cap on the spit tube, to release the stabilizing solution and seal the sample. Tell parent to close the cap very tightly and to shake the tube for 5 seconds
- Put the sample in the biohazard bag with the absorbant inside
- Put the biohazard bag with sample inside the rigid box and set aside for now
- Note: If participant is currently taking antibiotics do not take saliva sample until they have been off antibiotics for at least two weeks
You can throw away all of the packaging once you have finished with the spit tube. All you need to return to us is the tube inside the biohazard bag with two cotton balls, inside the white cardboard box.
We are now done with our spit collection! You can put another gold star on your token board!
W1-O Protocol - Hair Sample Online
Next up is the Hair Sample. Feel free to flip to the section on Hair Sample Collection in your session booklet, if Magic Box. When you are ready, I will walk you through it step-by-step!
Set Up Hair Sample Station
- Ask parent to gather the following materials for their “hair-sample station”:
- 1 sheet of aluminum foil (provided)
- 1 small ziplock bag with participant ID (provided)
- Painter-tape (provided)
- 1 scissor (salon grade if they have)
- 1 rat-tail comb to thin out hair (provided)
- 2 alligator clips (provided)
- Researcher set up the following materials (to help explain hair sample collection):
- 1 sheet of aluminum foil
- 1 small ziplock bag with participant ID
- 1 salon grade scissor
- 1 rattail comb
- Painter-tape
- 2 alligator curl clips
Explanation
- Refer to the instructions booklet included in the participant’s magic box, found here: hair_sample_collection_instructions
- Tell the parent that you will go over it verbally with them BEFORE they should start collecting the sample.
- Explain to both the child and parent that they will be collecting 30-50 strands of hair. The amount of hair to be collected is less hair than is lost in normal everyday-brushing from the back of the head. Show them the amount on your own head.
- Inform them how the site for the sampling is hidden by the surrounding hair, therefore not visible after collection.
- Explain how the sample is used to measure a hormone called cortisol that is present in the hair.
- Show on the hair sample picture directions sheet the hair sample taken from the wig to illustrate the amount of hair that will be collected (30-50 strands).
- Offer to show our hair sample collection video if the parent would like a more comprehensive visual.
- After taking the sample, the parent will tape it to the aluminum foil. When doing this, it is VERY important to place the tape at least 3cm below the root end. To show the parent how long 3cm is, you can use the measuring tape provided, or tell them it is 1.5 inches (really closer to 4cm but better longer than shorter).
- If hair kit included painters tape, ensure that at least 3 cm of root is above the painters tape, and that the tape does NOT cover the root. If hair is shorter than 3cm, instruct not to use the tape.
- If hair kit included rubber band, ensure that rubber band is put on hair PRIOR to cutting. The rubber hand then helps secure the bunched hair in the foil after hair sample is taken.
- When they are ready to package the hair sample, ensure that the foil does not fold at the root- this is a very sensitive area in which we are analyzing, and important not to damage!
- When finished, hair sample should be put in the foil, in the ziploc bag, in the white box along with the other samples
Hair Length
- For short hair (less than or just above 3cm, i.e., too short to tape and still have 3cm usable), follow the Short-Hair Protocol below.
- For longer hair (>3cm), follow the Longer-Hair Protocol below.
- Ideally, hair samples should be at least 3cm long. If the hair is less than 1cm long, the sample cannot be used.
Short-Hair Protocol (1-3cm)- advise parent to:
- See link for instructions with pictures (https://app.box.com/file/755295304996)
- Select a portion of hair from the posterior vertex of the head (in line with ears is a good reference point).
- Use the rattail comb to thin out the hair as much as possible, so that the parent is grasping a horizontal line of hair rather than a chunk.
- Ensure that 30-50 strands are included in the portion being held.
- Hold the loose hair tightly with index finger and thumb, and cut the hair along the part, as close to the scalp and as evenly as possible.
- Place loose hairs in foil and fold it securely. Do NOT tape the hair to the foil.
- Fold the foil without bending the hair, and ensure that the hair does not fall out of the foil.
- Ensure the root-end on the aluminum foil is labeled and place it in the ziplock bag.
- Ensure the ziplock bag is labeled with the participant’s ID and Wave.
Longer-Hair Protocol (>3 cm) - advise parent to:
- Take the comb and part the hair horizontally between the tips of the ears.
- Take a clip to clip away the hair from the top of the parting.
- Instruct the parent to grasp approx. 30-50 strands of hair under the hair that has been clipped up.
- Use the rattail comb to thin out the hair as much as possible, so that the parent is grasping a horizontal line of hair rather than a chunk. After this step, ensure the parent is still grasping 30-50 strands.
- Instruct the parent to cut the hair sample as close to the scalp as possible.
- Attach the hair to the center of the aluminum foil by taping with painter’s tape - leave at least 3 cm of hair from the root end; not cover the root end.
- If parent does not know how much 3cm is, you can: say that they can measure it with the cm side of the measuring tape; if they know inches say it is about 1.5 inches (really closer to 4cm but better too long than too short); or offer to demonstrate based on the length of your own finger.
- Place the hair inside the aluminum foil in the orientation indicated by the “root” written on the foil.
- Fold the foil without bending the hair, and ensure that the hair does not fall out of the foil.
- Place the folded foil in the ziplock bag.
- Put the ziploc bag back in the magic box.
Now we are all done with the hair sample! You can go ahead and put another star on your token board!
Participants can also watch the video below:
W1-O Protocol - Child Questionnaires Online
IF THERE IS NOT ENOUGH TIME
- If parents want to cut time, questionnaires can be done at another time, unless we have to read the surveys to the child through share-screen. (This applies to children who may have trouble reading, or are under the age of 8.)
Ages 8+
Next, we will move on to some Child Surveys. [Parent’s name], for this next part we will be asking [child’s name] some questions. Some of these questions might be about you, like about how supported she feels by mom/dad, or her life. We just wan’t to amke sure you don’t provide parent help with this part! So if you prefer to step out of the room or if [child’s name] wants to wear headphones while they answer that would be fine- if not, no worries!
[If yes, tell parents to work on parent questionnaires in the meantime. If they will leave the room, we will have the child call them when we are ready to regroup. This activity should take between 15-20 minutes.]
[If no, say this is alright and no worries. Parent can stay in room and work on parent questionnaires. Researcher to take note in lab session checklist.]
How comfortable do you feel with reading? Would you like to do the surveys all on your own, or would you like it better if we read through them together?
[If the child wants to do it together, refer to instructions under AGES 6-7 below]
[If the child wants to do it on their own, say] I am going to send you a link through the Zoom chat, with a code you will input to access the survey! We are ALMOST done with the session, and these surveys will not take too long- there should only be around 5! This should take around 15-20 minutes to complete!
[Wait for participant to pull up REDCap]
[To the child, say] Ok! Do you have it up? It should say “Welcome to the Mind, Brain, Body Study” at the top.
[Confirm the child is on the right page before proceeding.]
[To the child, say] Please fill the surveys and the questions out in order. Let me know if anything is confusing, or if you have any questions! Let us know when you are all done!
[RESEARCHER TO TAKE NOTES: PARENT BEHAVIOR DURING THE CHILD QUESTIONNAIRES]
Ages 6-7
Next, we will move on to some Child Surveys. [Parent’s name], for this next part we will be asking [child’s name] some questions. Some of these questions might be about you, like about how supported she feels by mom/dad, or her life. We just wan’t to amke sure you don’t provide parent help with this part! So if you prefer to step out of the room or if [child’s name] wants to wear headphones while they answer that would be fine- if not, no worries!
In a moment, I am going to share my screen with you, so you can see the survey questions. I will then read out each question and answer choice and [child’s name] can tell me your answer. Does that sound okay? This should take around 15-20 minutes to complete!
[RESEARCHER TO TAKE NOTES: PARENT BEHAVIOR DURING THE CHILD QUESTIONNAIRES]
[Researcher to share screen]
Sharing Your Screen
- Researcher will open REDCap on their computer and enter in child code
- On Zoom, click “share screen” with the participant
- Be sure to indicate the correct screen to share, NOT sharing full desktop
- Researcher will read through all questionnaires with children and indicate their responses on REDCap
Now that we have finished all of your surveys, we can take out the token board and put a gold sticker down. Look, we are just about done!
[If parent departed the room or if child is wearing headphones, ask child to get parent back on screen or take headphones out so parent can rejoin the session.]
W1-O Protocol - Session 2
At this time, I will now ask you to reach into your Magic Box and pull out your “Session 1 Booklet” out and flip to the cover page that says “Session 2 Booklet” so I can walk through the Session 2 instructions
[Wait for participant to retrieve Session 2 Booklet]
- Stool Sample explanation & BSS sheet
In the “Session 2 booklet” there are instructions for the POOP Sample Collection and a short survey that should be filled out after the poop sample collection. There is a toilet hat and a gut kit in the session package, which are the two major materials you will need for this collection. If you would like, we encourage you to try the poop sample collection this week so if you run into any trouble before the second session, we can answer any questions you might have at that time.
Note: If currently taking antibiotics, postpone stool sample collection until they have stopped taking antibiotics for at least two weeks.
[RESEARCHER THEN GIVE DETAILED POOP SAMPLE COLLECTION AND PACKAGING INSTRUCTION]
- Written Response (optional) We also have a few extra things that are optional to you, that would realy help our research team! It is a five minute writing activity that allows you to logon and type for five minutes about you and you family’s expereinces with COVID-19. These written responses are meant to capture the impacts of COVID-19 on families, caregivers, and children. We will send you the links and codes in an email as soon as we log off, so you and your child can participate in this if you are intersted.
- Confirm pre-scheduled time to complete post-session tasks ~1 week post-session
- Payment
- Explain that once the return mailer has been received to the lab after the second session, we will send payment through the mail along with a few educational science kits
W1-O Protocol - Multiple Child Sessions
All children:
- Parent-Child Interaction (each child 1 by 1)
- Height, Weight, Waist (altogether)
- Saliva and Hair sample (altogether)
Parent (simultaneously)
- Parent surveys
Child 1-4 (one at a time)
- Halloween Training
- Child Questionnaires
- Halloween Test
Parent/All children:
- Session 2 explanation
W1-O Protocol - Reporting
If an item on the “reporting” list is activated regarding potential Domestic Violence
- Researcher to chat with parent alone at the end of the session
[Researcher say] So now that we have reached the end of the session [child’s name] is all done! Congratulations and thanks so much for your hard work today [child’s name]! Can we just grab [parent’s name] for a chat real quick? This last part will just be between mom/dad and me.
[Researcher to wait for child to leave]
Awesome! So I just wanted to check-in about something with you real quick. Your child may have answered an item in our questionnaires related to [parents pushing or shoving each other/parents throwing things during fights]. It is in our protocol to just check-in and make sure everything is alright at home. UCLA has many resources we can connect you to if necessary. Is everything alright?
If yes, say
Great! I am glad to hear it. Thanks for letting us know! [Then proceed to thanking them for session and what to expect next week, etc.]
If no, say
Are you in any immediate danger at the moment?
[If yes, say] Thank you for letting me know. We are going to get in touch with our supervisor immediately. Please give me a moment to get in touch with her now. Researcher will then slack and call Bridget immediately at 347-741-4103.
[If no, say] Would you like us to connect you with some resources at UCLA? If yes, What sort of support would you be looking for? I’ll take this to my supervisor and she will give you recommendations and give you a call!
If no, but you don’t feel that everything is alright, say
Thank you for letting me know! I know this might be a bit difficult to talk about, and as we mentioned earlier in the session it is just part of our protocol to check-in, so our supervisor will be giving you a call some time in the next 24 hours to ask you some more questions. Researcher to slack Bridget immediately and call her at 347-741-4103.
If Suicidal Ideation arises…
Researcher to slack Bridget and call her immediately at 347-741-4103. Try to keep the person on the phone while Bridget gets in contact with the participant. If something happens and a participant mentions they may harm themselves/dropped off the call before you are able to reach Bridget, let Bridget know immediately and you will proceed together.
W1-O Protocols - Post-Session 1
W1-O Protocol - Saving the Video
Step 1:
When the session is complete, click the bottom right hand button to end the meeting. 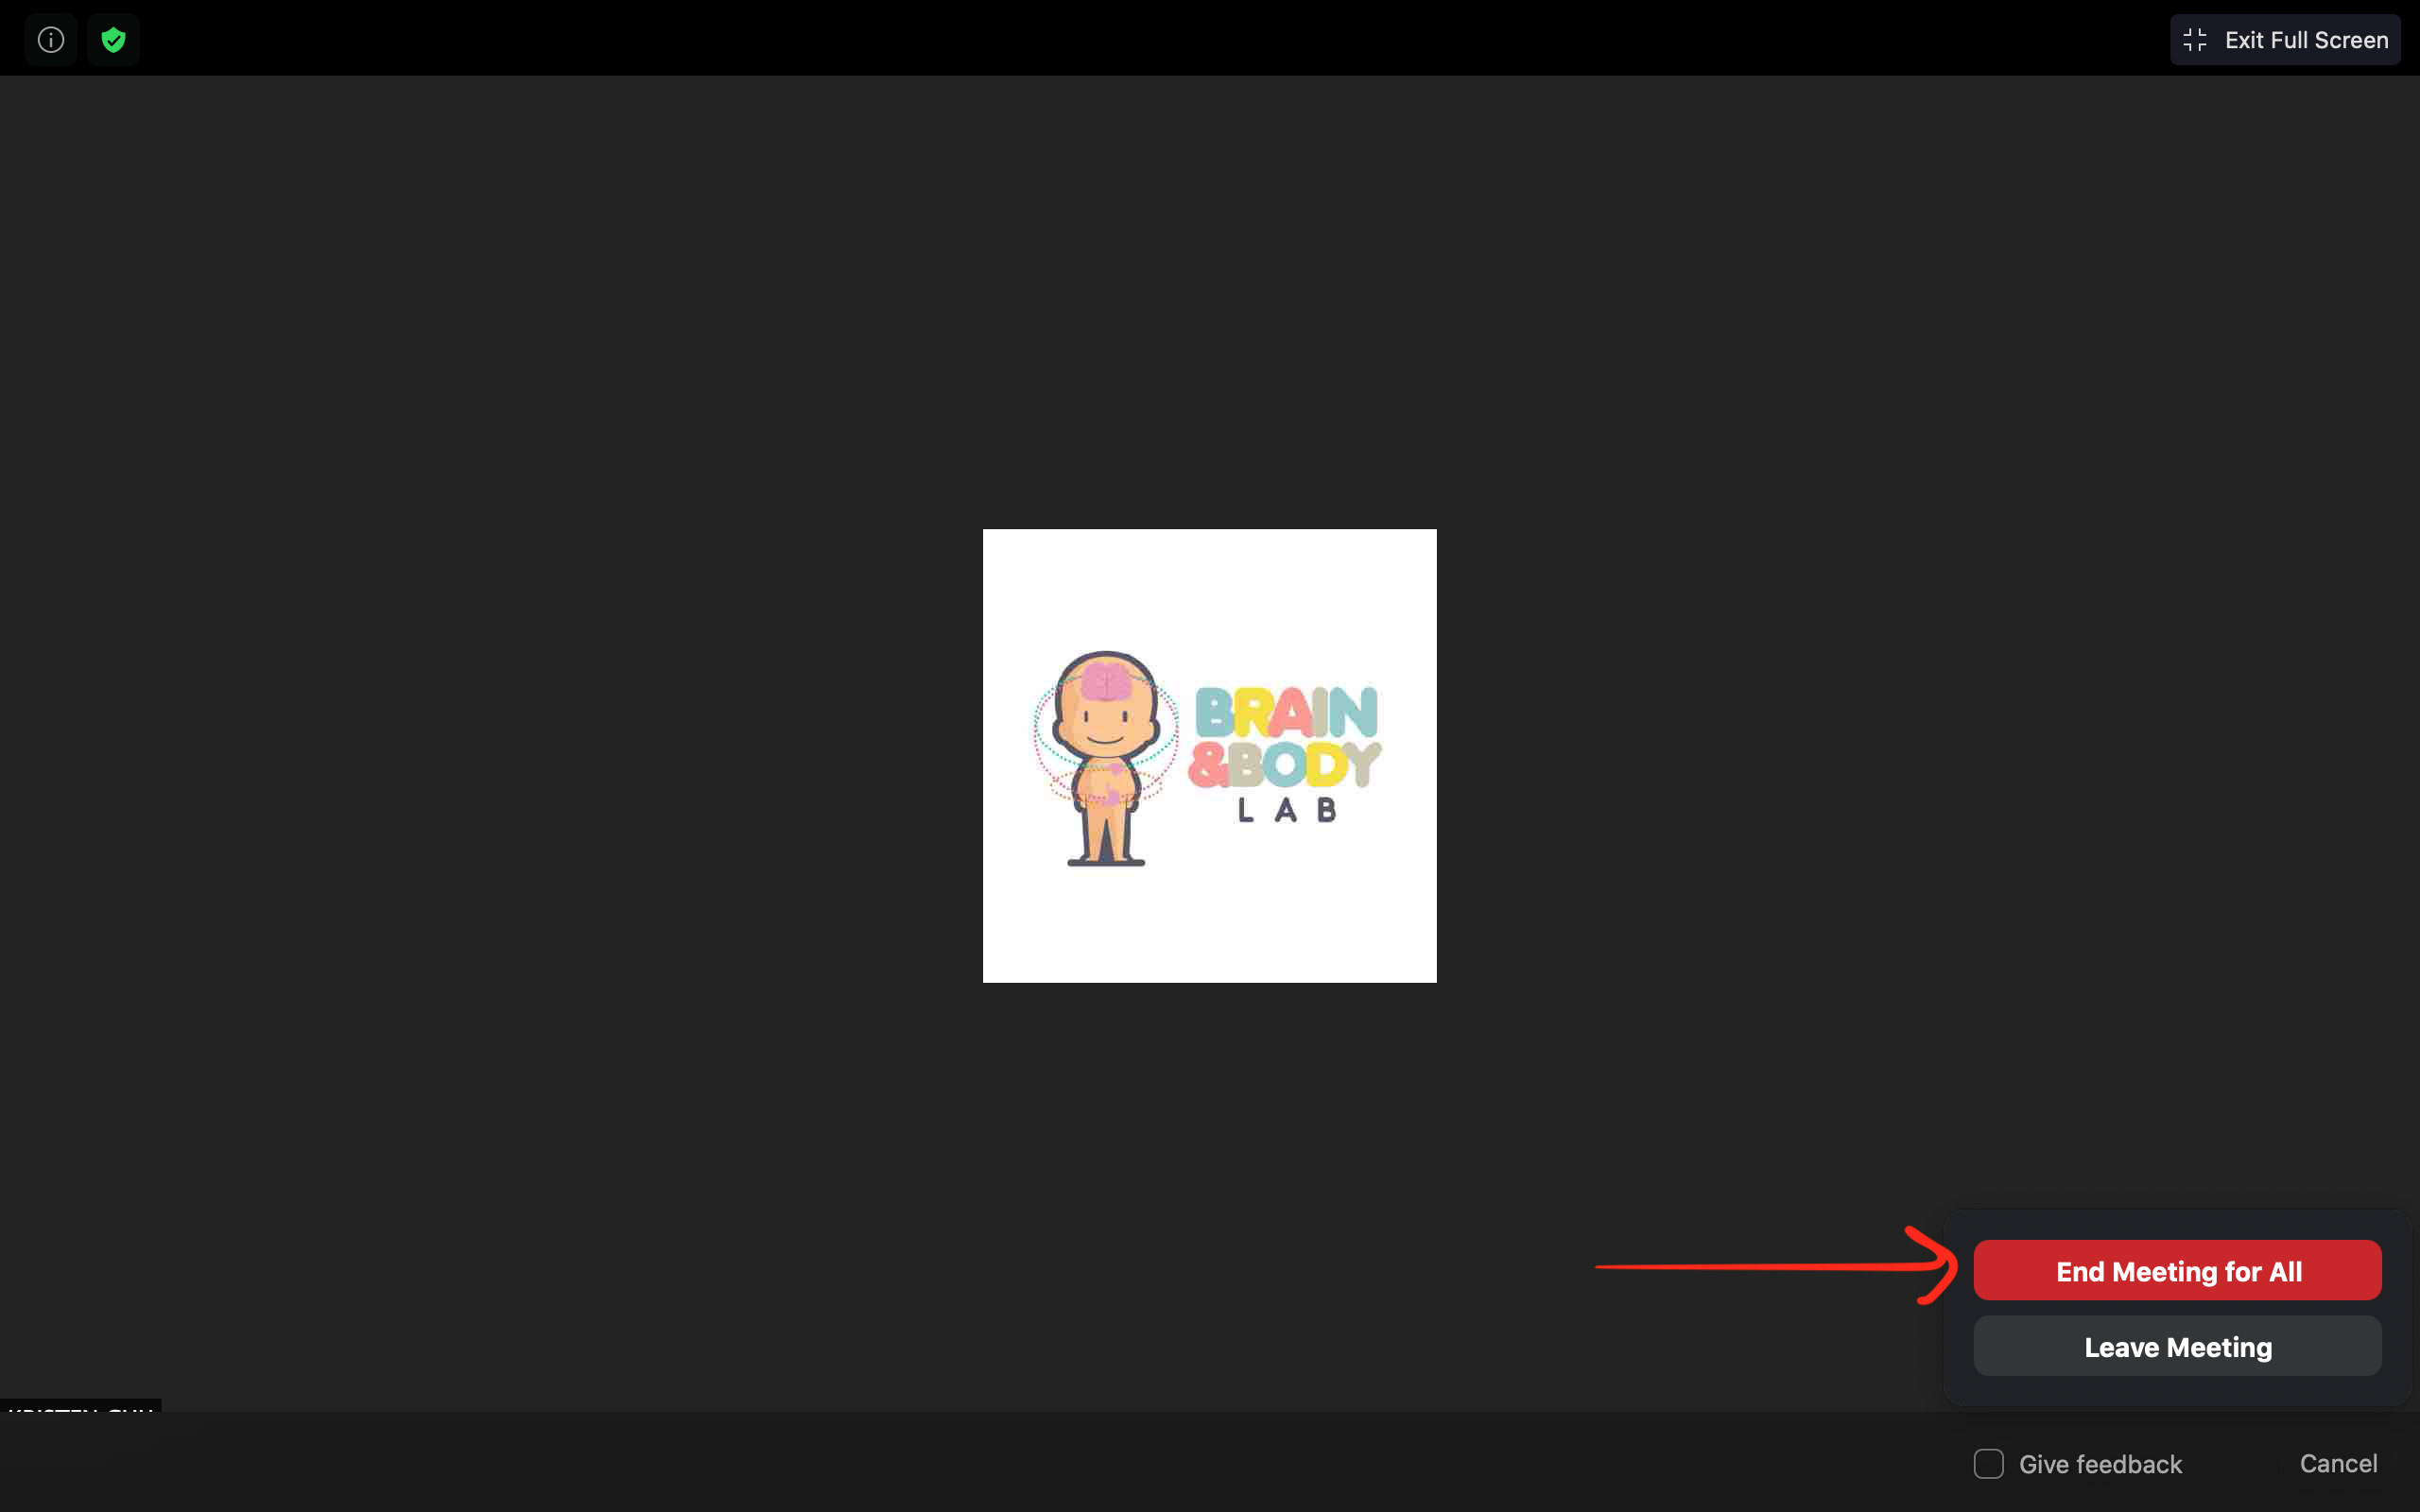 You will immediately see this window pop up to indicate the recording is being converted and saving to your computer.
 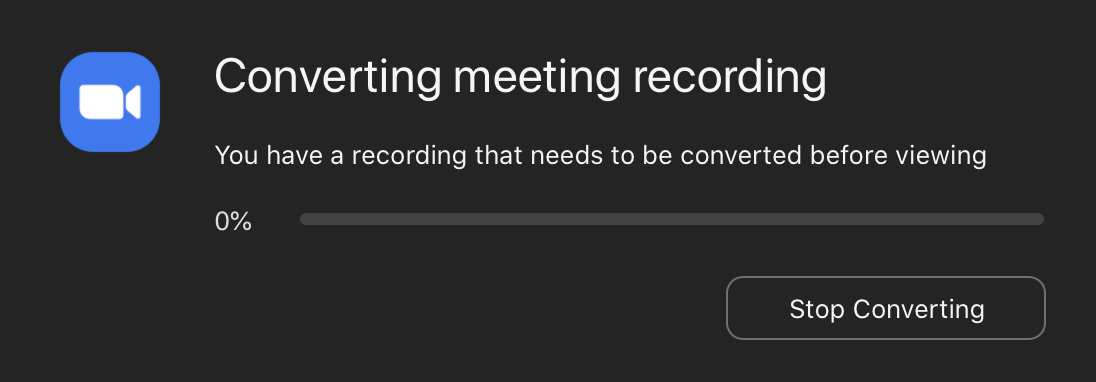 Step 2:
When the video conversion is complete, the video files will be saved in a folder titled “Zoom” on your computer, wherever your current automatic working directory is saved.
Step 2:
When the video conversion is complete, the video files will be saved in a folder titled “Zoom” on your computer, wherever your current automatic working directory is saved. 
To check where your automatic working directory is saved, login to Zoom and click on “Recordings” on the left menu column. Then switch to “Local Recordings” and view the Location for correct Meeting Recording you have just camptured. 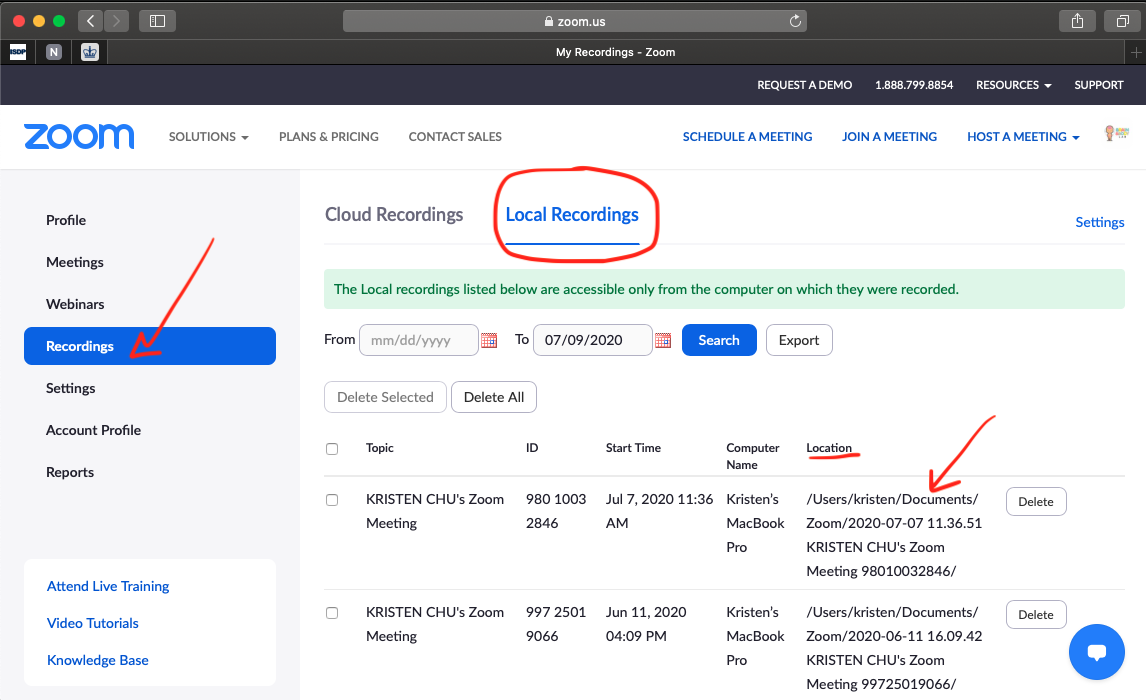
Step 3:
There will be three files in the folder- find the mp4 file and click open to ensure you have captured and converted the file successfully.  Step 4:
Check the External drive for the participant’s secondary ID number, and rename all 3 files with their secondary ID (MBB_2_XXX). Then upload to Box.
Step 4:
Check the External drive for the participant’s secondary ID number, and rename all 3 files with their secondary ID (MBB_2_XXX). Then upload to Box. 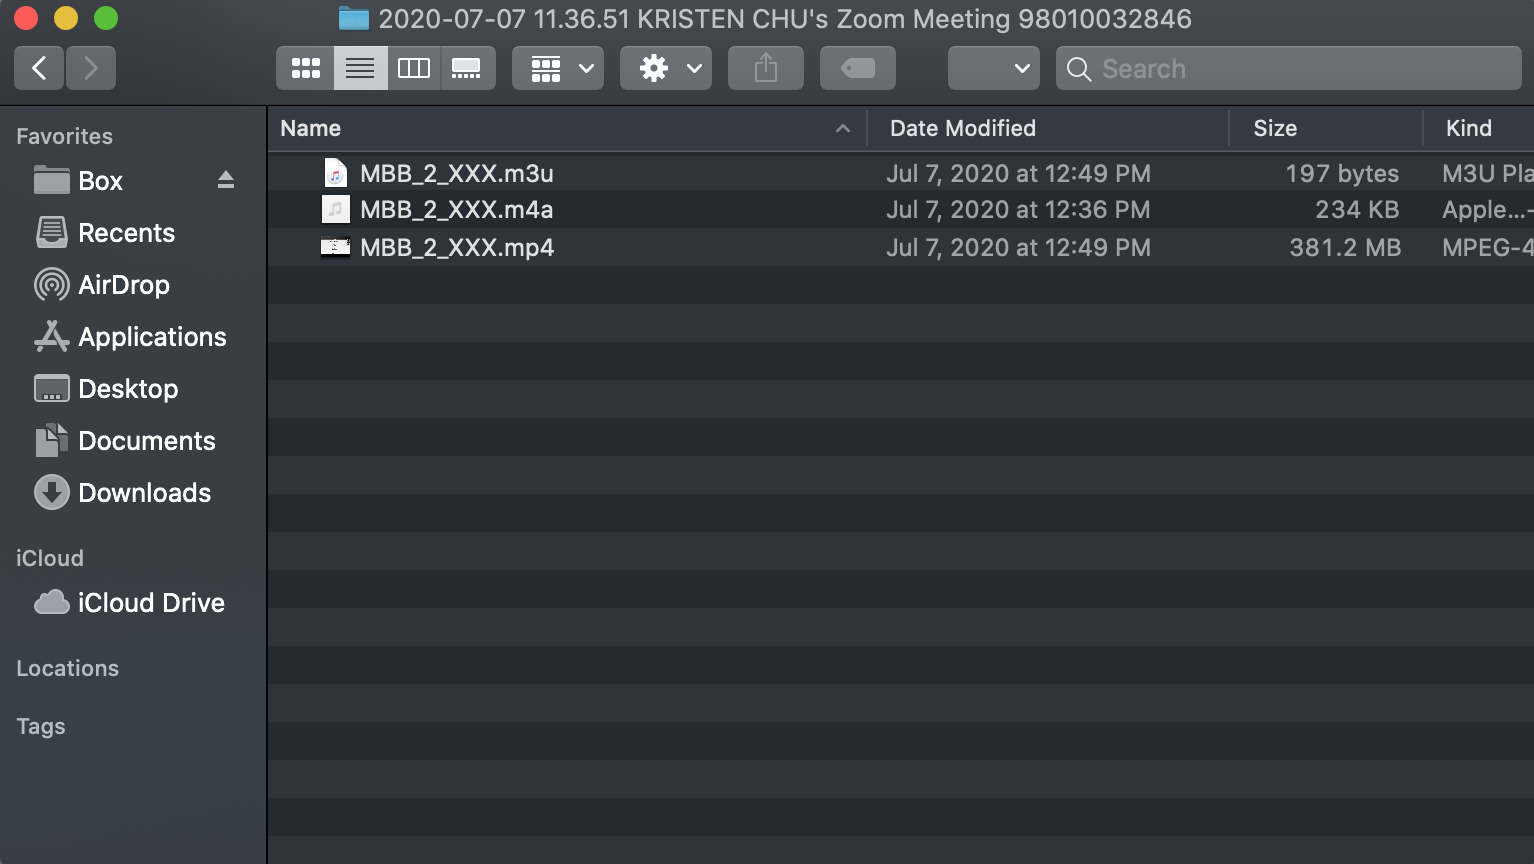 Step 5:
Save files to box in Box/BABLAB/Studies/Mind_Brain_Body/Data/Wave_X/Wave_X_parent_child_interactions/MBB_2_999
Step 5:
Save files to box in Box/BABLAB/Studies/Mind_Brain_Body/Data/Wave_X/Wave_X_parent_child_interactions/MBB_2_999
W1-O Protocol - Downloading the Gorilla task data
- Login to Gorilla.
- Make sure the participant that was just run is “included” before downloading data.
- Navigate to the experiment’s data tab.

- If data is up to date, you can go ahead and click download. 3b. NOTE: ENSURE you are on the correct VERSION PICKER. You can double check your participant’s version number in the “recruitment” tab where the participant lives. Change the version picker to the correct version for that participat.
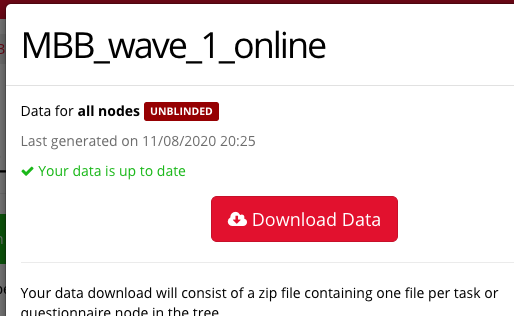
- If data is not up to date, scroll down and click the necessary options, then click “Regenerate Data”.
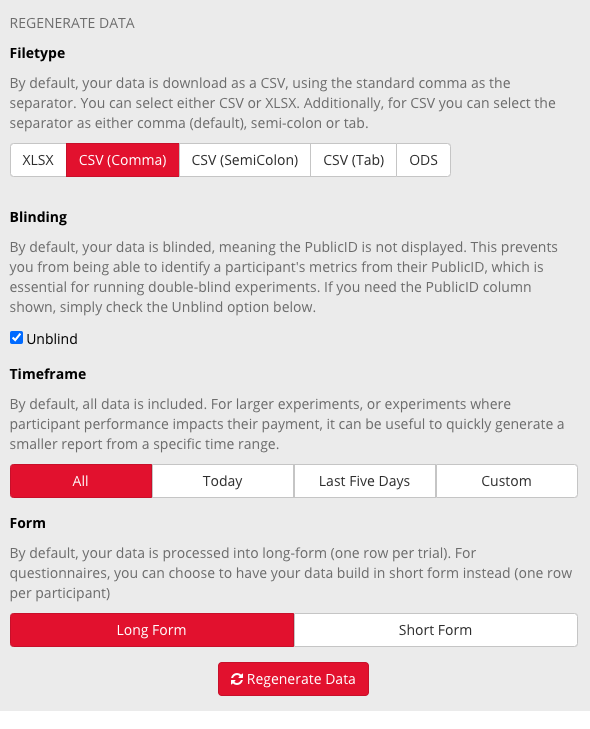
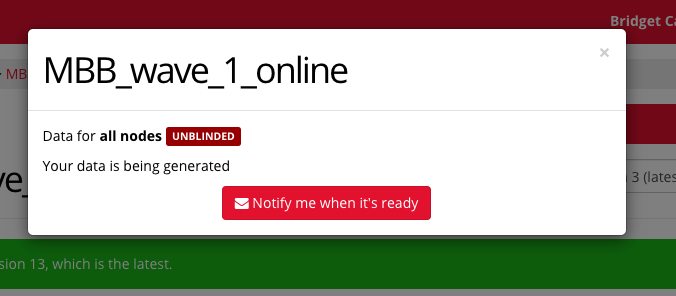
- You will see a wait screen as it generates.
- After a few minutes click into “Manage experiment data” again and download.
- Unzip the file to your desktop.
- Open the correct training and immediate test files and check that the participant’s data is all there. NOTE: can check the participant’s specific nodes to see the code of their halloween test delay, which will tell you which file their data is located in.
- Save this file in the Gorilla data folder on Box as “month_day_year.csv”
NOTE: If the data downloads and the first line of the participant’s data is there but the rest is missing, follow this protocol: 1. Go to an earlier version of the task, regenerate, and download data 2. Go back to the version of the task that the participant belongs to, regenerate, and download data 3. Check to see if all the participant’s data is there
W1-O Protocol - Session 2 Confirmation Email
- If session scheduling has not changed, copy Zoom link and Session 2 time information into Session 2 Confirmation Email and send
- If session scheduling has changed, update google calendar. Then, copy Zoom link and updated Session 2 time information into Session 2 Confirmation Email and send.
W1-O Protocols - Session 2
W1-O Protocol - Halloween Test Delay
[Once Zoom is Connected]
Hello! Welcome back to Session 2! [Ask how they are doing, and if they were able to try the Stool Sample collection. Answer any questions they have about their Home Session tasks (Stool sample, BSS sheet, Contact list)]
So today we are just going to do one quick task and then I will walk you through how to close up package and send it back to us, then answer any questions you might have
OK! It is time to go back to our learning and memory section.
[Give child instructions on Halloween Test] [Researcher to open up the halloween_part_3]
Ok [Child’s name]- now we want to see how much of your trick-or-treating adventure you remember. You will see an instructions page like this first!
You will first be shown a candy or a toy and will be asked if you saw that candy or toy when you went trick-or-treating. This is where your memory kicks in!
Here are some examples of what you might see.
The next set of questions show the houses that you visited and asks what candy was found there and where it was located on the screen.
Here are examples of what this looks like!
We also want you to remember that this is not a test! Just try your best!
When you finish, all you have to do is let me know!
[Researcher to stop sharing screen.]
Can you please go back to the “Gorilla” website. If you still have the browser up that’s great - please refresh the screen to continue. If not, you can go back to the same link as before and enter your MBB ID. Here you will be completing the second part of the computer game.
[Wait for child to log back on with primary MBB ID]
If necessary - the link can be found here.
[Confirm that they are on the correct page]
[Once confirmed, say] Ok! Now you can get started!
W1-O Protocol - Mailing Package
Next, I just want to check-in with you about mailing the package back to the lab.
- Reference the Package Checklist which has a checklist for every item they need to send back to the lab
- Everything goes into the mailer with the FedEx sheet on top
- Double check that stool and saliva sample are correctly packed (tube in biohazard bag with cotton balls, inside rigid white box)
- Drop off at any FedEx location or post box
W1-O Protocol - Payment
- Explain that once the return mailer has been received to the lab after the second session, we will send payment through the mail along with a few educational science kits
- Explain that they should expect an email from us when we send the package, and if they haven’t heard from us one week after we have sent the package, call to check-in about the payment
W1-O Protocol - Wave 2 Interview
- Researcher to open up REDCap Home Session Checklist and read script about Wave 2 Interview
- Researcher to take notes on parent response
Usually we do these sessions in person, and for second wave of this study in one year from now, we’d love to have you come in person! Who knows what world will look like then, but I’d still like to ask some questions to gauge at a bare minimum what you would need to feel comfortable with coming back into the lab.
W1-O Protocol - Testimonials
We wanted to know if you are interested in providing a testimonial for our website about your experience participating in our Mind, Brain, and Body study. If you choose to provide a testimonial we will post it on our website. We would also include first name and your child’s first name and age if you grant us permission to do so. Is that something you would be interested in?
If yes: Great, thank you for your interest in sharing your experience! Please send us the testimonial via email and indicate whether we can include your names. It can also be anonymous if you would prefer that.
If no: No problem at all, thank you for participating in our study!
W1-O Protocols - Post-Session 2
W1-O Protocol - Downloading the Gorilla delay test data
Login to Gorilla and navigate to the experiment’s data tab.
If data is up to date, you can go ahead and click download. NOTE: ENSURE you are on the correct VERSION PICKER. You can double check your participant’s version number in the “recruitment” tab where the participant lives. Change the version picker to the correct version for that participant.
If data is not up to date, scroll down and click the necessary options, then click “Regenerate Data”.
You will see a wait screen as it generates.
After a few minutes click into “Manage experiment data” again and download.
Unzip the file to your desktop.
Open the correct delay test file and check that the participant’s data is all there. NOTE: can check the participant’s specific nodes to see the code of their halloween test delay, which will tell you which file their data is located in.
Save this file in the Gorilla data folder on Box as “month_day_year.csv”
W1-O Protocol - Session 2 TO DO List Email
- Fill in templated email with all leftover tasks for participant to complete
- Add links to REDCap for their optional qualitative responses
- Refrain from sending this email if they ONLY have qualitative responses left to do- participants will get 2+ emails through our “home reminder” system. This email is designed more for participants who have not done the stool sample yet, or still have outstanding tasks from Session 1 that we’d like to remind them about immediately/are time sensitive.
W1-O Protocol - If participant had feedback to give
- If participant provided feedback on their experience or had comments to give us make a note of it on the “other notes” section of the session 1 checklist on REDCap. Also send a message to lab manager with an overview of feedback provided and whether it is feedback we should consider for the future.
W1-O Protocols - Final
W1-O Protocol - Storing Saliva Sample
- Screw lids on very tight (to prevent evaporation)
- Log the location (grid) on the sample storage log
W1-O Protocol - Storing Stool Sample
Sample Quality
- Put on gloves.
- Open the mailer to ensure that it contains both the stool sample (in biohazard bag) and the Bristol Stool Scale.
- Check for quality of the stool sample by shaking it up and down vigorously (keep the sample in the biohazard bag), then check for its consistency and color - It should be a dark-brown liquid.
- If stool sample does not meet requirement (e.g. sample is in solid form or amount collected is too little), contact the family to see if they would be willing to send another sample with compensation.
- Contact family if the Bristol Stool Scale is missing in the mailer.
Sample Transfer
- Wear appropriate PPE:
- Gloves
- Lab coat
- Safety glasses
- Surgical Mask
- Closed-toe shoes
- Long pants
- Hair tied back
- Prepare your station and ensure that you have the following:
- Drape
- 2.0mL cryogenic vials
- Stool samples in biohazard bag
- Test tube racks
- Transport box with divider
- Sharpie for labeling
Steps:
- Lay a new drape on the work station and keep all equipments and sample on the drape throughout the transfer process.
- With the stool sample collection vial still in the biohazard bag, shake it up and down vigorously.
- Take the stool sample out of the bag and put it on the test tube rack.
- Untwist two 2.0mL vials and place them on the test tube rack.
- Untwist the stool sample collection vial, and carefully pour the sample into the first 2.0mL vial. (It’s okay if the ball does or does not get transferred)
- Stop pouring when solution reached the 1.8mL line to prevent overflow, and pour the remaining sample (if any) in a second 2.0mL vial.
- Cap the 2.0mL vials tightly to prevent spills.
- Label the 2.0mL vials with a sharpie, ensure it has the participant ID and Wave and vial number.
- Place the labeled 2.0mL vials in the transport box with divider.
- Close the now-empty stool sample collection vial, put it back in the biohazard bag, and dispose it in the biohazard waste bin.
- Clean up work station, dispose the drape, and wipe down the table top with disinfectant wipe.
- Remove PPE and wash hands with soap and water thoroughly.
- Bring the transport box to C454 where the -80˚C freezer is located (key in BABLab Lock Box).
- Place the 2.0mL vials in their designated space in the freezer box (in accordance to the Sample Storage Log Diagram).
- Log the sample in the Sample Storage Log.
W1-O Protocol - Data Review & Data Audit
Follow-Up (completed by Scheduling Coordinator)
- Before sending Home Reminder 3, make sure RA’s have completed Data Entry, Data Quality Check 1, and Data Quality Check 2.
- After sending Home Reminder 3 - create blank Trello card for participant on “In Data Review” list of Data Audit Board.
Data Review
- Once card has been created, do Data Review.
- Checking for completion of:
- child questionnaires (see child questionnaire table)
- parent proxy questionnaires (see parentproxy questionnaire table)
- parent self questionnaires (see parentself questionnaire table)
- hair sample
- saliva sample
- stool sample
- bss sheet
- contact sheet
- halloween delay test
- height, weight, waist
- PC interaction video
- halloween training and test data captured
- After completing Data Review, move card to Good Sample, Bad Sample, or No Sample list based on the stool sample.
Data Audit
Before reaching out to participants
It is important to check that information marked as missing on the participant’s Trello card is actually missing before reaching out to participant to request it.
Check for the missing information in the participant’s folder on Box
If a REDCap survey is missing check if it was maybe just not input on REDCap but is there in participant folder
Look through email threads with participant for info on why a file might be missing or if they sent it to us in the past
If it is info the researcher collected during the session ( height, weight, waist) check if researcher has that info
IF the information is actually missing then you can go ahead and reach out to the participant
You will be sending them editable copies of the files they are missing. It is advised you create some way to track each file ( ex. you can name file as date of session and then delete that name later on)
There is an email template available in the BAB email under templates titled “MBB_O - Data Audits Mind Brain Body Study”
Timeline for Data Audits:
Call participant and request missing information from them (surveys, contact list, etc). After calling ( and leaving a voicemail if they don’tt answer) send them an email requesting they fill out missing info and upload it to our Box folder
One week later call them again and send another email. Leave a voicemail if they don’t answer.
One week later call them again and send a third email. Leave a voicemail if they don’t answer. At this point if you have not heard from them at all you can end the audit for that person.
- if you have heard from participant but haven’t gotten the missing info then extend the audit a week or two at your discrection if you think they will complete the missing info.
Documenting the audits
The folder for Box uploads is in BABLAB/Studies/Mind_Brain_Body/Data/Wave_1_online/Uploads Check it to see if participant’s have uploaded the missing info
After each contact
Make sure you write in the description the date you reached out to participant and any notes from the contact
If the participant did not seem willing to provide the missing info make a note
If participant emailed add date of contact into description too
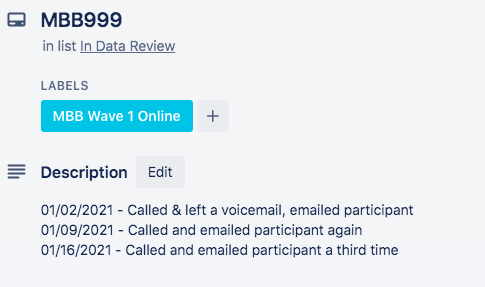
Successful Audit
Add the missing info to the participant’s folder on Box.
Make a note on participant’s Trello card that you received the missing info.
Add the info to the ammend list on the Trello card.
3.1) If you know how to input the information into REDCap and have time to do so you can add the info and then mark that item on amend list as completed.
- If you input the missing data then go to the participant log and mark it as complete on the Data Quality Check tab
- If there are any items that need to be amended add an amend label to the Trello card
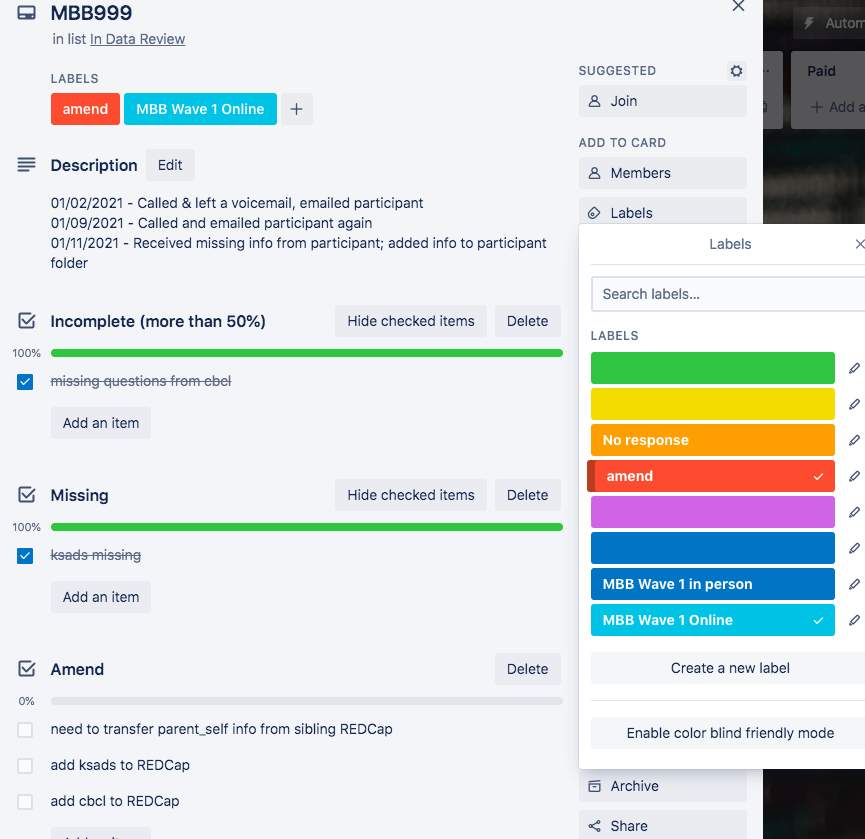
- Move the Trello card to the appropriate Done column of Audit dashbaord
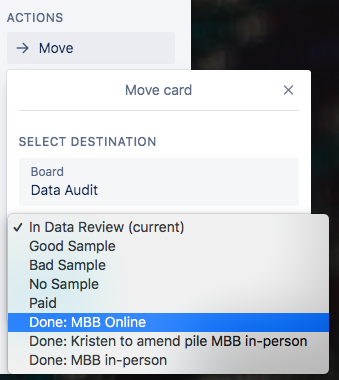
Unsuccesful Audit
Make a note in the description of participant’s trello card that the data was not received
Add the no response label to the card.
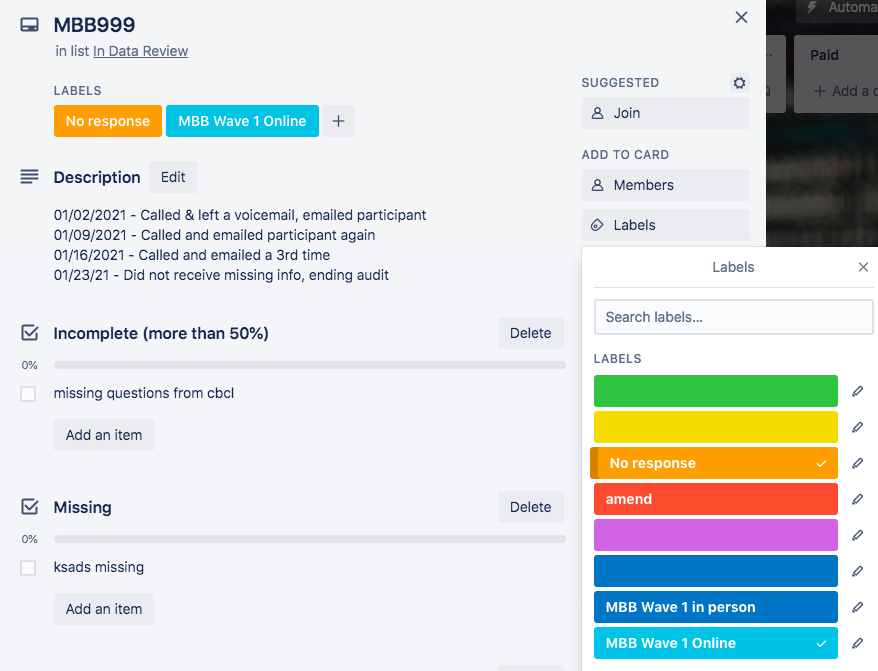
- Move to the appropriate Done pile of Audit board
| ##### Getting A Code From REDCap |
| 1. Log onto REDCap and click on “record status dashboard” |
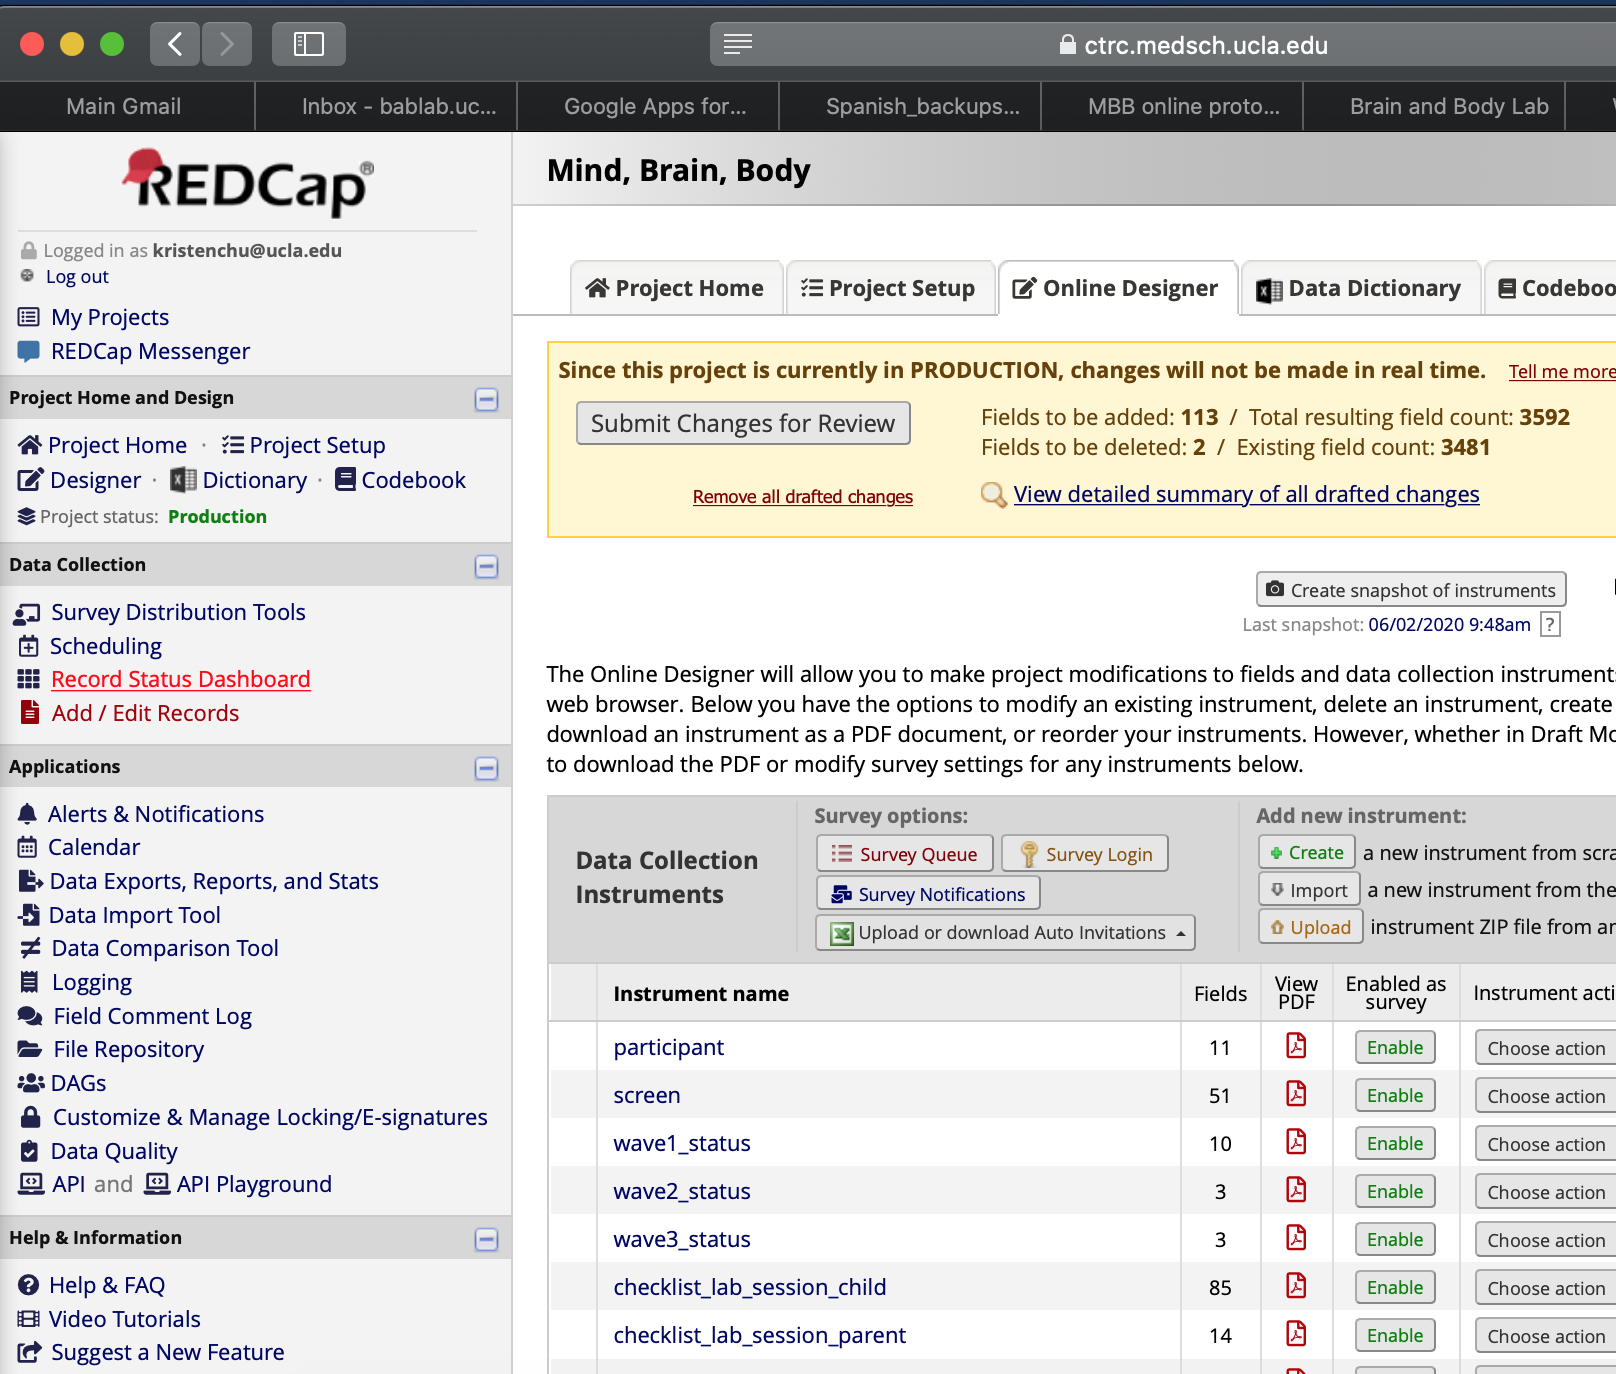 |
| 2. Click on designated participant |
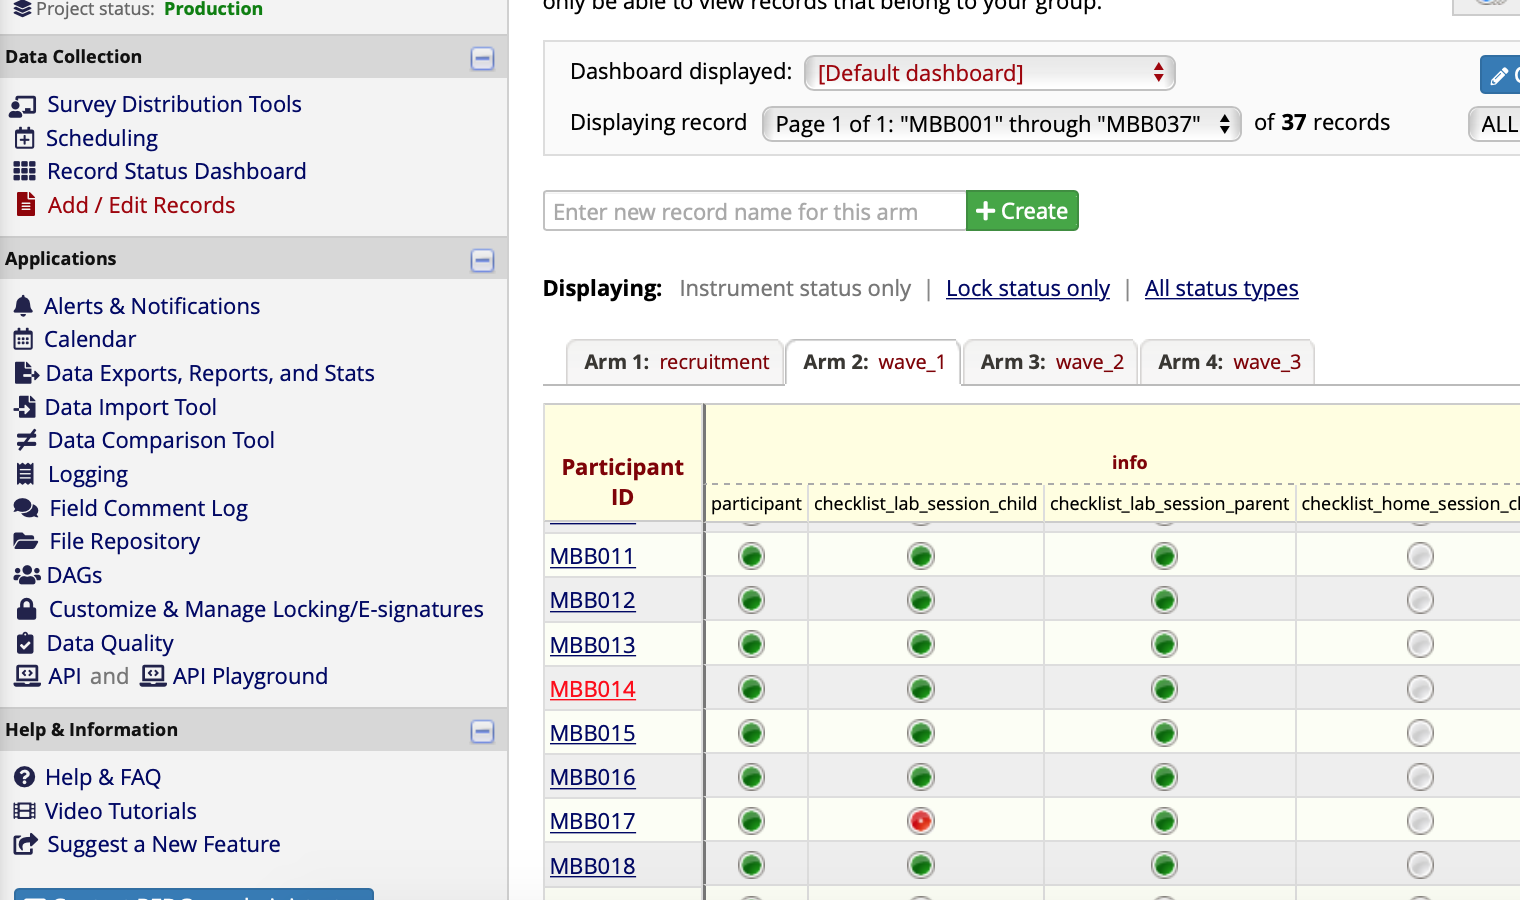 |
| 3. Click on the first incomplete questionnaire for the parentself, parentproxy, or child questionnaire sets |
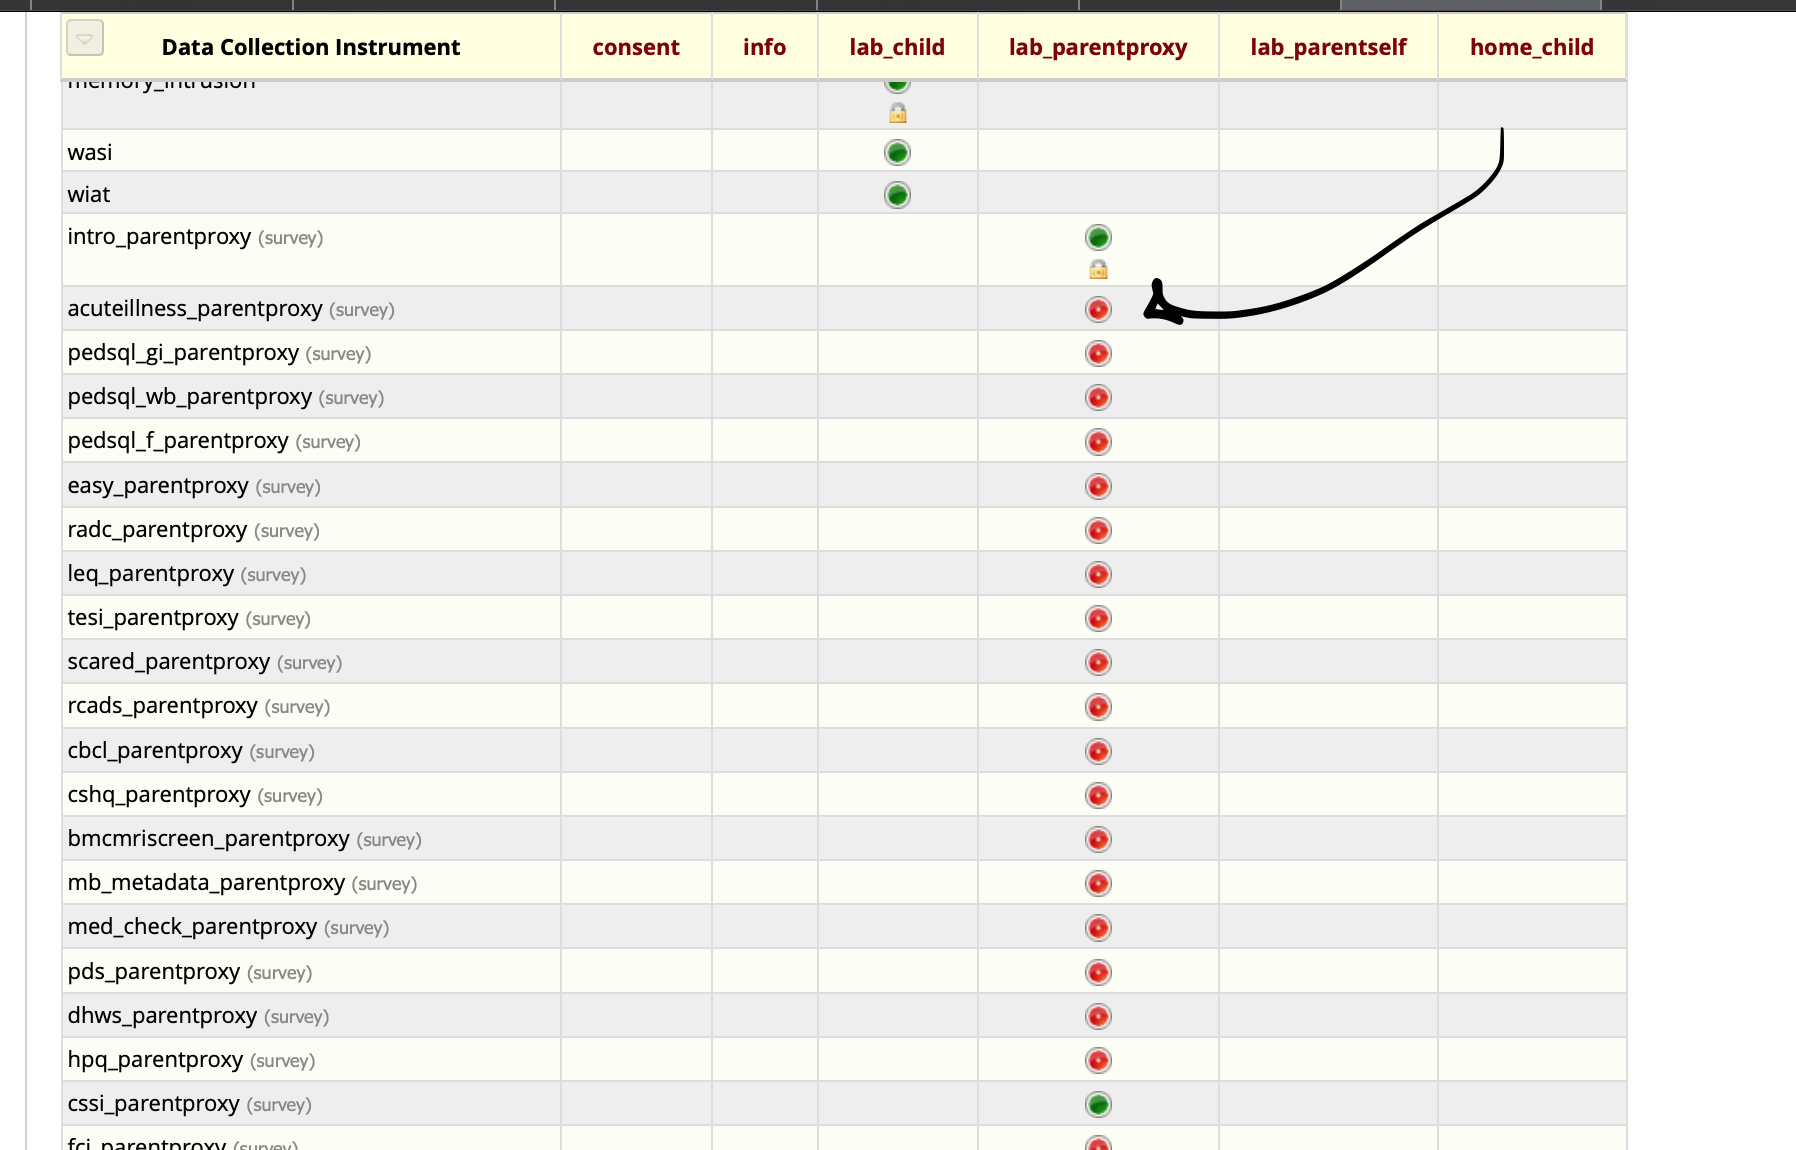 |
| 4. Click on Survey Options |
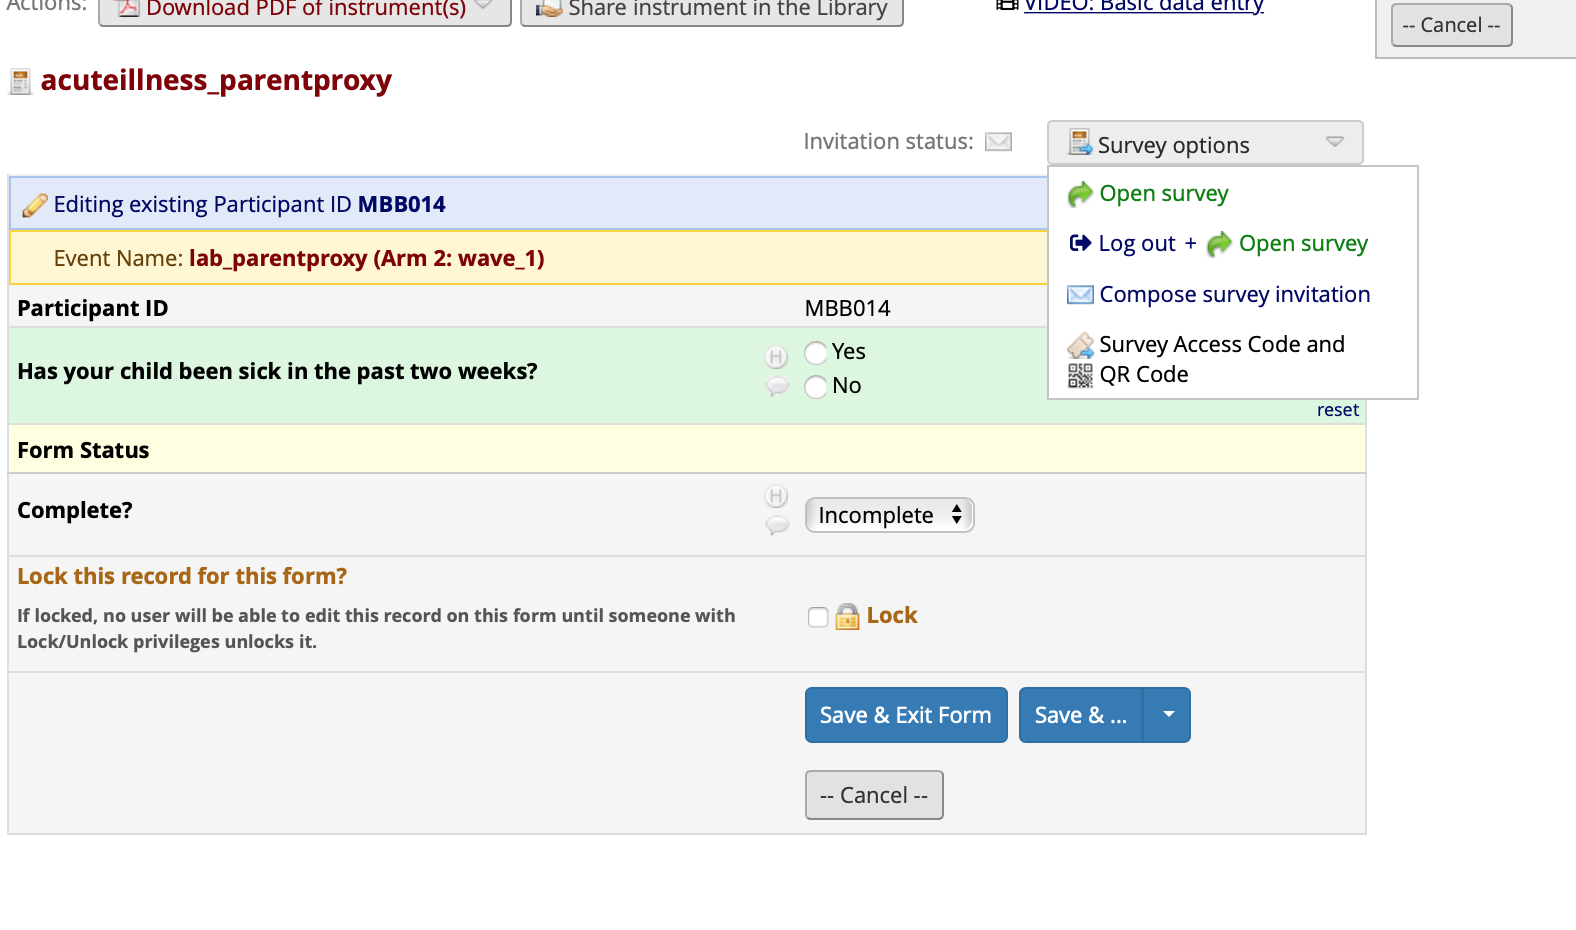 |
| 5. Click Survey Access Code and QR Code |
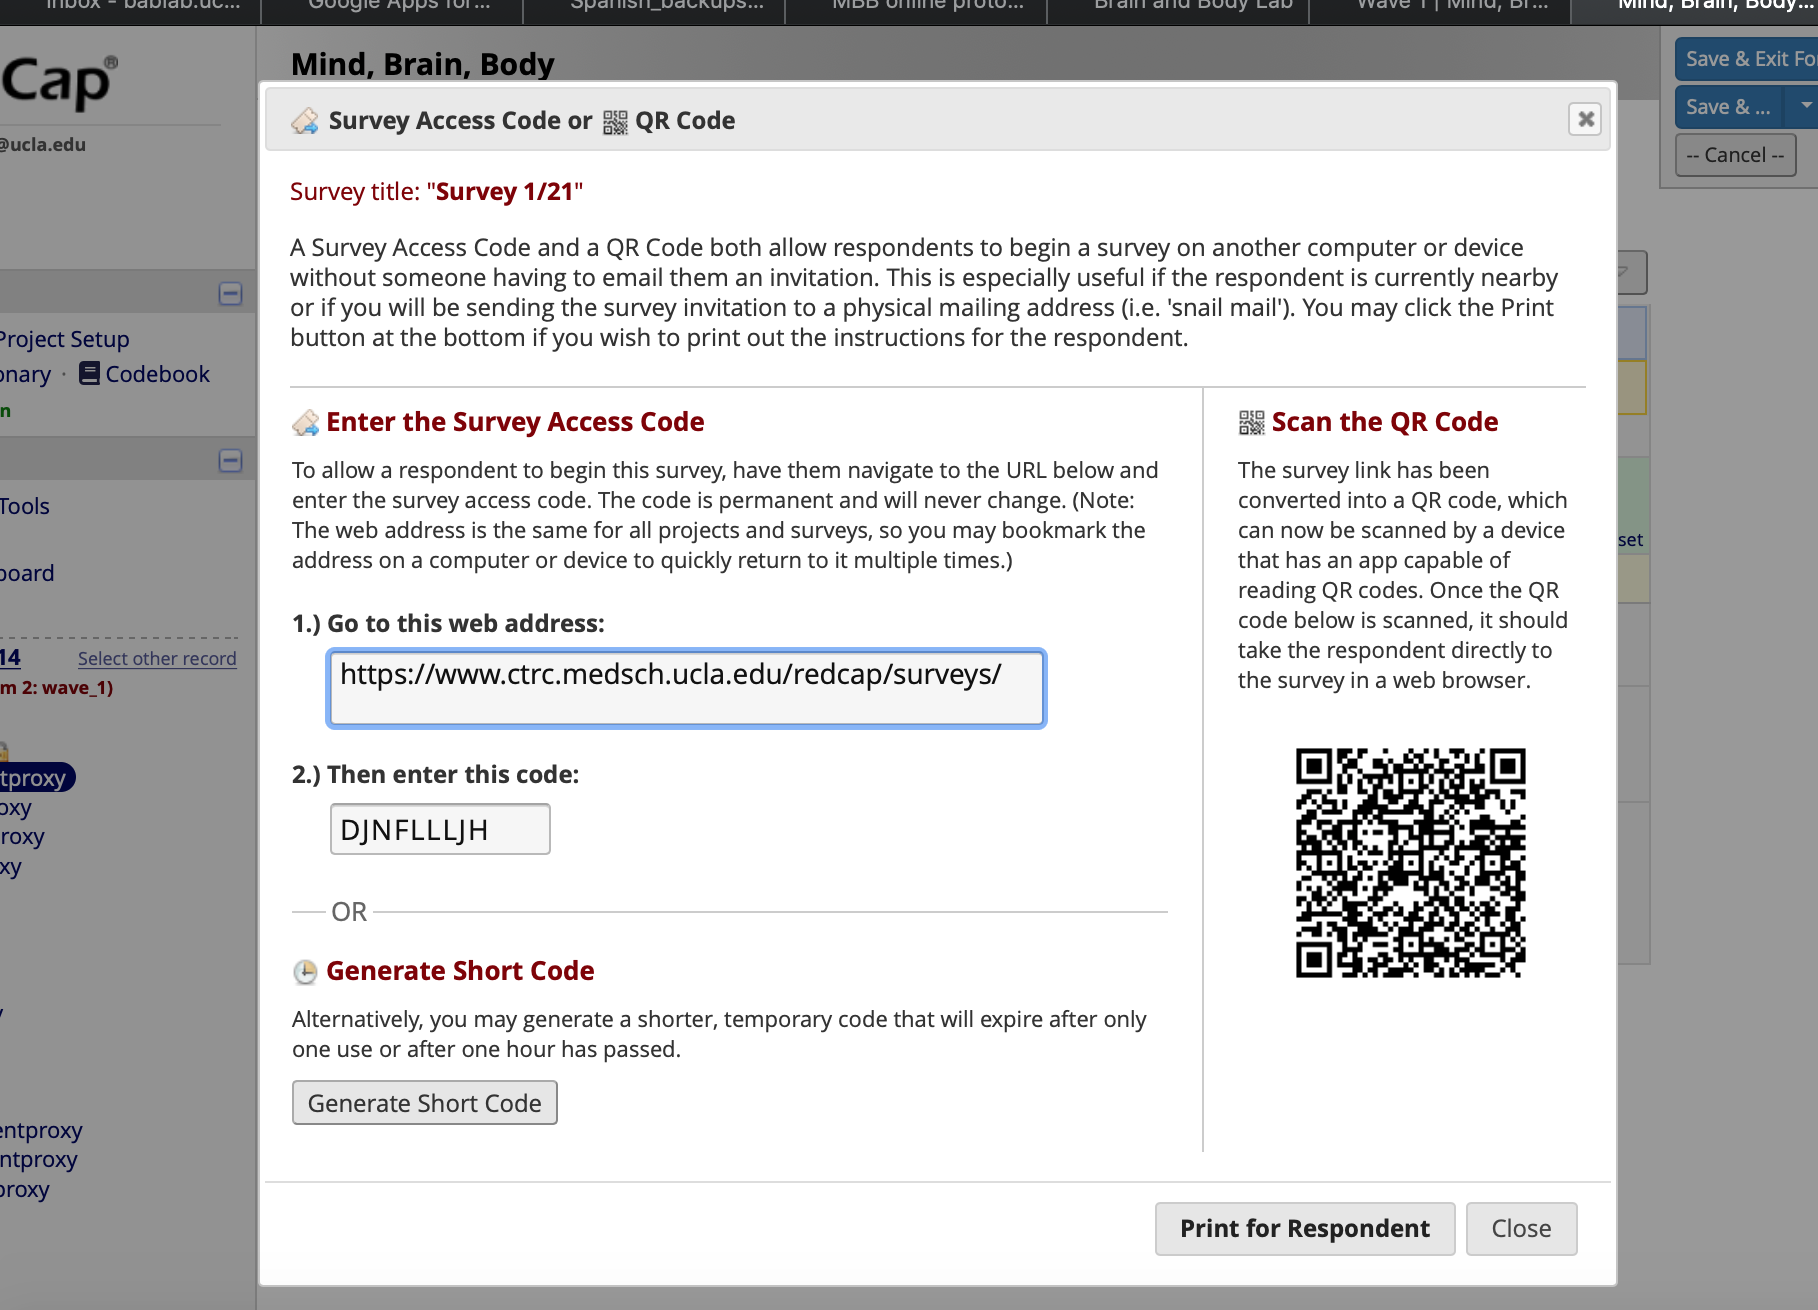 |
| 6. Copy and paste web address and code + send to email to participant |
W1-O Protocol - Data Entry Check Board Audits
RA’s will be conducting Data Entry Checks to ensure that all data collected from MBB participants is accurately entered in REDcap. To audit the data entry checks, read over all notes in the Data Entry CHECK tab in the MBB_participant_log to identify errors that need to be fixed (ie. data entered incorrectly, discrepancy between paper copy and REDcap form).
Open the MBB_participant_log and go to the Data Entry CHECK tab for whichever wave you are checking.
GREEN items are attributed to completed/accurate sections, OR if an RA had found a discrepancy between the REDcap and paper copy and was able to fix it themselves.
YELLOW items are attributed to incomplete sections where:
- participant did not complete (paper is blank)
- participant was not given this survey (not given on paper)
These items were most likely not completed by the participant, so there will be no data to verify.
RED items are attributed to sections where:
- data is missing on REDCap from paper copy, but no place to put it on REDCap
- data is added on REDCap but not on paper copy
- data entry is missing but illegible
- any other less common discrepancies that need to be double checked
These items have been flagged by an RA and require auditing.
Open REDcap and go to corresponding MBB participant that requires auditing.
- For any flagged items, read notes on Participant Log and the participant’s REDCap to get an idea of the issue. If necessary, locate the participant’s paper copy in their “Data” folder to verify the discrepancy. (Can be found in BABLAB > Studies > Mind_Brain_Body > Data > (wave) > Wave_data)
IF the issue is fixable, edit the item on REDcap to match the paper copy, and note the item as Complete on the MBB_participant_log.
IF there is a discrepancy between the paper copy and REDcap, check an updated version of the paper copy to verify whether this discrepancy has been fixed since the participant completed the study. The paper copies can be found at BABLAB > Studies > Mind_Brain_Body > Documents > Questionnaires > Wave_X (specific to which wave you are checking)
If the paper copy has not been updated, make a note and report to lab manager. If the paper copy has been updated, then this will be a case where we are missing data from the participant because they did not receive some of the questions that are now on REDCap. - Open the Trello Data Audit Board, and locate the MBB participant’s card. - Under Description, note the date of the data entry audit check, and provide a note explaining the missing items. (See below for example) - Under Incomplete, note specific questions that participant did not receive on their paper copy. Lab Manager will then assess the importance of these questions, and whether they need to be retrieved during data audits, or the next wave of data collection. - Once Trello is updated, unflag items on MBB Participant Log, and mark as Complete.
IF the issue is not fixable – write detailed notes of where the discrepancy needs to be fixed, and report it to the Lab Manager. Lab Manager should assess the amount of items missing, the importance of the items to the scale and to the overall study, and the process in which audits have been conducted to see if it would be convenient to re-request such information. After assessing such details, the Lab Manager should decide how to proceed with the issue on a base-by-base situation.
IF there is an instance where the paper copy is illegible, or multiple options have been selected, verify with Lab Manager on how it should be entered onto REDcap. Lab Manager should refer to the above details to assess what the importance of the item is. Lab Manager should then decide whether or not to recontact the participant for explanations on illegible handwriting.
Examples:
Participant: MBB033
Item: Covid_Objective_Parentproxy
Issue: “Did your child’s school close due to outbreak” answer not inputted into Redcap, which didn’t activate the rest of questions to be entered. Participant answered “Yes” and “homeschooled” and answered rest of questions, however the follow-up questions were not inputted into redcap, because only one option can be selected for “Did your child’s school close due to outbreak”
Resolve: In this situation, we may assume that the participant should have circled “yes” in order to activate the branch logic-ed items on REDCap that they did fill out on paper, which must have applied to them.
Participant: MBB033
Item: Demographics_parentproxy
Issue: Participant selected “bachelors degree” AND “other” and wrote Theatre degree
Resolve: Because we are looking how many years they studied (professional; bachelors, etc.) it doesn’t matter which type of degree they specify if so.
Participant: MBB035
Item: Cbcl_parentproxy
Issue: Participant selected “not true” AND “sometimes true” however, it looks like a mistake because they often erased and changed their answers and may have forgotten to erase one of the checkmarks.
Resolve: For not true and sometimes true, probably would make it sometimes true (not zero) For sometimes true and true, choose the middle - So select sometimes true in this case. The one that would impact composite the least.
W1-O Protocol - Report Card
Scored Cbcl data for the report cards can be found in BABLAB/Studies/Mind_Brain_Body/Scripts/Wave_1/Data_scoring/Cbcl/cbcl_scored
Running script to get cbcl data ready
Ask lab manager to update REDCap raw data file.
Open the R script for scoring cbcl using RStudio. Make sure you open with desktop Box BABLAB/Studies/Mind_Brain_Body/Scripts/Wave_1/Data_scoring/Cbcl/cbcl_scoring.Rmd
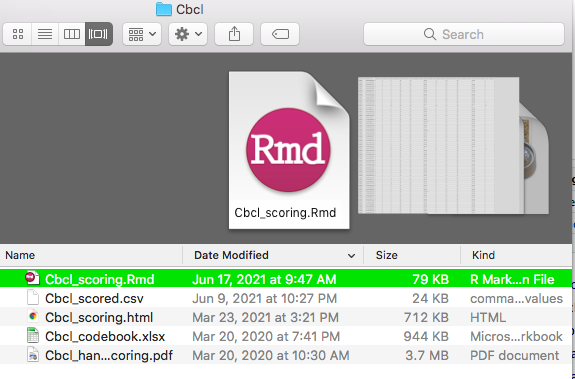
- Change the line with file name so it has the most updated file.
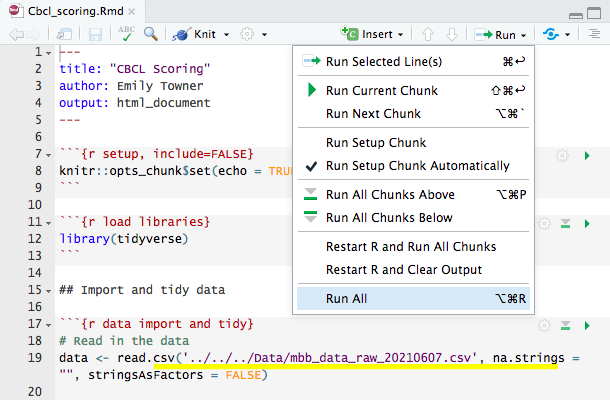
3.1 To access the raw data file name go to BABLAB/Studies/Mind_Brain_Body/Scripts/Data and look for most recent date.
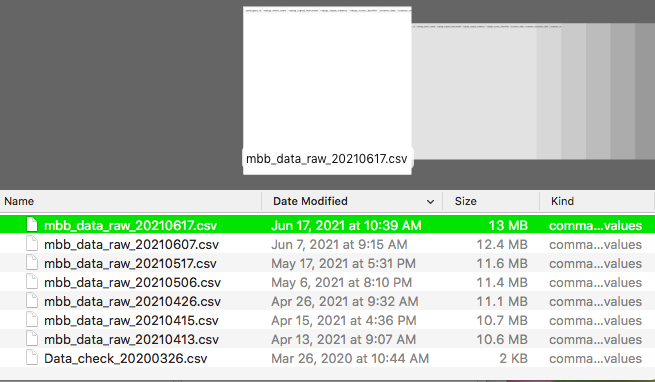
- Run the script by clicking run all.
- if there is an error saying data file couldn’t be found make sure the file name is correct
- Make sure you have all the “packages” needed for the script downloaded in your RStudio
Making report card
- Open a participant data folder - BABLAB/Studies/Mind_Brain_Body/Data/Wave_1_online/Wave_1_online_data/
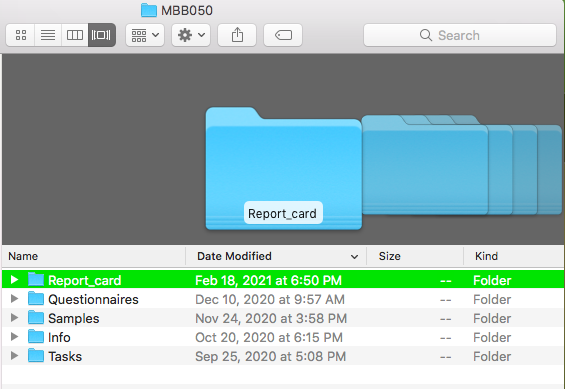
- Navigate to the report card folder and rename the template file - MBB999 to the relevant participant - and open the file
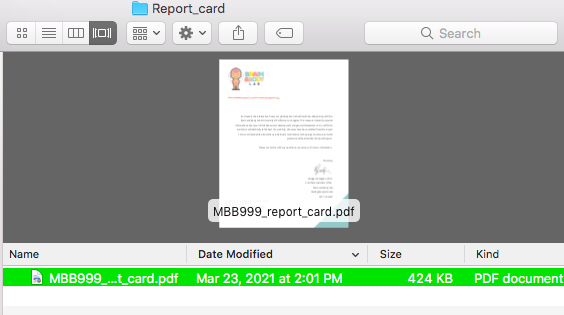
- Navigate to the last page of the pdf and fill in the scores for this participant. You can type directly on the page- it is a fillable form.
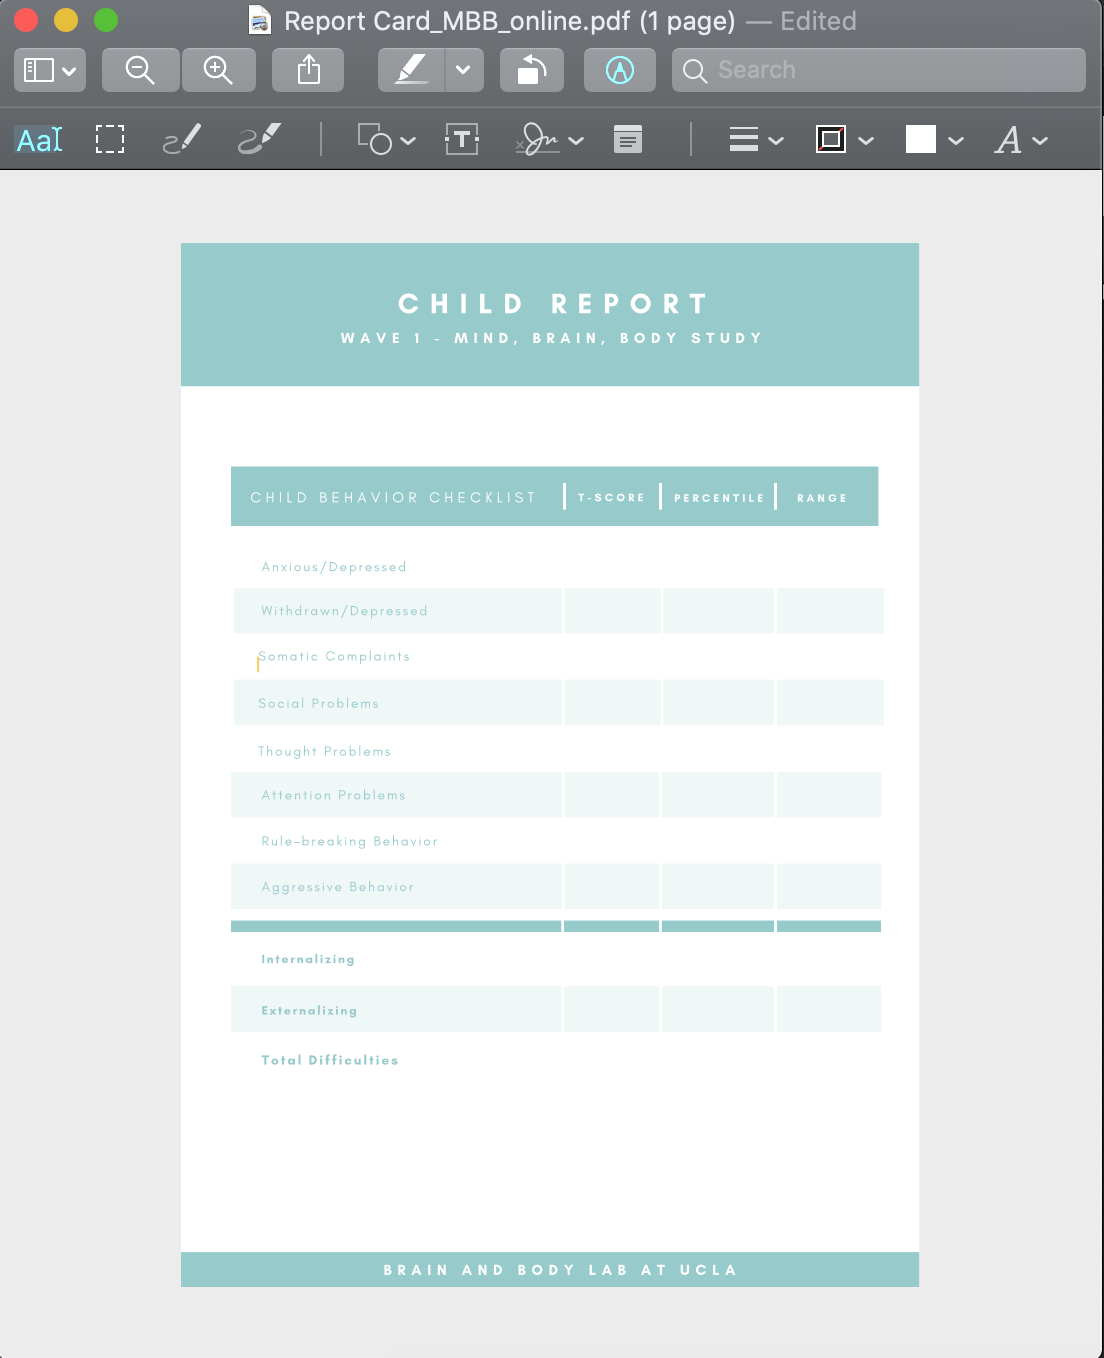
- The data you are inputting into the report card comes from the file titled “Cbcl_scored.csv” which can be found in BABLAB/Studies/Mind_Brain_Body/Scripts/Wave_1/Data_scoring/Cbcl
4.1 Some info about the scored cbcl data file
Make sure you do not save any changes you make to the cbcl file. Open the file on Desktop Box
You can freeze the first row of the data by going to Layout tab and then the Window section. Click on freeze first row

Make the names of the columns fully visible by clicking on the 1 to highlight row 1 then clicking Wrap text.
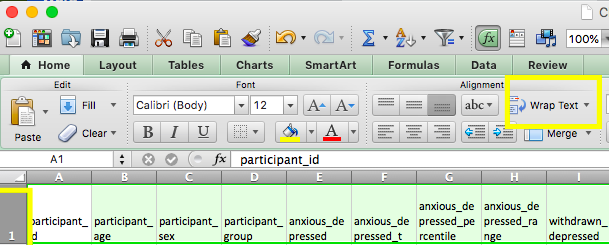
After you have entered the data, it should look like this:

If there are any comments, enter them on the comments page.
- For example, if any NA’s are present due to less than 70% of data for that subset being available to calculate a score - note that here.
- If there are no comments, delete this page.

- Important- Once you have completed the edits to the pdf, you must follow these steps to “lock” the data so that it is no longer editable before sending to the participant. To do so, click file/print/PDF/Save as PDF. Save the PDF to your desktop, then replace the original PDF with the desktop version.
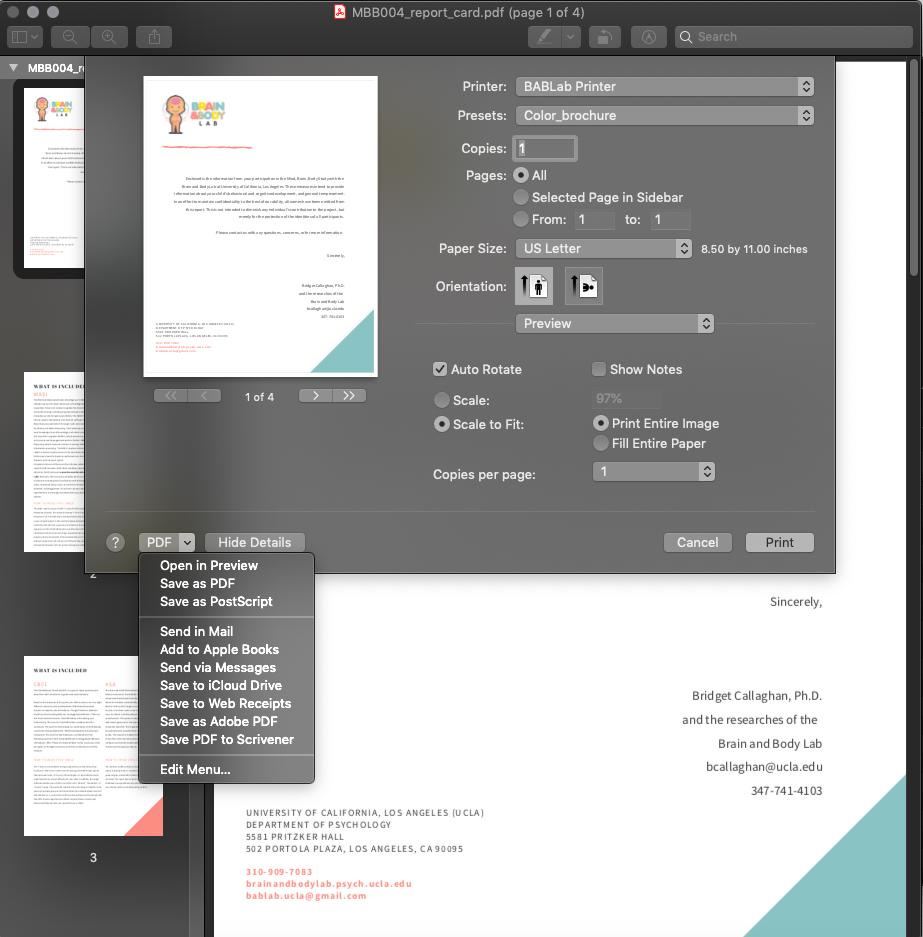
- The report card is now ready to be sent to the participant.
Notes:
If the scores for a particular participant seem off check in with the lab manager so they can verify there isn’t something wrong with the cbcl script
The fill in spots for the aggressive behavior row don’t match the rest of the document so there are two small text boxes where you can put in the values
Sending report card email
Make a copy of certificate template on your desktop, type in participant name, and save as a pdf
- certificate is in BABLAB/Studies/Mind_Brain_Body/Payment/Wave_1/Wave_1_print
- when you save it as a pdf open it then rotate it so the pdf is oriented correctly
Open participant’s report card pdf and save a copy to your desktop without the participant ID which will be attached to email
Open up report card email template & fill in highlighted parts
Attach thank you letter, cerificate, and report card to email
- thank you letter is in BABLAB/Studies/Mind_Brain_Body/Payment/Wave_1/Wave_1_print
W1-O Protocol - Payment
Payment package contents:
- Payment box
- Type in participant’s name and print copy of certificate
- Print thank you letter
- Include $65 Amazon gift card
- gift card code will be sent in payment email as well as sending physical gift card in mail
- Check stool sample quality- if poor, send another stool kit
- Science kit- Neuron
- 4 pipe cleaners
- Pipe Cleaner Neuron photo directions quarter sheets
- goodie bag + tie
- Science kit- Brain hat
- left + right side brain hat sheet
- Brain hat photo directions quarter sheets
- plastic sheet cover
- Science kit- Petri Dish
- petri dish sheet
- Microbiome photo directions quarter sheets
- plastic sheet cover
- virus stickers
Mailing payment package
- Once the package has been created and sealed, it is time to bring the package down to Tyler’s office in the Psychology building.
- To mail the package to the participant, you will need the following information:
- Recharge ID
- Participant name
- Participant mailing address
- From Tyler’s office, you will receive a FedEx label in which you can write this information
- Take a picture of the FedEx label and upload to Box
- Leave the package in Tyler’s office for FedEx pickup
- Send payment confirmation email to participants
Recording Payment
- Log participant payment in reimbursement log book
- Log participant payment in reimbursement spreadsheet
Payment emails
- In the same email thread that you’ve been emailing participant open up the payment email template

- Fill in highlighted parts.
Add in the gift card codes
- gift card codes are under last name of caregiver in BABLAB/Studies/Mind_Brain_Body/Payment/Wave_1/Gift_card_codes
If we’re still missing anything from them ( a survey, contact list, etc) also request it in the payment email
Mark payment email as complete on the MBB participant log in column called ” Send payment confirmation email to participant”